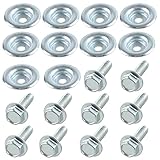
I remember the first time I tried to install a hitch on my old pickup. Watched a YouTube video, thought it looked simple enough. Three hours later, I was staring at a pile of bolts, some of which definitely didn’t seem to fit where the instructions vaguely pointed. It made me wonder: are all bolts needed when installing a hitch, or is there some sort of ‘optional hardware’ drawer?
Here’s the unvarnished truth: those little bags of hardware aren’t just suggestions. Skimping on even one bolt can turn a secure connection into a ticking time bomb.
Forget fancy jargon; let’s talk about what actually keeps your trailer from becoming a rogue projectile.
Why You Can’t Just Wing It with Hitch Bolts
Look, I get it. You’ve got the hitch, you’ve got the truck, and you’ve got a vague idea of where it all connects. You see a bunch of bolts and nuts in the box, and maybe a few look like overkill. Maybe one is a different length, or another has a weird washer. The temptation to leave a few out, especially if access is a nightmare or you’re just plain tired, is strong. I’ve been there. I once had a bolt that seemed to just… spin. Instead of wrestling with it, I figured, ‘Eh, there are plenty of others holding it on, right?’ Big mistake. Huge.
That feeling of unease when you’re towing something heavy, knowing you might have skimped on a few fasteners? It’s not worth it. Every single bolt, washer, and nut included in your hitch kit serves a specific purpose.
They are engineered to handle the immense forces that a trailer puts on your vehicle – forces that can easily exceed what you might imagine. We’re talking about shear forces, tensile forces, and torque. If you don’t use all the specified hardware, you’re not just compromising the installation; you’re compromising safety.
Think about it: a hitch isn’t just bolted to your frame; it’s holding together the connection between your truck and whatever you’re hauling. If that connection fails, bad things happen. Really bad things. I learned this the hard way when a wobbly trailer, thanks to a slightly loose hitch mount that I thought was secure enough, made me swerve more than I should have.
It wasn’t a catastrophic failure, but it was a wake-up call.
The manufacturers spend a lot of time and money designing these systems. They’re not including extra parts just to make the packaging look fuller. They’ve done the stress calculations, they’ve done the testing. When they say ‘use all hardware,’ they mean it.
It’s not a suggestion; it’s a directive. Your vehicle’s frame has specific mounting points for a reason, and the bolts provided are sized and rated to mate with those points precisely. Cutting corners here is like saying you don’t need all the lug nuts on your car’s wheel because it seems to be holding on fine with just a few. It’s a recipe for disaster, plain and simple.
The common advice that you can sometimes leave a bolt or two out is just plain wrong. It’s the kind of advice that sounds logical if you haven’t dealt with the real-world stresses of towing.
The Anatomy of a Secure Hitch Mount
Let’s break down why each piece matters. When you get a hitch kit, you’ll typically see a few main types of hardware, and they all play a part in keeping your hitch firmly attached to your vehicle’s frame. (See Also: Are All Honda Atv Bolt Patterns The Same )
First off, you’ve got your main mounting bolts. These are usually thick, high-strength bolts, often grade 8 or higher, designed to handle serious shear loads.
They go through your vehicle’s frame and the hitch bracket. The key here is that they often come in specific lengths and diameters for a reason. A longer bolt might be needed for thicker frame sections or to accommodate a specific bracket design.
A shorter bolt might be used where there’s less material to pass through, but it’s still designed to meet the required tensile strength.
Then there are the nuts. Usually, these are either standard hex nuts or, more commonly, lock nuts. The lock nuts, with their deformed threads or nylon inserts, are there to prevent vibrations from loosening the bolt over time.
This is HUGE. I cannot stress enough how much I’ve come to appreciate a good lock nut after seeing what a few thousand miles of highway can do to a less secure fastener.
They add a bit of resistance, sure, but that resistance is what keeps your hitch from becoming a rattle trap, or worse, a safety hazard. Some kits might also include specialized washers. These aren’t just flat pieces of metal; they could be hardened washers to distribute load over a wider area of the frame, or perhaps conical washers designed to provide a spring-like tension that helps maintain clamping force even as materials expand and contract with temperature changes.
Sometimes, you’ll find what look like ‘spacer’ blocks or ‘fish wire’ hardware. These are for vehicles where the mounting holes aren’t easily accessible from the outside. The fish wire is a long, flexible piece of wire with a loop on one end and a threaded end on the other.
You snake it through the frame, attach the bolt and washer to the loop, and then pull it back through the mounting hole. It’s a clever system, but it requires using the specific bolts and washers that are meant to be pulled through.
Skipping this, or trying to use a bolt that’s too large, will just lead to frustration and a potentially compromised mounting point. Every component is there for a reason, and they work in concert to create a connection that’s strong enough to handle towing a boat, a camper, or a trailer full of tools.
Hardware Comparison: What’s Included & Why
| Hardware Type | Common Purpose | Why It’s Necessary | My Verdict |
|---|---|---|---|
| Grade 8 Bolts | Primary frame attachment | Highest tensile and shear strength for important load-bearing points. | Don’t even think about using lower grades. Safety first. |
| Lock Nuts (Nylock/Stover) | Prevent loosening due to vibration | Key for maintaining consistent clamping force on rough roads or highways. | A lifesaver. If you ever lose one, replace it with an identical lock nut. |
| Hardened Washers | Distribute load and prevent frame deformation | Prevents the bolt head or nut from digging into the vehicle frame, especially on thinner metal. | Important for frame integrity. Never skip these. |
| Conical/Spring Washers | Maintain clamping force under dynamic loads | Helps the connection stay tight as components flex and temperature changes occur. | Clever engineering. They add subtle but important security. |
| Spacer Blocks | Fill gaps in frame or provide alignment | Makes sure the hitch sits flush and evenly against the frame, distributing stress properly. | Use them if they are included. They prevent uneven stress. |
| Fish Wire Kit | Install hardware in blind holes | Allows installation of bolts/washers where direct access is impossible. | A godsend for awkward frame designs. Follow instructions precisely. |
When Does Common Advice Go Off the Rails?
There’s a lot of well-meaning advice out there on the internet, and for some things, it’s great. But when it comes to hitch installation, the idea that ‘you probably don’t need all of them’ is where things get dicey. I’ve heard people say, ‘Oh, this hole looks like it’s just for alignment, you don’t need a bolt there.’ Or, ‘This bolt is really long, it must be optional.’ That’s a dangerous assumption. What looks like an ‘alignment hole’ might be designed to accept a specific torque spec or reinforce a particular stress point on the frame. That ‘really long’ bolt might be the only thing preventing the hitch from tilting downwards under a heavy tongue weight.
My own experience with this involved a hitch designed for a smaller trailer. The instructions showed four main bolts, but there was a fifth, smaller hole on the bracket that seemed to line up with a less substantial part of the frame. I, in my infinite wisdom at the time, decided that the four big bolts were more than enough and left the fifth one out. For light loads, it was fine. (See Also: Are Ak Bolts Interchangeable )
But then I hooked up a medium-sized utility trailer and hit a pothole. The hitch didn’t come off, but there was a definite ‘clunk,’ and a sickening sense of flex. I pulled over immediately, and sure enough, the frame around that skipped hole had slightly deformed.
The hitch was still attached, but it was clearly stressed, and I’d created a weak point. I had to carefully reinforce the frame area and install the correct bolt.
It was a stark reminder that even what appears to be a minor omission can have significant consequences when real forces are at play.
Another common myth is that if a bolt goes in easily and tightens up, it’s fine, regardless of whether it’s the exact bolt specified. This overlooks the material strength and diameter. A slightly smaller bolt might thread in nicely but lack the sheer strength to hold under load. Conversely, a bolt that’s too large might wedge into the hole but put undue stress on the frame material, potentially cracking it.
The manufacturers provide specific hardware because it’s been matched to the demands of the hitch and the vehicle. It’s not just about threading in; it’s about load capacity, shear strength, and proper torque.
Sticking to the provided hardware list is the only way to be sure you’re not creating a hidden failure point. This is especially true for towing applications, where failure can be catastrophic.
Real-World Towing: What Happens When It Fails
Let’s talk about what can actually go wrong if you don’t use all the bolts. The most obvious and terrifying is the hitch detaching from the vehicle. This is rare with modern, properly installed hitches, but it’s the ultimate failure. Imagine towing a trailer, and suddenly, it’s no longer attached. That trailer can go anywhere – into oncoming traffic, off the road, causing an accident. This is the extreme, but it’s the reason why manufacturers are so meticulous with their hardware specifications. A missing or incorrectly installed bolt can be the single point of failure that leads to this scenario.
More common, though still dangerous, are partial failures or deformations. This is what I experienced. A bolt that’s too small or missing can lead to the hitch bracket flexing or shifting under load. This can manifest as weird noises, a wobbly trailer, or the trailer not tracking straight behind your vehicle.
It affects your control and the stability of the entire setup. If you’re towing a heavy load, especially uphill or on uneven terrain, these stresses can be magnified. The hitch might start to pull away from the frame at one point, or the frame itself could bend or crack around the mounting holes. I once saw a friend’s trailer hitch start to peel away from his truck frame after hitting a serious dip in the road.
He’d apparently used a few bolts that were ‘close enough’ but not quite right, and the shear forces just ripped them through the softened mounting area of the frame. It was a mess, and a costly repair.
Another insidious problem is the loosening of hardware over time due to vibration. If you skip the lock nuts or use standard nuts that aren’t torqued precisely and checked regularly, they can back off. This leads to a loose hitch, which, as I mentioned, can cause wobbling and instability. (See Also: Are All Bolt Patterns The Same )
It’s a gradual process. You might not notice it until it becomes severe. The sound of loose hardware rattling against the frame can be deafening, and it’s a clear sign that something is wrong. My neighbor, bless his heart, swore he didn’t need those little nylon insert nuts.
He’d just tighten them down. A year later, his hitch was noticeably sagging, and the bolts were worn where they’d been grinding against the frame because the nuts had worked themselves loose.
Practical Tips for a Rock-Solid Hitch Installation
So, how do you avoid all this drama? First, read the instructions. Yes, I know, nobody likes reading instructions, but for hitch installation, it’s most important. Pay attention to the hardware list. If it says you need four 10mm bolts and two 12mm bolts, and specific washers for each, that’s what you use. Don’t substitute. If you’re unsure about a particular bolt or washer, check the manufacturer’s website or give them a call. They’d rather you ask a dumb question than have a faulty installation.
Second, organize your hardware before you start. Lay out all the bolts, nuts, and washers that came with the kit. Match them up to the diagrams in the instructions. If there are two different lengths of bolts, make sure you know exactly which mounting hole each one is intended for. Sometimes, the holes are labeled (A, B, C, etc.) or the diagram shows clear differences. Take pictures of the instructions and the hardware bag if you need to. This upfront organization saves a massive headache later. I once taped the instruction sheet with the hardware diagram right onto the hitch itself so I could reference it easily while working under the truck.
Third, get the right tools. You’ll need sockets, wrenches, and possibly a torque wrench. A torque wrench is your best friend here. The instructions will usually specify torque values for each bolt.
Overtightening can strip threads or crack the frame; undertightening means the connection won’t be secure. A torque wrench makes sure you’re applying the correct, consistent force.
Also, don’t be afraid to use a bit of anti-seize on the threads if the instructions don’t explicitly forbid it (though this is rare for hitches). It makes them easier to get apart later and prevents galling. Finally, if you’re pulling bolts through frame rails using a fish wire, be patient. It’s a fiddly process, but it works.
Don’t force it; guide it.
The Hitch Hardware Cheat Sheet
- Read the Manual: Seriously. Every bolt, washer, and nut has a purpose.
- Organize Hardware: Lay it all out and match it to the diagrams before you start.
- Use Specified Tools: Sockets, wrenches, and a torque wrench are your friends.
- Torque Correctly: Follow the manufacturer’s torque specifications precisely.
- Inspect Regularly: After installation, check your hitch hardware periodically for tightness and wear.
I’ve installed a few hitches over the years, and while the process can be straightforward, the hardware is where people trip up. My first few attempts were a bit of a learning curve, mostly involving me second-guessing the included fasteners. But after seeing a friend’s trailer get dangerously loose on the highway because he’d ‘lost’ a couple of bolts and decided it was fine, I learned my lesson. The manufacturers aren’t trying to trick you with extra parts; they’re trying to keep you and everyone else on the road safe. So, to answer the question directly: yes, you absolutely need all the bolts when installing a hitch. Every single one.
Verdict
So, there you have it. The simple, unglamorous truth is that when it comes to bolting up a trailer hitch, every single piece of hardware provided is there for a reason. Skipping even one fastener is a gamble you’re not equipped to win.
Think of it like this: your hitch is a important link in a chain of safety. You wouldn’t leave a link out of your anchor chain, would you? The same applies here. Stick to the plan, use what they give you, and you’ll have a hitch that’s as solid as the truck it’s attached to.
If you’re unsure about any step or feel like you’re missing a important piece of hardware, stop. Re-read the instructions, check the manufacturer’s website, or call their support line. It’s better to ask for clarification than to tow with a compromised setup. The question of whether are all bolts needed when installing a hitch should be a resounding ‘yes’ for anyone who values safety and a secure connection.