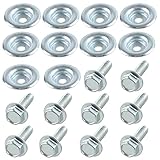
I remember staring at a pile of shiny new hardware for my ’70 Challenger, feeling that familiar mix of excitement and dread. Among the gleaming chrome and precise threads, a question popped into my head, one I’d heard whispered around garages and forums: are any Mopar big block head bolts wet? It sounds like a dumb question, I know, but when you’re deep into a rebuild, you start questioning everything. You’ve seen fancy diagrams and heard tales of special coatings, and suddenly, the simplest bolt can feel like a complex puzzle.
Let me cut to the chase: the idea of “wet” head bolts in this context is mostly a bunch of hooey, a distraction from what actually matters. But understanding why people ask this, and what the real deal is with head bolts, is where the useful info lies. It’s about sealing, it’s about torque, and it’s about not having your engine blow apart because of a misunderstanding.
What Does “wet” Even Mean for a Head Bolt?
Look, when someone asks if Mopar big block head bolts are ‘wet,’ they’re usually trying to get at something deeper, usually related to sealing. They’ve probably seen diagrams of head gaskets and coolant passages, and maybe they’ve heard of some bolts needing sealant or special washers. In modern engines, especially those with complex aluminum heads or intricate cooling systems, you might find bolts that are either coated with a thread-locking compound or, less commonly, have a sealant applied to the threads or under the head. This is to prevent coolant or oil from leaking through the bolt holes and into the combustion chamber or vice-versa, or to make sure proper clamping force by creating a consistent seal against the head surface.
But for classic Mopar big blocks, like the legendary 383, 400, 440, or even the mighty 426 Hemi, the answer is generally a firm ‘no.’ These engines are built with cast iron blocks and heads (mostly), and the design philosophy was pretty straightforward: strong materials, solid construction, and reliability. The head bolts themselves are typically made of hardened steel, designed to withstand immense clamping forces. They go into blind holes, meaning the threads don’t go all the way through the block or head to an external passage. So, the bolt itself isn’t directly exposed to coolant or oil in a way that would necessitate it being ‘wet’ from the factory.
The misconception likely stems from a few places. One is the practice of using thread sealant on some bolts in other applications, leading to a generalization. Another is the confusion with freeze plugs or core plugs, which are literally plugs installed into the block to allow casting water to escape and, in freezing conditions, to pop out and prevent the block from cracking – they are definitely ‘wet’ with coolant. The actual function of a head bolt is purely mechanical: to hold the cylinder head securely to the engine block under massive combustion pressures and temperature fluctuations. There’s no inherent need for the bolt itself to be coated in anything to achieve its primary purpose on a classic Mopar big block.
So, when you’re pulling apart a vintage Mopar engine or assembling one, don’t go looking for special ‘wet’ bolts. Your standard, high-quality replacement head bolts will do the job perfectly fine, provided you torque them correctly and use a good quality head gasket. The worry about ‘wet’ bolts is an unnecessary complication for this specific engine family. Focus on the gasket, the mating surfaces, and the torque sequence – that’s where the real sealing magic happens.
What You Should Be Looking for: Torque & Sealant
Okay, so the bolts aren’t ‘wet’ from the factory. But that doesn’t mean you can just slap them in dry and call it a day. The real ‘wetness’ concern, if you want to call it that, comes down to two things: thread sealant for some holes, and the proper lubrication/anti-seize for the threads and under the bolt heads when torquing. And this is where a lot of folks get it wrong, leading to snapped bolts or inaccurate torque readings.
I learned this the hard way on a 440 I rebuilt years ago. I meticulously cleaned everything, used what I thought was the right amount of oil on the threads, and torqued them down.
Fast forward a few thousand miles, and I had a coolant leak between cylinders 4 and 5. Turns out, a couple of those head bolts were slightly too tight, distorting the gasket just enough. I had to pull the heads again.
Here’s the breakdown: On a Mopar big block, most of the head bolt holes are blind. That means they don’t go through to any fluid passages. However, there might be a few that do go into a water jacket. These are the ones where you might consider a very small amount of thread sealant.
How do you know which ones? Consult your engine’s service manual. It’s your best friend for this kind of detail. If the manual specifies sealant for certain holes, use a quality thread sealant designed for high temperatures and automotive fluids.
Don’t go nuts with it; just a few wraps of tape sealant or a small dab of liquid. Too much can create a ‘hydraulic lock’ effect, preventing the bolt from seating properly and leading to inaccurate torque readings or even a snapped bolt during tightening.
The more universal and arguably more important aspect is how you treat the bolt threads and the underside of the bolt heads during the torquing process. Simply screwing them in dry is a recipe for disaster. Steel bolts threaded into a cast iron block create friction. If you torque a dry bolt, the friction is high, and the actual clamping force you achieve for a given torque value will be lower than intended. (See Also: Are All Honda Atv Bolt Patterns The Same )
Conversely, if you lube them up too much or use the wrong lube, you can overtighten them, stretching the bolt beyond its elastic limit or even snapping it. So, what’s the magic lube? Usually, it’s a light engine oil or a dedicated ARP thread sealant/lubricant if you’re using high-performance bolts.
The key is consistency. You want the same amount of lubrication on every bolt so that the torque readings are comparable across the entire cylinder head.
The service manual will often specify “lubricate threads and under head” or something similar. Follow that advice. Some aftermarket head bolt manufacturers, like ARP, specifically recommend their own proprietary lube, which is formulated to provide consistent clamping force and prevent galling. If you’re using stock-type replacement bolts, a good quality conventional engine oil is generally acceptable. Apply a thin, even coat. Don’t let it drip everywhere, but make sure the threads are slick and the underside of the bolt head has a nice sheen. This makes sure that when you reach your target torque, you’re getting the intended clamping force, which is important for sealing the head gasket and preventing leaks.
Common Mistakes and What to Avoid
This is where I’ve seen people shoot themselves in the foot more times than I can count. It’s not always about using the wrong part; it’s often about using the right part incorrectly.
When it comes to Mopar big block head bolts, the most common mistake is definitely related to torque and lubrication. As I mentioned, people either go too dry or too wet, and the results are never good.
Another big one is reusing old head bolts. Seriously, don’t do it.
Head bolts are designed to stretch slightly when torqued to their final specification. This stretching is what provides the clamping force. Once a bolt has been stretched, it’s already at its yield point. Reusing it means it won’t achieve the correct clamping force, or worse, it could fail catastrophically under load.
Think of it like bending a paperclip – you can bend it back and forth a few times, but eventually, it snaps. Head bolts are designed for one stretch to final torque. Every time you torque them, you’re stressing that metal.
I had a buddy who swore up and down he could ‘get away with it’ on a 383 rebuild. He reused the original bolts, saying they looked ‘fine.’ Within 500 miles, he had a blown head gasket on one cylinder. We pulled the heads, and sure enough, the bolts on that cylinder were visibly stretched compared to others.
It was a classic case of ‘I saved $50 and cost myself $500 in parts and labor.’ New head bolts are relatively inexpensive, especially considering the cost of rebuilding an engine and the potential for catastrophic failure if they don’t hold. I always recommend buying a quality set of new head bolts for any rebuild, whether it’s a stock replacement or a performance build.
Another mistake is improper cylinder head preparation. Even if you have the best head bolts and the best gasket, if the mating surfaces of the cylinder head and the block are not perfectly flat, clean, and smooth, you’re going to have leaks. Warped heads, debris, or even microscopic scratches can prevent the gasket from sealing.
This is why getting the heads professionally checked for flatness and resurfaced if necessary is often a good idea, especially on older engines. And when you’re cleaning, be meticulous. Use a good gasket remover, plastic scrapers (never metal, unless specified by a manual for very specific tasks, and even then, be cautious), and brake cleaner or a similar solvent to make sure the surfaces are spotless before installing the new gasket and bolts. Don’t skip the cleaning step; it’s as vital as the torquing. (See Also: Are Ak Bolts Interchangeable )
Finally, and this ties back to the ‘wet’ bolt idea, is using the wrong kind of sealant or lubricant, or using it on the wrong parts. Some head gaskets, especially MLS (Multi-Layer Steel) gaskets, are very sensitive to sealants.
They often have their own built-in sealing layers and require a clean, dry installation, or a specific spray sealant recommended by the manufacturer. Applying the wrong stuff can interfere with the gasket’s sealing ability.
Always, always read the instructions that come with your head gasket and your head bolts. They are written for a reason, usually by people who know a lot more about the specific products than you or I do, and they’ll tell you exactly what to use and how to use it.
Torque Sequence Matters
The order in which you tighten the head bolts is not arbitrary. It’s designed to apply even pressure across the cylinder head, preventing warping and making sure the gasket seals uniformly. For most Mopar big blocks, the sequence starts from the center of the head and works outwards in a spiral pattern. You’ll typically do this in multiple stages: a low initial torque to seat the gasket, followed by progressively higher torque values until you reach the final specification. Your service manual will have the exact sequence and torque values. Follow it religiously. A common mistake is to just tighten all the bolts to final torque in one go, which is a recipe for uneven clamping and potential leaks.
| Component | Recommendation | Opinion/Verdict |
|---|---|---|
| Head Bolts | New, high-quality, correct grade steel | Absolutely key. Never reuse. |
| Head Gasket | Quality MLS or composite gasket specific to application | Match the gasket to your heads and intended use. Don’t cheap out. |
| Thread Sealant (if required) | High-temp, automotive grade sealant | Use sparingly, only where specified. |
| Lubricant/Anti-Seize | Light engine oil or ARP lube | Important for consistent torque. Don’t use grease. |
| Torque Wrench | Calibrated, click-type or beam | Key for accuracy. Have it checked periodically. |
The Real Deal: Performance vs. Stock Replacements
When you’re talking about Mopar big blocks, you’re often talking about engines that see some serious duty, whether it’s a daily driver that gets hammered on the highway, a street-strip machine, or a full-blown race car. This distinction is important because it dictates the type of head bolts you should be using. For a mild rebuild or a bone-stock restoration, a high-quality set of stock-replacement head bolts will usually suffice. These are typically made from hardened steel and are designed to meet or exceed OEM specifications.
Brands like Fel-Pro or Mahle often offer good quality replacement parts. The key here is ‘quality.’
Don’t grab the cheapest set you find online; look for reputable brands that have a track record of making reliable engine components.
However, if you’re building a performance engine – think higher compression ratios, aggressive camshafts, forced induction (turbo or supercharger), or even just a hot street build that’s going to see regular abuse – you’re going to want to step up to performance-grade head bolts. These are usually made from stronger materials, like ARP’s 8740 chromoly steel or their even stronger custom-age alloys. Performance bolts are also often designed with a larger radius under the bolt head, which helps to increase the clamping force and reduce the risk of bolt failure. They might also have rolled threads, which are stronger than cut threads and less prone to stripping.
When you go with performance bolts, you’re also often looking at different installation procedures. For example, ARP bolts usually come with their own special assembly lube, which is formulated to provide the exact friction coefficient needed to achieve the specified torque without overstretching the bolt.
They also often recommend specific torque values that might differ slightly from stock. It’s absolutely important to follow the manufacturer’s instructions for these high-performance parts.
Using the wrong lube or torque sequence with a high-strength bolt can actually be more dangerous than using stock parts incorrectly. I once saw a high-dollar build where the mechanic used regular engine oil on ARP studs, and when he torqued them down, one of the studs snapped clean off below the threads. Cost him a weekend and a few hundred bucks for a replacement stud and the re-machining.
The reason for this difference is simple: physics. Higher combustion pressures and temperatures generate significantly more force trying to lift the cylinder head off the block. (See Also: Are All Bolt Patterns The Same )
Stock bolts are designed for stock conditions. Push beyond those conditions, and you need hardware that can handle the extra stress. It’s not just about holding the head on; it’s about maintaining consistent clamping force across the entire gasket surface under extreme conditions.
This is where the ‘are any Mopar big block head bolts wet’ question becomes hilariously irrelevant; the real question is, ‘are my head bolts strong enough and torqued correctly to handle the pressure?’ For anything beyond mild street use, the answer often lies in a quality set of aftermarket performance head bolts.
Practical Tips for Installation
Alright, let’s get down to brass tacks. You’ve got your shiny new head bolts, your fresh gasket, and your torque wrench. Here’s how to avoid the pitfalls I’ve stumbled into over the years.
- Cleanliness is King: This cannot be stressed enough. Clean the block deck and the cylinder head mating surfaces until they gleam. Use a good quality solvent like brake cleaner or denatured alcohol. Wipe them down with a lint-free cloth. Any dirt, oil, or old gasket material will compromise the seal.
- Inspect the Threads: Before you even think about putting a bolt in, run a tap through the bolt holes in the block (if they’re accessible and you suspect debris) or at least chase them with a die to clean them up. This makes sure the bolts thread in smoothly and seat correctly. For blind holes, you want to make sure there’s no crud at the bottom that will prevent the bolt from reaching its proper depth.
- Lubricate Consistently: As we’ve hammered home, proper lubrication is key. Apply a light, even coat of engine oil or the recommended assembly lube to the threads of each bolt and under the head. Don’t overdo it. You want slick, not swimming.
- Follow the Torque Sequence and Stages: Get that service manual and stick to the sequence. Typically, you’ll have at least two or three stages of torque. Start with a low torque (e.g., 20-30 ft-lbs) to seat the gasket, then move to an intermediate torque, and finally, the full specified torque. Make sure you hear that satisfying ‘click’ or see the needle hit your mark every single time.
- Torque in One Sitting (Mostly): Once you start torquing, try to get the whole sequence done without long breaks. Some manuals might suggest a ‘final snugging’ after a certain heat cycle, but generally, you want to achieve the final torque as efficiently as possible to make sure consistent clamping.
- Double-Check Everything: Before you bolt on the intake manifold or anything else, give the heads a visual once-over. Do they look seated evenly? Are there any obvious gaps? It’s your last chance to catch something before it becomes a major problem.
One thing I learned recently is that some people swear by using a little bit of Loctite Blue (medium strength) on the threads of non-water-passage head bolts for added security. I’m generally against adding anything not specified by the manual, but I’ve heard from a few very experienced builders that it can help prevent loosening under extreme vibration. However, it can make them a nightmare to remove later, and it can affect torque readings if not applied very sparingly. For a street engine, I’d stick to the manual’s recommendation. For a track car, maybe it’s worth a conversation with a specialist. But for the average Joe rebuilding a big block, stick to the basics: clean, lube, and torque.
Are Mopar Big Block Head Bolts Coated From the Factory?
No, factory Mopar big block head bolts are generally not coated or ‘wet’ from the factory in the way one might interpret. They are typically made of hardened steel and are designed for mechanical fastening. Any special coatings or sealants are usually applied by the end-user during assembly if specified by the service manual, particularly for bolts going into water passages.
Do I Need Thread Sealant on Mopar Big Block Head Bolts?
You only need thread sealant on Mopar big block head bolts if your specific engine’s service manual indicates that certain bolt holes penetrate into a water jacket. Most head bolt holes on these engines are blind, meaning they don’t reach a fluid passage, and therefore do not require sealant. Overuse of sealant can cause issues with torque readings.
Can I Reuse Mopar Big Block Head Bolts?
It is strongly advised not to reuse Mopar big block head bolts. These bolts are designed to stretch slightly when torqued to their final specification, which provides the clamping force. Once stretched, they have reached their yield point and will not provide the same consistent clamping force if reused, increasing the risk of head gasket failure or bolt breakage.
What Is the Most Common Mistake When Installing Mopar Big Block Head Bolts?
The most common mistakes involve improper lubrication and incorrect torquing. Either installing bolts dry (leading to inaccurate torque readings and potential overtightening) or using too much lubricant (which can cause the bolt to stretch beyond its limit and snap). Failing to follow the correct torque sequence and multi-stage tightening process is also a very common and damaging error.
Verdict
So, the whole ‘are any Mopar big block head bolts wet’ debate? It’s mostly a red herring. The factory bolts aren’t ‘wet,’ and you don’t need to go looking for them. What you do need is a solid understanding of how head bolts actually work: they clamp, they stretch, and they need to be treated with respect. That means new bolts, the right lube, a calibrated torque wrench, and meticulous attention to the service manual’s instructions.
Don’t get caught up in the hype about special coatings unless your specific application calls for it, and even then, follow the manufacturer’s guidance to the letter. The real magic in sealing a Mopar big block engine is in the correct installation of the head gasket and the precise application of clamping force through the head bolts. Get that right, and you’ll have a much better chance of keeping your engine running strong without leaks.
If you’re building one of these legendary engines, remember that cutting corners on something as fundamental as head bolts is a surefire way to invite trouble. Invest in good parts, take your time, and don’t be afraid to consult your service manual like it’s scripture. Your engine will thank you for it.