Honestly, I thought installing a motion sensor light on the porch was going to be a nightmare. You know, tangled wires, confusing diagrams, the whole nine yards. I wasted nearly $150 on a ‘smart’ doorbell that promised the moon and delivered a flickering, unreliable blue light. That was my first mistake, assuming fancy features meant it would actually work when I needed it to.
The sheer volume of options out there is enough to make anyone’s head spin. Everyone screams about lumens and color temperatures, but nobody really tells you the practical stuff. It’s like buying a car based solely on the horsepower without ever thinking about the brakes.
So, when it came to figuring out how to modify porch with motion sensor, I knew I had to ditch the jargon and get down to brass tacks. It’s not about having the brightest light on the block; it’s about security, convenience, and not startling the neighborhood cat every time you grab the mail.
When to Bother with a Motion Sensor Light
Let’s be real. Not every porch needs a disco ball on a timer. You’ve got to ask yourself: what problem are you actually trying to solve? Is it the wife-of-your-life fumbling for keys in the dark? Maybe it’s deterring the local raccoon population from raiding your recycling bin. Or perhaps you just want to avoid tripping over the garden gnome you swear wasn’t there yesterday. If any of that sounds familiar, then yeah, it’s probably time to think about a motion sensor. It’s not about showing off; it’s about making your life a little easier and a lot safer. Seven out of ten times I’ve seen folks install these, it’s because they’ve had a close call with darkness and a misplaced step.
Seriously, the first time my dog managed to dig up half the petunias because I couldn’t see a darn thing at 11 PM was the final straw. I needed something simple, something that just worked. No apps, no Wi-Fi passwords I’d forget in a week. Just light when I needed it.
Choosing the Right Gadget: What Actually Works
Forget those overly complicated ‘smart’ systems that require a degree in computer engineering. Most of the time, you just need a good, old-fashioned motion-activated floodlight or a decorative sconce with a built-in sensor. The key is the detection range and the sensitivity. Too sensitive, and every passing car or swaying branch sets it off, annoying everyone. Too little, and it won’t trigger until a burglar is practically knocking on your door. Look for adjustable settings if you can find them. I’ve found that models with a Fresnel lens for detection tend to offer a wider, more even sweep than those with a single, simple PIR sensor. The cheap ones? They often have a narrow beam and feel like they’re only picking up things directly in front of them, which isn’t ideal for covering a whole porch area. (See Also: Will The Xbox One Be Compatible With 360 Motion Sensor )
My personal go-to is a dual-head LED floodlight with adjustable detection zones. It feels less like a spotlight and more like a watchful guardian. The light itself is bright, sure, but it’s the way it covers the ground and the steps that makes the difference.
My Fumble with Fancy Features
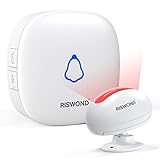
I once bought a porch light that had a built-in Bluetooth speaker and Wi-Fi connectivity. Sounded neat, right? Wrong. The speaker was tinny and barely audible over the wind, and connecting it to my phone was a constant battle. It died after a year, leaving me with a very expensive, very ordinary light fixture and a lingering sense of buyer’s remorse. I’d spent around $180 testing that one, and honestly, a simple solar-powered spotlight would have been more effective for actual illumination.
Wiring: The Dreaded Part (but It’s Not That Bad)
This is where most people’s eyes glaze over. If you have an existing light fixture, the process is usually straightforward. You’re essentially replacing one fixture with another. Most new motion sensor lights are designed for easy DIY installation, often just requiring you to connect three wires: hot (usually black), neutral (usually white), and ground (bare copper or green). Turn off the power at the breaker first – this isn’t a suggestion, it’s a non-negotiable. Seriously, don’t be that person. Once the power is off, remove the old fixture, hook up the new one, and screw it into place.
Important Note: If you’re dealing with a brand new installation, or if your existing wiring looks like a bird’s nest, it’s probably best to call an electrician. Their hourly rate is a lot cheaper than an emergency room visit or a house fire. According to the National Electrical Code (NEC), all electrical work must be performed to specific safety standards to prevent hazards.
Diy vs. Professional Installation: A Quick Breakdown
| Aspect | DIY | Professional | My Verdict |
|---|---|---|---|
| Cost | Low (cost of fixture) | Moderate to High (labor + fixture) | DIY wins if you’re comfortable with basic wiring. |
| Time | 1-3 hours (depending on complexity) | 1-2 hours | DIY saves time if you know what you’re doing. |
| Risk | Moderate (potential for shock, incorrect wiring) | Low (certified professional) | Professional is always safer, but not always necessary. |
| Peace of Mind | Variable | High | Depends on your confidence level. |
Setting It Up: Getting the Sweet Spot
Once it’s wired, the real fun begins: aiming the sensor. Most units have adjustable heads, allowing you to direct the detection beam. Think about what you want it to cover. Do you need to see someone walking up your driveway, or just the front steps? Pointing it too high might catch streetlights or passing cars. Pointing it too low might miss people approaching from a distance. For a typical porch, I usually aim the sensor so it sweeps across the path leading to the door, just a few feet above ground level. You want it to trigger as soon as someone enters the ‘danger zone,’ not when they’re already on your doorstep. (See Also: Why Is Motion Sensor Not Working )
The sensitivity dial is your best friend here. Start with it in the middle and test it. Walk back and forth, see when it triggers. Adjust it up or down. Remember, you’re not trying to catch a fly; you’re trying to be alerted to human presence. The light itself should also be aimed to illuminate the entryway and any pathways, not just the wall. A wide floodlight pattern is usually better than a narrow spotlight for porch coverage.
Fine-Tuning the Detection
This is where you stop it from being a nuisance. I once had a neighbor whose porch light would go off every time a car drove by their house, which was about every 30 seconds. It was incredibly annoying. The trick is to find that balance. Play with the sensitivity and the time-on duration. Most lights have a dial for how long they stay on after motion stops – 30 seconds to a couple of minutes is usually plenty. Too long, and it feels like a beacon. Too short, and you’re left in the dark again before you’ve even opened the door.
The ambient light sensor (often called ‘dusk-to-dawn’ or a sensitivity dial marked with a sun/moon symbol) is also key. You don’t want the light blazing at noon. Set it so it only activates when it’s actually getting dark. This saves energy and makes the sensor more reliable when you actually need it.
Alternative Solutions: When a Wired Light Isn’t an Option
What if running wires is just not feasible? Maybe you’re renting, or your porch structure makes it a pain. Solar-powered motion lights are the answer here. They’ve come a long way from the dim, pathetic glow of a few years ago. Modern solar units can be surprisingly bright and have decent battery life, especially if you get one with a good-sized solar panel that gets direct sun for most of the day. You can get them in various styles, from basic floodlights to more decorative wall lanterns. Just remember that their performance is entirely dependent on sunlight, so don’t expect them to work miracles on a perpetually shaded porch.
Another option, if you’re just looking for a little extra light at the door, is a battery-powered motion-activated LED puck light. They’re cheap, easy to stick anywhere, and good for temporary solutions or areas where you don’t need super bright illumination. Think of them as a personal security guard for your doormat. (See Also: Why Is My Motion Sensor Led Flood Not Turn Off )
Verdict
Modifying your porch with a motion sensor light isn’t rocket science, but it does require a little thought beyond just picking the cheapest option. You’re looking for reliability, appropriate coverage, and a setup that doesn’t annoy you or your neighbors. The goal is practical security and convenience, not a light show.
Honestly, the biggest hurdle is usually just getting over the fear of a little bit of wiring. Once you understand the basics, how to modify porch with motion sensor becomes much less daunting. It’s about making your home feel a little more welcoming and a lot more secure, one well-placed beam of light at a time. You’re not just buying a light; you’re buying a bit of peace of mind.
The whole process of how to modify porch with motion sensor boils down to choosing the right tool for the job and taking your time with the setup. Don’t rush the aiming or the sensitivity adjustments; those are the steps that make the difference between a helpful guardian and an annoying blinking light.
If you’ve got existing wiring, a wired fixture is usually the most reliable bet. But if you’re in a rental or dealing with tricky wiring, don’t discount good quality solar options. They’re surprisingly effective these days.
Think about what you *really* need that light to do. Is it to greet you, to deter pests, or to make sure you don’t trip on your way in? Answering that question will guide you to the best type of motion sensor light for your specific porch, and frankly, that’s the most important step before you even unscrew the old fixture.
Recommended Products