Honestly, the first time I saw that big ol’ Shark robot vacuum docking station fill up, I just stared at it. Like, what am I even supposed to do with this mountain of dust bunnies and pet hair that’s accumulated? It looked like a tiny, furry volcano about to erupt. My initial thought was, ‘This can’t be good.’
Seriously, after spending a pretty penny on the thing, I expected a bit more… guidance. Instead, I got a manual that might as well have been written in ancient hieroglyphics. So, naturally, I did what any slightly annoyed, hands-on person would do: I winged it. And let me tell you, my first attempt at how to empty shark robot vacuum base was an absolute disaster.
Bought the wrong bags, made a mess that took longer to clean than the robot ever did. It felt like trying to defuse a bomb with oven mitts on. You know that feeling, right? Where you know there’s a simple solution, but you’re just too deep in the weeds of your own making?
This isn’t going to be one of those fluffy, ‘everything is perfect’ guides. We’re going to talk about what actually works, what’s a waste of your time, and how to get that dirt bin emptied without turning your living room into a hazard zone.
First Encounter: The Dust Bin of Doom
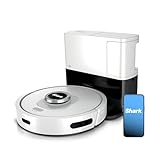
So, you’ve got your Shark robot vacuum, and it’s been doing its thing, whirring around, collecting the detritus of your daily life. Great. Now, the little indicator light on the base starts blinking. It’s a cheerful little beacon, really, signaling that the robot has deposited its haul into the larger dust bin within the dock. This is where things get… interesting. It’s not just a matter of popping open a lid and tipping it into the trash. Oh no.
My very first robot vacuum, a different brand entirely, had a simple canister you just pulled out and emptied. Easy. This Shark setup, with its self-emptying base, felt more like a sophisticated piece of machinery that demanded respect. Or at least, a specific set of steps. And if you skip a step, well, let’s just say you might end up with dust bunnies clinging to your eyebrows. I learned this the hard way after trying to force the bag compartment open on my fourth attempt, thinking it was jammed.
The real trick, I discovered after about three days of mild panic and a lot of wiping down surfaces, is that the entire front panel of the docking station actually hinges open. It’s not a drawer; it’s a door. A rather innocuous door, I might add, that doesn’t scream ‘open me.’ It’s like a magician’s trick, but instead of pulling a rabbit out, you’re pulling out a bag full of microscopic invaders.
There’s a satisfying little click when you find the sweet spot to pull, and then the whole front assembly swings outward. Inside, you’ll find the disposable bag, usually secured with some sort of cardboard flap or clip. This part feels surprisingly flimsy, like it was designed by someone who never actually had to empty it more than, say, twice a year. I’ve already started looking for more robust, reusable alternatives, because honestly, the amount of plastic waste from these disposable bags feels criminal. According to the EPA, single-use plastics are a major environmental concern, and I’m pretty sure my robot vacuum is contributing more than I’d like to admit. (See Also: Should I Turning My Shark Robot Vacuum Off )
The Bag Itself: A Study in Disappointment
Now, about this bag. It’s typically a paper or thin plastic affair, designed to hold what feels like a week’s worth of your home’s microscopic offenders. For me, that’s a lot of dog hair, some questionable crumbs from my toddler’s endless snacking, and whatever else the robot decides is worthy of collection. The bag is usually attached to a cardboard frame that slots into the base. You’re meant to pull the whole thing out, seal it, and toss it. Simple, right?
WRONG. The first few times, I remember the cardboard frame snagging. It would catch on the plastic housing, and I’d have to wiggle it, yank it, and generally wrestle with it. This inevitably led to tiny tears, and a fine dusting of whatever I was trying to contain would escape. It felt like trying to carry water in a sieve. The sound it made was a faint, rustling rip, followed by a soft puff of dust. Not ideal when you’re trying to keep your home clean.
And the seal? Often just a sticky strip. One time, it didn’t adhere properly, and I had a slow, dusty leak all the way to the outdoor trash bin. It was like a breadcrumb trail of shame. So, my advice? Have some packing tape or a strong sealable plastic bag ready. Always have a backup plan for when the included ‘seal’ turns out to be more of a suggestion.
Short.
Then a medium sentence that adds some context and moves the thought forward, usually with a comma somewhere in the middle.
Then one long, sprawling sentence that builds an argument or tells a story with multiple clauses — the kind of sentence where you can almost hear the writer thinking out loud, pausing, adding a qualification here, then continuing — running for 35 to 50 words without apology.
Short again.
Dealing with the Clog: When Things Go Sideways
Occasionally, you’ll get a notification that the base is full, but when you go to empty it, you realize it’s not the bag that’s the issue – it’s a clog. This is where your robot vacuum maintenance can feel like a plumbing job. Usually, the clog happens where the robot’s internal suction port meets the bag system. Think of it like a drainpipe backing up. It’s usually a clump of hair, maybe a larger piece of debris that didn’t get fully pulverized, or even a stray sock that somehow made its way into the robot’s path (don’t ask).
If you see the indicator light flashing and suspect a clog, first, DISCONNECT THE POWER. Seriously. Don’t be that person who tries to dislodge a blockage with the vacuum motor still trying to suck things through. You’ll just make things worse, and possibly break a crucial component. Once it’s off, open the docking station as you normally would to access the bag. You might need a flashlight to really see what’s going on in there. Look for any obvious obstructions right at the point where the robot’s dirt disposal chute connects to the bag. Sometimes, a gentle poke with a long, blunt object – like the handle of a dustpan or even a sturdy dowel rod – is all it takes. Just be careful not to puncture the bag or damage any internal seals.
I once spent nearly twenty minutes just trying to clear out a particularly stubborn clump of long hair and carpet fibers. It was packed in there tighter than sardines in a can. The smell? Let’s just say it wasn’t ‘ocean breeze.’ After what felt like an eternity of delicate poking and prodding, I managed to dislodge it with a bent wire coat hanger. It felt like performing microsurgery, but it worked. The sheer relief when the air finally rushed through was palpable. It was a minor victory, but a victory nonetheless. (See Also: Is It Best Robot Vacuum With Self Emptying Bin )
Comparison: Manual Emptying vs. Self-Emptying Base
This whole self-emptying base thing is a bit of a mixed bag, isn’t it? On one hand, you don’t have to touch the dirt bin every single time the robot runs. That’s a definite plus, especially if you’re squeamish or just plain busy. On the other hand, you’re now dealing with disposable bags that cost money and create waste. It’s like trading one chore for another, albeit a less frequent one.
Let’s break it down:
| Feature | Manual Emptying Bin | Self-Emptying Base (Bagged) | Self-Emptying Base (Bagless – if applicable) | My Opinion |
|---|---|---|---|---|
| Frequency of Handling Dirt | Every single run | Every 30-60 days (approx.) | Every 30-60 days (approx.) | Manual is tedious, but you control disposal. Base is convenient, but you’re beholden to bag costs. |
| Cost of Consumables | Zero (just the bin) | Ongoing cost of bags (e.g., $20-$30 for a pack of 3-4) | Zero (if bagless) | Bags are a sneaky, continuous expense. Bagless base would be ideal, if available. |
| Mess Factor | Moderate (can be dusty) | Low (if bag seals properly) | Moderate (can be dusty when emptying) | Bagged base is cleaner during use, but bag disposal can still be messy. |
| Environmental Impact | Low | High (disposable bags) | Low | Bagless is the clear winner for sustainability. |
| Convenience | Low | High | High | The primary selling point of the self-emptying base. |
Everyone talks about how amazing self-emptying bases are. And yeah, they *are* convenient. But I feel like the true cost, both in terms of money and environmental guilt, is often glossed over. It’s the classic ‘pay now or pay later’ scenario, just with more dust.
Maintaining the Base Itself
It’s not just the bag you need to worry about. The base unit itself can collect dust and debris. Think about it: it’s sitting on the floor, and the robot is constantly docking and undocking. Hair can get tangled around the charging contacts, and dust can accumulate in the vents. I find that I need to wipe down the exterior of the base at least once a month, and check the charging contacts for any buildup.
If you notice the robot struggling to connect to the dock, or not charging consistently, those charging contacts are the first place to look. A simple wipe with a dry, lint-free cloth usually does the trick. Sometimes, a slightly damp cloth (make sure it’s barely damp, you don’t want to short anything out!) can help remove stubborn grime. It’s like keeping your phone clean; it just ensures everything works as it should. It’s funny how often we overlook the maintenance of the charging station itself, focusing only on the robot. This simple check saved me a call to customer support on two separate occasions.
The ‘why’: Why Bother with This Base?
So, why go through the whole rigmarole of a self-emptying base? For me, it boils down to two things: time and a slight aversion to daily dirt-bin duty. When the robot is running its full cycle, it can accumulate a surprising amount of dust and debris. Having the base automatically suck that into a larger, sealed bag means I don’t have to deal with that mess every single day. It’s a trade-off, sure, but for someone with pets and a busy schedule, that convenience is worth something. It means I can run the robot more often without the constant dread of having to empty a small, overflowing bin right after.
However, I do sometimes question the marketing hype around these things. They’re presented as this ultimate solution, a hands-off marvel. But the reality is, you still have to manage the bags, deal with potential clogs, and maintain the base itself. It’s not magic, it’s just a different kind of chore. My neighbor, who has a similar setup, actually opted to bypass the bag system after a few months, figuring he’d just manually empty the internal bin more often to save money. That’s a valid approach if you’re willing to get your hands dirty, literally. (See Also: Is It Best Robot Vacuum For Cleaning Large Homes )
How Often Should I Empty the Shark Robot Vacuum Base?
This depends heavily on your home environment. For most homes with pets or high traffic, you’ll likely need to empty the bag within the base every 30 to 60 days. If you have a smaller home with minimal foot traffic and no pets, you might get away with 2 months or even longer. Keep an eye on the indicator light on your base, and if it starts blinking, that’s your cue.
What If My Shark Robot Vacuum Base Is Full but the Light Isn’t on?
There could be a few reasons. The most common is a clog in the suction port connecting the robot to the base. Another possibility is that the sensor detecting the fill level is dirty or obstructed. Try cleaning the sensor area with a dry cloth and checking for any blockages where the robot empties into the base.
Can I Use a Generic Bag Instead of the Shark Brand?
While it might seem tempting to save money, it’s generally not recommended to use generic or unapproved bags. The bags are designed to fit specific dimensions and airflow requirements of the Shark base. Using the wrong type of bag could lead to poor suction, clogs, or even damage to the base unit. Stick to the manufacturer’s recommended bags for optimal performance and to avoid voiding your warranty.
My Shark Robot Vacuum Base Is Making a Loud Noise When It Empties. What’s Wrong?
Loud noises usually indicate a clog or something caught in the impeller fan within the base. Disconnect power immediately. Carefully inspect the suction port and the bag compartment for any obstructions. If you can’t find anything obvious, and the noise persists, it might be time to contact Shark customer support, as there could be an internal issue with the motor or fan.
Verdict
So, there you have it. Figuring out how to empty shark robot vacuum base isn’t rocket science, but it’s definitely more involved than just tipping something into the bin. It’s about understanding the mechanism, being prepared for the occasional clog, and making a conscious decision about whether the convenience of the self-emptying feature outweighs the ongoing cost and environmental impact of those disposable bags.
Honestly, I’ve found that a quick check once a month, just to make sure everything is clear and the charging contacts are clean, is far better than waiting for a flashing light and a potential mess. It’s like a quick check under the hood of your car – a little preventative maintenance goes a long way.
Before you just blindly accept the ‘set it and forget it’ marketing, take a moment to consider what’s actually involved. Is this the right solution for *your* home and *your* priorities? Only you can decide that.
Recommended Products