I remember the first time I wrestled with my basement sump pump discharge line. Water was seeping back into the pit, and I was convinced it was a leak. Turns out, the whole setup was just… wrong. It’s one of those things you don’t think about until it bites you. So, are pressurized fittings needed for sump pump drain lines? The short answer is: it depends, but usually, no, and here’s why that matters for your basement.
Many DIY guides and even some plumbers will tell you to use every fitting known to man to make sure things are ‘sealed tight’. But when it comes to a sump pump, that can actually cause more problems than it solves. You end up fighting the system instead of working with it.
Why Most Sump Pump Drain Lines Don’t Need Fancy Fittings
Let’s get one thing straight right off the bat: a sump pump’s job isn’t to blast water uphill under high pressure. Its job is to move water from a pit, usually in the lowest part of your basement or crawl space, to an area where it can drain away harmlessly – often outside or into a municipal storm drain. The ‘pressure’ involved in that scenario is minimal. Think of it more like gravity helping you out, with the pump giving it a nudge.
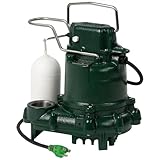
Most residential sump pumps are designed to operate with relatively simple plumbing. You have a discharge pipe, usually 1.5 or 2 inches in diameter, that runs from the pump’s outlet to wherever the water needs to go. The connection between the pump and this pipe is the most important point. Here, you absolutely need a secure connection that won’t leak. This is typically achieved with a threaded fitting on the pump’s outlet that screws into a corresponding fitting on your discharge pipe, often secured with a hose clamp or a plastic union nut that comes with the pump.
The common advice to use threaded fittings and pipe dope on every single joint in your drain line is often overkill for a standard sump pump setup. In fact, forcing a very tight, sealed connection on a discharge line that’s supposed to allow for some flexibility can actually put stress on the pump itself or the piping, potentially leading to cracks or breaks over time. The water isn’t under significant pressure that would force its way through a slightly less-than-perfect seal in a way that matters. If water is backing up into the pit, it’s usually due to a check valve issue, a blockage, or the discharge point being too high, not because a fitting isn’t ‘pressure rated’.
I learned this the hard way when I first installed my own system. I used a whole roll of Teflon tape and painstakingly tightened every single threaded connection on the PVC pipe leading away from the pump. It looked like a professional job. A few weeks later, during a heavy rain, the pump ran constantly, but the water level in the pit barely dropped.
I spent hours checking for leaks, only to find that the discharge pipe itself had a hairline crack near one of those super-tight fittings I’d installed. The constant vibration and slight flex from the pump’s operation, combined with the rigid connections, had stressed the plastic. Loosening up the connections and using just enough Teflon tape where it was actually needed, and relying on hose clamps for flexible connections, solved the issue. It was a frustrating lesson in not over-engineering a simple system.
What ‘pressurized Fittings’ Even Means Here
When people talk about ‘pressurized fittings’ in plumbing, they’re usually thinking about systems that handle significant water pressure – like your home’s main water supply lines, or perhaps a well pressure tank system. These systems operate at pressures that can be anywhere from 40 to 80 PSI (pounds per square inch) or even higher. At those pressures, a leaky joint isn’t just a drip; it’s a potential geyser. For these applications, you’ll see a lot of threaded fittings made from brass or solid PVC, often requiring specific types of pipe dope or Teflon tape designed for higher pressures, and sometimes even solvent welding for PVC connections to make sure absolute integrity.
A typical sump pump discharge line operates at a fraction of that pressure. The ‘head pressure’ – the force of the water column pushing down – is the main factor. For a pump lifting water 10 feet, that’s roughly 4.3 PSI. Even if your pump is rated for a higher lift, say 20 feet, that’s still only around 8.6 PSI.
Most sump pumps are designed to handle this low-pressure environment. The key is a watertight seal, not a high-pressure seal. (See Also: Are Pumpkin Seed Husks Edible )
The fittings you’ll commonly find on a sump pump itself – usually a threaded outlet (often NPT, National Pipe Thread) – are designed to connect to a corresponding threaded fitting on your discharge pipe, or to a flexible adapter. These threads are what allow for a secure connection, and a few wraps of Teflon tape or a bit of pipe dope is usually enough to make them watertight for this low-pressure application.
The confusion often arises because people see threaded fittings and assume they need to be tightened to the nth degree, like they might on a pressurized water line. This is a mistake. Over-tightening can strip threads, crack plastic fittings, or put undue stress on the pump housing. The goal is a snug fit that seals the threads, not a torque-fest. Many modern sump pumps even come with a specific discharge adapter that uses a rubber gasket and a large plastic nut, which is designed to be hand-tightened or snugged with pliers. This type of fitting is ideal because it allows for a bit of flex and is designed precisely for the low-pressure, vibration-prone environment of a sump pump discharge.
So, while you’ll use threaded fittings to connect the pump to the discharge pipe, they aren’t ‘pressurized fittings’ in the same sense as those used in high-pressure home plumbing. They’re simply threaded connections designed to create a watertight seal in a low-pressure system. The focus should be on a secure, watertight connection that can withstand minor vibrations and movement, rather than brute force and high-pressure sealing. Many hardware store ‘plumbing fittings’ are designed for higher pressures, and you might end up with something more solid than you need, which can ironically lead to installation headaches.
Common Mistakes and Why They Happen
One of the biggest mistakes I see people make, and one I definitely made myself, is using solvent-welded PVC couplings for the entire discharge line. Solvent welding creates incredibly strong, permanent bonds that are fantastic for pressurized water lines. But with a sump pump, your discharge pipe needs a little bit of give. The pump vibrates when it runs, and the pipe might shift slightly. If every joint is rigidly welded, all that stress concentrates at the pump’s outlet, which is often a plastic fitting itself. This can lead to premature failure of the pump’s discharge port or the first section of pipe.
Another common error is not using a check valve, or using a faulty one. This isn’t strictly about fittings, but it’s a huge reason water backs up. A check valve is supposed to prevent water from flowing back down the discharge pipe into the pit once the pump stops. If it’s stuck open, clogged, or installed backward, you’ll have water flowing back, making the pump run more often and potentially causing it to cycle too much, shortening its lifespan. Many sump pump kits come with a basic check valve, but upgrading to a better quality one, especially one that allows for a slightly more flexible connection to the discharge pipe (like a flexible union or a swing-away type), can be a good investment.
Over-tightening threaded connections is another prevalent mistake. As I mentioned, people see threads and think ‘seal it tight!’ They crank down on fittings, using pipe wrenches on plastic. This is a recipe for disaster. You can crack the fitting, strip the threads on the pump, or create stress points. For NPT threads on a sump pump discharge, a snug fit with a few wraps of quality Teflon tape is usually all you need. The threads are tapered, so as you tighten, they seal. You don’t need to feel like you’re trying to unscrew a lug nut.
Then there’s the issue of discharge location. Some people try to run their sump pump discharge line way too far horizontally or too high vertically. While the pump has a maximum head rating, exceeding it significantly means the pump is working overtime, potentially overheating, and the flow rate will be pathetic.
This can lead to the pit filling faster than the pump can clear it, even if all the fittings are perfect. It’s about matching the pump to the job. If you have a long run or a significant elevation change, you might need a more powerful pump, not just more fittings. Trying to force water up a ridiculously high run with an undersized pump is a common, and often expensive, mistake.
Sump Pump Discharge Pipe Materials
| Material | Pros | Cons | My Verdict |
|---|---|---|---|
| PVC (Schedule 40) | Inexpensive, easy to cut and glue, readily available. | Can become brittle over time, especially with UV exposure. Rigid connections can stress pump if not handled carefully. | Good for short, straightforward runs. Use unions for flexibility. |
| ABS | Similar to PVC but often more impact-resistant in cold temperatures. | Can also degrade with UV exposure. | A decent alternative to PVC, especially in cooler climates. |
| Flexible Hose (Corrugated Plastic) | Very flexible, easy to connect, absorbs vibration well. | Can kink easily if not laid out carefully. Can be less durable long-term than rigid pipe. Sometimes harder to get a truly secure, leak-free connection at the pump. | Great for final connections or where significant movement is expected, but avoid for the entire run if possible. |
| Metal (e.g., Galvanized Steel, Copper) | Durable, high-pressure rated. | Expensive, heavy, prone to corrosion (galvanized steel), requires specialized tools and fittings. Overkill for sump pumps. | Absolutely not necessary and a waste of money for this application. |
Practical Tips for a Reliable Sump Pump Discharge
When I’m setting up a sump pump discharge, my goal is simplicity and reliability. First off, I always use a discharge pipe that’s at least the same diameter as the pump outlet – usually 1.5 or 2 inches. (See Also: Are Pumpkin Seed Acid Or Alkaline )
Going smaller is a common mistake that chokes flow. For the connection to the pump, I prefer the plastic union nut that often comes with the pump or a similar flexible adapter with a rubber gasket.
If I have to use a threaded fitting, I’ll wrap the threads with three or four layers of quality Teflon tape (the thicker, white kind is usually better) and tighten it until it’s snug, then maybe a quarter turn more. No pipe wrenches on plastic! If it feels like it’s going to crack, stop.
For the rest of the discharge line, I like to use Schedule 40 PVC. It’s cheap and readily available. However, instead of solvent-welding every joint, I use threaded couplings and unions. A union fitting is a lifesaver. It has three parts and allows you to easily disconnect the pipe for maintenance or replacement without having to cut and re-glue. I’ll connect the pump to a short piece of PVC with a threaded fitting, then use a union to connect that to the main PVC run. This union provides a flexible break point that absorbs vibration and makes future work a breeze. It costs a few extra bucks, but trust me, it’s worth it.
I also pay close attention to how the pipe is supported. If it’s a long run, I’ll use pipe hangers or stakes to keep it from sagging or shifting excessively. This prevents stress on the joints and the pump.
And for the love of all that is dry, make sure the discharge point is far enough away from your foundation, and ideally, slopes downhill, so water doesn’t just pool and seep back towards your house. I once saw a neighbor’s discharge pipe end just a few feet from their foundation, and during a storm, the water literally flowed right back under their patio and into their basement.
A little extra hose to get the water further away can save you a world of hurt.
Finally, always test your system after installation, and periodically afterward. Run the pump, and watch the discharge line. Listen for any unusual noises. Make sure water is flowing freely. During heavy rain, check the pit level. If the water level is consistently high or the pump is running constantly without clearing the pit effectively, something isn’t right. It might be a blockage, a faulty check valve, or an issue with the discharge point. Don’t just assume it’s working because it’s making noise.
When Might You actually Need Higher-Rated Fittings?
Okay, so I’ve been pretty clear that for 99% of residential sump pump applications, you don’t need special ‘pressurized’ fittings. But are there exceptions? Honestly, they are rare and usually involve custom or highly unusual setups. If you were, for some bizarre reason, trying to pump water from your sump pit through a very long, very narrow pipe to a location that required overcoming extreme friction loss and significant vertical lift – basically trying to create a high-pressure scenario – then yes, you might need fittings rated for that. Think of situations where you’re not just draining a basement, but perhaps part of an industrial process, or a very complex drainage system for a large property.
Another niche scenario could involve submersible pumps used for things other than standard basement drainage. For example, some decorative fountain pumps or pond pumps that might be designed to push water through long hoses or spray nozzles at higher velocities could benefit from fittings that can withstand a bit more force. Even then, the pumps themselves are designed with specific outlet types and pressure ratings. You’d match the fittings to the pump’s specifications. The key is understanding the system’s pressure requirements. A standard basement sump pump discharge line is simply not a high-pressure environment. (See Also: Are Organic Pumpkin Seeds From China Bad )
The real danger of using fittings that are too solid or rigidly installed is that they don’t allow for the natural flex and vibration of the system. A more flexible connection, even if it’s just a short piece of reinforced hose or a rubber coupling, can absorb these forces better than a rigid, over-tightened threaded connection. This protects the pump’s motor and the discharge plumbing from premature wear and tear. So, while the temptation to ‘overbuild’ might seem like a good idea, for sump pump drain lines, it’s often counterproductive. Stick to what works for low-pressure, high-volume movement of water.
People Also Ask (faq)
Do I Need a Check Valve on My Sump Pump Discharge Pipe?
Yes, absolutely. A check valve is key for any sump pump discharge line. Its sole purpose is to prevent water from flowing back down the pipe and into the sump pit once the pump turns off. Without a check valve, water would continuously drain back, causing the pump to cycle on and off unnecessarily, leading to premature wear and tear, and potentially keeping your basement wet. It’s a a must component for a properly functioning sump pump system.
Can I Connect My Sump Pump Discharge to My Sewer Line?
In most residential areas, it is illegal and highly discouraged to connect your sump pump discharge directly to the sanitary sewer line. Sump pumps discharge large volumes of water, especially during heavy rains. Discharging this into the sanitary sewer can overwhelm municipal wastewater treatment systems, causing backups and overflows. Always check your local plumbing codes, but generally, sump pump water must be discharged to a storm drain, a dry well, or an approved surface discharge location away from your home.
What Is the Maximum Discharge Height for a Sump Pump?
The maximum discharge height, also known as the ‘head height’ or ‘total dynamic head,’ varies significantly by sump pump model. It’s a important specification found on the pump’s label or in its manual. This rating indicates the maximum vertical distance the pump can lift water. Pumping water higher than the pump’s rated head height will result in drastically reduced flow or the pump failing to discharge water at all. It’s important to choose a pump with a head rating that exceeds your home’s specific discharge requirements.
How Far Away From My House Should My Sump Pump Discharge Pipe Extend?
Ideally, your sump pump discharge pipe should extend at least 10 to 20 feet away from your home’s foundation. The water discharged should also be directed downhill, away from your foundation. This prevents the water from pooling and seeping back into your basement or crawl space. If you have a long run or an area where the water might naturally flow back towards the house, consider extending the pipe even further or using splash blocks to disperse the water more effectively. The goal is to get the water as far away as possible so it doesn’t become a problem later.
Final Thoughts
So, to circle back to the main question: are pressurized fittings needed for sump pump drain? For nearly every home situation, the answer is a resounding no. You need secure, watertight connections, but not ‘high-pressure’ rated ones. Over-engineering this part of your plumbing can actually cause more problems, leading to stress on the pump and potential leaks down the line.
Focus on a good connection at the pump itself – often a flexible adapter or a carefully made threaded joint – and then consider using unions in your PVC run for ease of maintenance. Simple, well-supported piping that directs water away from your foundation is key. Don’t get caught up in using the most solid fittings you can find; sometimes, less is more when it comes to sump pump discharge plumbing.
Before you buy a single fitting, take a good look at your sump pump’s outlet and measure the distance and height to your discharge point. Match your pump’s capabilities to the job. This small bit of planning can save you a lot of headaches and prevent that dreaded basement water intrusion. You’ve got this.