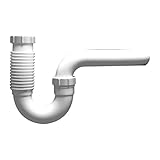
I remember the first time I had to snake out a drain in our old camper. It was a nightmare. Water was backing up, and all I could think was, ‘Surely this is different from my house, right?’ The common wisdom you hear is that RVs are just smaller, simpler versions of your home. But when it comes to something as basic as a sink p trap, are sink p traps in travel trailer same as house? The answer, like most things in RV maintenance, isn’t a simple yes or no. It’s more like, ‘mostly, but with a few key differences that can really mess you up if you don’t know them.’
I’ve spent years wrestling with plumbing issues on the road, from leaky faucets to stubborn clogs, and I’ve learned that what works for your stationary abode might not always cut it when you’re bouncing down the highway. Let’s break down what’s really going on under your sink, whether you’re parked at a campsite or just trying to wash dishes at home.
The Simple Truth: Mostly Yes, but with Caveats
Look, at its core, a p-trap is a p-trap. Its job is the same everywhere: to hold a little bit of water, creating a seal that stops sewer gases from wafting up into your living space. Imagine trying to eat dinner while smelling what’s coming out of the black tank – not ideal. That’s the magic of the p-trap.
The basic shape, usually a U-bend followed by a slight upward curve, is designed to capture that water. Whether it’s under the sink in your brick-and-mortar house or in your tiny travel trailer bathroom, the physics are identical. Both are designed to prevent those noxious fumes.
You’ll find the same materials, generally PVC or ABS plastic, connecting your sink drain to the rest of your plumbing system. The principle is so fundamental that manufacturers don’t really reinvent the wheel for RVs. They use what works, and what works is the humble p-trap.
So, if you’ve ever replaced a p-trap under your kitchen sink at home, you’ll likely recognize the setup in your RV. The pipes might be a bit smaller in diameter, and the overall system is certainly more compact, but the function and the basic components are largely the same. This is where the ‘yes’ comes in. You can often buy a generic p-trap kit from any hardware store and it will do the job.
I’ve personally grabbed a few from Home Depot on road trips when a leak sprung up and they worked just fine. The important part is the water seal, and that’s achieved through the same curved pipe design, whether it’s in a 3,000-square-foot house or a 200-square-foot travel trailer. This similarity is a lifesaver when you’re trying to make a quick fix on the go. You don’t need specialized RV-only parts for this particular component, which is a small victory in the often-expensive world of RV repair.
However, the devil is always in the details, especially with RVs. While the p-trap itself might be the same, the context it operates in is wildly different. Your house plumbing is a static, gravity-fed system with a constant water supply and a solid drainage network. RV plumbing, on the other hand, is a dynamic, often pressurized system dealing with limited water, potentially uneven terrain, and a more sensitive waste management system.
This is where the ‘but’ comes in, and it’s a significant one. The pressures, the movement, and the overall design of an RV plumbing system can impact how a p-trap functions and, more importantly, how it holds up over time.
Ignoring these differences is where people, myself included in my early RVing days, run into trouble. I once assumed an RV p-trap would be as durable as my house one, only to have it loosen up and start dripping after a particularly bumpy stretch of highway. Lesson learned.
One of the biggest differences, though it doesn’t change the p-trap itself, is the water source and pressure. Houses typically have municipal water pressure, which is consistent. RVs often use onboard pumps, which can fluctuate, or they connect to campground hookups, which also vary wildly. This inconsistent pressure can put more stress on fittings and seals, including those on your p-trap. Furthermore, the constant vibration from travel can loosen connections that might stay tight in a stationary home. So while the physical p-trap might be identical, its lifespan and reliability can be significantly affected by the unique challenges of mobile living.
Why RV Plumbing Is a Different Beast
Let’s talk about what makes RV plumbing so different, and why it matters even when discussing something as simple as a p-trap. Your house plumbing is designed to be permanent. Pipes are usually rigid, secured tightly, and connected to a vast municipal sewer system or a well-maintained septic tank. Gravity does a lot of the heavy lifting, and the system is built for high volume and consistent flow. You rarely have to think about water pressure variations beyond what your municipal supply dictates, and even then, it’s usually within a predictable range.
Now, contrast that with your travel trailer. Everything is designed for lightness, compactness, and durability under stress.
Pipes are often flexible or semi-rigid plastic, chosen for weight and ease of installation in tight spaces. They’re secured, but the constant movement of the vehicle means those securing points can work loose over time. The water system is pressurized by a pump, which cycles on and off, creating pressure fluctuations. When you’re hooked up to campground water, that pressure can be anything from a trickle to a jet stream, depending on the campground’s infrastructure. (See Also: Are Omega Watch Straps Real Alligator )
This inconsistency is a major factor. I once had a campground with such high pressure that it felt like a firehose, and I genuinely worried about my RV’s plumbing holding up. It makes you appreciate the stability of home plumbing.
Then there’s the waste system. In a house, your drains connect to a large municipal sewer line or a substantial septic system. They’re designed to handle a lot of volume and can process waste over time.
RVs, however, have holding tanks – black tanks for toilet waste and grey tanks for sink and shower water. These tanks have limited capacity.
Furthermore, the pipework leading to these tanks is often smaller and more direct than in a house. This means clogs can form more easily, and blockages can be more problematic.
A p-trap in an RV can also be a point where debris collects, and because of the smaller pipe diameters and potentially less solid flushing mechanisms, clearing that debris can be trickier. Think about how much more likely a twig is to clog a narrow garden hose compared to a wide irrigation pipe. That’s the principle at play here.
The materials used in RV plumbing are also a consideration. While PVC is common in both, RVs might use lighter-duty plastics or even PEX tubing for water supply lines. These are chosen for flexibility and weight savings.
This flexibility, while good for installation, can also mean a bit less rigidity. When you combine this with the constant jostling of travel, fittings and connections are more prone to loosening.
I’ve definitely had to tighten hose clamps and PVC slip nuts more often on my camper than I ever have on my house plumbing. It’s the sum of these parts – the pressure, the movement, the tank system, the materials – that makes RV plumbing a fundamentally different beast, even if the p-trap itself looks the same.
Common Issues and What to Watch For
So, if the p-trap is basically the same, where do the problems arise? It’s usually not the trap itself, but how it’s installed, how it’s stressed, and what’s going through it. One of the most common issues I see (and have experienced firsthand) is leaks. Because RVs are constantly vibrating and flexing as you drive, any connection that isn’t perfectly tight can start to weep.
This applies to the slip nuts connecting the p-trap to the tailpiece of the sink and to the drainpipe leading to the holding tank. A tiny drip might not seem like a big deal, but in an RV, especially if it goes unnoticed, it can lead to mold and water damage in those hard-to-reach cavities. I learned this the hard way after a trip where a persistent musty smell turned out to be a slow leak from a loose p-trap fitting under the bathroom sink.
It took me days to trace it back.
Another issue is clogging. While houses can handle more waste, RV plumbing systems are more sensitive. The p-trap, by its design, can be a prime spot for hair, soap scum, food particles, and other debris to accumulate. In an RV, where pipes might be slightly smaller or have more bends due to space constraints, this buildup can lead to slow drains or complete blockages much faster than in a house.
If you’re using RV-specific soaps and cleaners that are biodegradable, that’s good, but even those can contribute to gunk. Some people try to flush their RV drains with water, but that’s often not enough. (See Also: Are Traditional Mouse Traps Humane )
I found that using a drain snake or a specialized RV drain cleaner (the chemical kind, used sparingly and with extreme caution, mind you) is sometimes necessary. Just remember that whatever you use, it eventually goes into your holding tank, so be mindful of that.
Here’s a little table I put together from my own experiences and observations. It breaks down common problems and my verdict on their severity and solution. It’s not scientific, just years of getting my hands dirty.
| Problem | Description | Severity | My Verdict |
|---|---|---|---|
| Leaky Slip Nuts | Water seeping from the plastic nuts connecting the p-trap. | Moderate to High (potential water damage) | Tighten by hand first. If still leaking, use pliers gently. Consider Teflon tape on threads if hand-tightening fails. |
| Slow Drain | Water drains slowly from the sink. | Low to Moderate | Try hot water flush, then a drain snake. Check for debris in the trap itself. |
| Complete Clog | Sink is completely blocked. | High (inconvenience, potential backup) | Drain snake is usually best. Avoid harsh chemicals unless absolutely necessary and follow instructions carefully. |
| Foul Odors | Smell of sewer gas from sink. | Moderate to High (indicates seal failure or clog) | Check water level in trap. If full, investigate clog or loose fitting. Often the trap water evaporates if not used regularly, or a fitting is loose. |
| Pipe Loosening | Connections feel loose due to vibration. | Moderate | Regularly check and gently tighten all fittings, especially after long drives. |
One thing you really need to watch out for is using harsh chemical drain cleaners designed for household use. They can sometimes be too aggressive for the plastics and seals in RV plumbing, potentially causing damage that’s far more expensive to fix than a simple clog. Always, always check if a product is RV-safe. I learned this the hard way when a friend suggested a heavy-duty cleaner for a stubborn clog, and it ended up making the plastic pipe brittle. Thankfully, it was just a minor leak, but it could have been much worse. The common advice to just ‘use whatever you have’ is frankly terrible advice when it comes to RVs.
Practical Tips for RV P-Trap Maintenance
Given all this, what can you actually do to keep your RV sink p-trap happy and functioning? It’s mostly about preventative care and knowing how to handle minor issues before they become major headaches. First off, get familiar with your RV’s plumbing layout. Most RVs are pretty straightforward. Under the sink, you’ll see the tailpiece from the sink drain, then the p-trap, and then the pipe leading away. Just knowing where everything is will save you time and panic if something goes wrong. Take a flashlight and just look. See how it’s connected. Feel the fittings.
Regular checks are your best friend. After a long drive, or even just a few days of heavy use, give the p-trap fittings a gentle squeeze. You don’t need to crank on them, just a snug-up. If you feel any looseness, gently tighten them. This simple habit can prevent a lot of leaks. I make it a point to do this every time I do a fluid check or a general walk-around of the RV. It takes maybe 30 seconds and can save you hours of cleanup and repair work later. It’s like checking your tire pressure – a little effort now saves a lot of trouble down the road.
When it comes to cleaning, avoid letting gunk build up. For sinks that get a lot of use, running hot water down them for a minute after you’re done using them can help wash away smaller particles before they settle. For tougher stuff, use an RV-specific drain cleaner sparingly, or better yet, use a drain snake. The flexible coil snakes you can buy at any hardware store are fantastic for RVs. You can often reach right into the trap or just past it to dislodge obstructions. I keep a small 6-foot snake in my RV toolkit, and it’s paid for itself a dozen times over. It’s much safer than chemicals and more effective than just pouring hot water.
Here’s a quick process I follow if I suspect a clog or slow drain:
- Run Hot Water: Start with a good stream of hot, but not boiling, water for a couple of minutes. This can sometimes loosen minor blockages.
- Manual Inspection: If that doesn’t work, carefully unscrew the slip nuts on the p-trap (have a bucket underneath!). Remove the trap and check for obvious obstructions like hair or food debris. Clean it out thoroughly.
- Snake It Out: If the trap itself is clear, or the clog is further down, use your drain snake. Feed it into the pipe coming from the sink and also into the pipe going towards the tank. Gently work it back and forth to break up the clog.
- Reassemble and Test: Reconnect the p-trap, making sure all fittings are snug. Run water to check for leaks and make sure the drain is clear.
Lastly, be mindful of what goes down your drain. Avoid pouring grease or coffee grounds directly into the sink. Scrape plates into the trash before rinsing. Use only biodegradable soaps and cleaners that are specifically rated for RV use. These small habits, combined with regular checks and prompt attention to any signs of trouble, will keep your RV p-trap doing its job without causing you grief. It’s all about respecting the limitations of the system and being proactive.
The DIY Factor: Can You Fix It Yourself?
Absolutely. Fixing or replacing an RV sink p-trap is one of the most accessible DIY repairs you can tackle, and it’s a fantastic way to save money and gain confidence in your RV maintenance skills. The parts are cheap, and the tools required are minimal. You’ll likely need a pair of channel-lock pliers or a pipe wrench (though often you can just hand-tighten/loosen the slip nuts), a bucket to catch water, and maybe some Teflon tape or pipe dope if you’re having persistent issues with leaks after reassembly. The process is virtually identical to replacing a p-trap under a house sink, with the added consideration of working in a more confined space and dealing with the potential for vibration-induced loosening.
The main reason why so many people shy away from RV plumbing repairs is fear of making things worse, or the misconception that RV parts are somehow exotic and hard to find. For a p-trap, this is simply not true. A standard plastic p-trap kit from any major hardware or home improvement store will work perfectly fine. You might even find that the size and configuration are identical to what you have.
The only real difference you might encounter is the diameter of the pipe connecting to the drain line. Most RVs use 1.5-inch or sometimes 1.25-inch drain pipes, which are common sizes for household sinks as well. Just measure what you have before you go shopping, or take a picture of the existing trap with you.
I’ve swapped out RV p-traps more times than I can count, and I’ve never had to order a special ‘RV p-trap’ online. It’s always been a quick trip to the local hardware store.
When you’re replacing one, the steps are straightforward. First, place your bucket underneath the existing trap. (See Also: Are Sticky Mouse Traps Humane )
Then, unscrew the slip nuts – one connecting to the sink tailpiece, the other connecting to the drain pipe. Be prepared for some residual water to drain out. Once it’s disconnected, clean the ends of the pipes and the threads.
If your new trap came with rubber gaskets, make sure they’re properly seated. Then, simply thread the slip nuts onto the new trap and connect it to the pipes. Hand-tighten them first, then give them a quarter-turn with pliers if needed. The key is to get them snug enough to create a seal but not so tight that you crack the plastic fittings.
Once it’s reassembled, run water into the sink and check carefully for any leaks around the nuts. If you see any drips, try tightening a bit more. If it persists, you might consider adding a bit of Teflon tape to the threads before reassembling. It’s a simple fix that often solves minor leak issues.
The contrarian opinion here? Some RV technicians will tell you that you must use specific RV-branded plumbing parts.
I call BS on that for standard components like p-traps. The plumbing codes and basic physics for water flow and sealing don’t change based on whether your house is mobile or stationary.
While you should use RV-specific cleaners and perhaps certain types of flexible hose or fittings for water supply lines where movement is extreme, a basic p-trap is a functional component that doesn’t need to be branded by your RV manufacturer. I’ve saved hundreds of dollars over the years by using standard hardware store parts for many non-important RV plumbing components.
It’s not about cutting corners; it’s about understanding what parts are truly specialized and what parts are just standard plumbing components rebranded at a higher price. Your wallet will thank you.
Do RV Sink P Traps Need to Be Different From House Sink P Traps?
No, not fundamentally. The function of an RV sink p trap is identical to a house sink p trap: to create a water seal that prevents sewer gases from entering the living space. Both are typically made of PVC or ABS plastic and use the same U-bend design to hold water. You can often use standard household p-trap kits in an RV.
Why Do RV Sink Drains Clog More Easily?
RV sink drains can clog more easily due to several factors, including smaller pipe diameters, potentially less consistent water pressure for flushing, and the accumulation of debris in a system that leads to limited-capacity holding tanks. Travel vibrations can also loosen fittings, contributing to potential issues.
How Often Should I Check My RV Sink P Trap?
It’s a good idea to check your RV sink p trap connections for tightness and leaks regularly, especially after driving. A quick visual inspection and gentle tightening of fittings after a long trip or every few months can prevent minor issues from becoming major water damage problems.
Can I Use Household Drain Cleaners in My RV?
It is generally not recommended to use standard household drain cleaners in your RV unless they are specifically labeled as RV-safe. Harsh chemicals can damage the plastic pipes, seals, and even the holding tanks in your RV plumbing system, leading to costly repairs.
Final Verdict
So, to circle back to that initial question: are sink p traps in travel trailer same as house? The short answer is yes, in terms of their function and the basic component itself. You can grab a standard p-trap from the shelf at your local hardware store and it’ll do the job. But the context is everything. The vibrations of travel, the fluctuating water pressure, and the unique waste management system of an RV mean you have to be a bit more vigilant. Don’t just install it and forget it.
My advice? Treat your RV plumbing with a bit more respect than your stationary setup. Check those connections regularly, be mindful of what goes down the drain, and when in doubt, opt for simpler, safer methods like drain snakes over harsh chemicals. Most problems you encounter with an RV p-trap won’t be because the trap itself is inherently different, but because the environment it lives in is much more demanding.
If you’re comfortable with basic DIY, tackling a p-trap replacement or repair yourself is totally doable and a great way to save cash. Just remember to have that bucket ready and don’t overtighten those fittings. Understanding these nuances will save you a lot of headaches and potentially expensive repairs down the road, keeping your travel trailer plumbing in good working order, no matter where the road takes you.