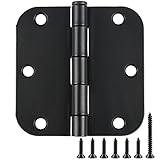
I remember the first time I tried to get those fancy Sugartune hinges on my new cabinet doors to sit just right. It felt like trying to herd cats. I’d seen the glossy ads, the perfectly aligned doors, and thought, ‘Yeah, I can do that.’ Turns out, ‘doing that’ involved more fiddling than I ever anticipated. So, the big question on a lot of people’s minds, and it was on mine too: are Sugartune hinges adjustable? The short answer, as with most things in life, is a bit more complicated than a simple yes or no.
I’ve spent more hours than I care to admit wrestling with cabinet hardware, and Sugartune has been part of that journey. It’s easy to get caught up in the marketing hype, but when you’re the one holding the screwdriver at 10 PM, you want practical answers.
The Truth About Adjusting Sugartune Hinges
Let’s get this out of the way: Yes, Sugartune hinges are designed with adjustability in mind. That’s one of their selling points, and for good reason. When you’re installing cabinets, especially if you’re a DIYer like me who might not have a perfectly plumb wall or a perfectly square cabinet box, you need some wiggle room. These hinges typically offer adjustments in three directions: up/down, left/right, and in/out (depth). This is what allows you to achieve that clean, professional look with doors that are perfectly aligned, with consistent gaps between them and around the frames.
The adjustment screws are usually located on the hinge arm itself, where it attaches to the cabinet door or the cabinet frame. You’ll typically find one for horizontal adjustment (side-to-side), another for vertical (up and down), and sometimes a third for depth, which controls how far the door sits in relation to the cabinet face. The mechanism is fairly standard across many modern concealed hinges, and Sugartune follows suit. You’ll need a Phillips head screwdriver, and sometimes a flathead depending on the screw type, to make these adjustments. It’s not rocket science, but it does require a bit of patience and a keen eye.
My first encounter with Sugartune was on a kitchen remodel project. I was upgrading from old, surface-mounted hinges to these sleek, concealed ones. I’d bought a pack of 20, convinced it would be a breeze. I got a few doors on, and they looked… okay. But one was slightly higher than the other, and the gap on the left was wider than the gap on the right. I spent what felt like hours just trying to eyeball it, turning screws randomly. That’s when I realized I needed to understand which screw did what. It’s a learning curve, for sure. You can’t just wing it and expect perfect results, no matter how fancy the hinge is.
How the Adjustments Actually Work
Okay, so you’ve got the hinge, you’ve got the screwdriver, and you’ve got doors that are slightly off-kilter. How do you actually use those adjustment screws? It’s all about understanding the mechanics. Most concealed hinges, including Sugartune, use a system where the screws don’t directly move the door; instead, they move the mounting plate or the hinge arm itself within a slot or a cam mechanism. This subtle shift translates into the visible movement of the door.
Let’s break down the typical adjustments:
- Horizontal Adjustment (Left/Right): This is usually controlled by a screw that moves the hinge arm sideways within its mounting bracket on the cabinet frame. Turning this screw will push or pull the door left or right. This is your go-to for correcting uneven gaps between doors or between a door and the cabinet frame.
- Vertical Adjustment (Up/Down): This often involves loosening screws on the mounting plate attached to the cabinet frame, allowing you to slide the entire plate up or down slightly. Some hinges have a dedicated screw for this, which might adjust a cam that lifts or lowers the hinge arm. This is important for aligning doors that are noticeably higher or lower than their neighbors.
- Depth Adjustment (In/Out): This screw typically acts on the hinge arm itself, pushing it closer to or further from the cabinet frame. This is useful for doors that are sticking out too far or are recessed too much, affecting the overall flushness of your cabinet face.
When I finally sat down and read the (admittedly sparse) instructions that came with my Sugartune hinges, I discovered the little diagrams showing which screw was which. It was a revelation. Before that, I was just randomly turning things and hoping for the best. It’s like trying to tune a guitar by just banging on the strings; you might get lucky, but it’s far more efficient to know which tuning peg affects which string. The key is to make small, incremental adjustments. Turn a screw a quarter turn, close the door, observe the change, and then decide your next move. Trying to fix everything with one giant turn will likely just make things worse.
Common Mistakes and What to Avoid
Here’s where I’ve personally flushed money and sanity down the drain. People see these fancy, adjustable hinges and think they’re a magic wand. They’re not. The biggest mistake I see, and one I’ve made myself, is trying to force adjustments or expecting a huge change from a tiny turn. These hinges are for fine-tuning, not for correcting major installation errors.
Mistake 1: Expecting Perfection from a Bad Install. If your cabinet boxes are wildly out of square, or if your mounting plates are installed at completely different angles, no amount of hinge adjustment will make those doors look perfect. The hinges work within a certain tolerance. If you’re starting with a fundamentally flawed foundation, you’re going to be fighting a losing battle. I once tried to adjust hinges on a cabinet that was visibly sagging. It was like trying to polish a turd. The doors looked slightly better, but the underlying issue made it a pointless exercise. (See Also: Are Spring Loaded Door Hinges Better )
Mistake 2: Over-tightening or Stripping Screws. These adjustment screws are often made of relatively soft metal. If you apply too much force, especially with a screwdriver that doesn’t quite fit the screw head, you can strip the threads. Then you’ve got a hinge that’s stuck in its current position, and you might have to replace the whole thing. I learned this the hard way when I was getting impatient with a stubborn depth adjustment. Crunch. Yep, stripped. That taught me to go slow and steady.
Mistake 3: Not Making Both Hinges on a Door Work Together. A cabinet door usually has two hinges. You can’t just adjust one hinge and expect the door to magically square up. You need to consider both hinges. Often, you’ll need to make slight adjustments to both hinges to achieve the desired alignment. For example, if a door is hanging too low, you might need to slightly raise one hinge and slightly lower the other, or adjust both upwards. It’s a balancing act.
Mistake 4: Not Understanding Which Screw Does What. As I mentioned earlier, many people just start turning screws randomly. This is inefficient and can lead to frustration. Take a moment, identify the screws, and understand their function. A quick online search for the specific Sugartune model can often yield better diagrams than what comes in the box.
Real-World Use Cases and My Experience
I’ve used Sugartune hinges on kitchen cabinets, bathroom vanities, and even a built-in bookshelf. They’re a step up from basic, non-adjustable hinges, and for most home applications, they strike a good balance between functionality and cost. The adjustability is what makes them worthwhile. Without it, I’d still be using those clunky, visible-jointed hinges that always seemed to sag after a year or two.
One particular instance stands out. I was installing a new set of upper cabinets in my kitchen. The wall wasn’t perfectly flat, and the cabinet boxes themselves, while new, had slight variations. After mounting the doors, one particular door on the end was hanging about 3mm too high on the latch side and about 2mm too far out from the adjacent door. It was subtle, but it drove me nuts every time I looked at it. I grabbed my trusty Phillips head screwdriver and went to work on the Sugartune hinges.
First, I tackled the height. I loosened the mounting plate screws on the lower hinge slightly, nudged the plate up a hair, and retightened. Then I did the same for the upper hinge, making a similar small adjustment. Closed the door.
Better, but still not perfect. Next, the gap between this door and the one next to it. I found the horizontal adjustment screw on the hinge arm that was attached to the door and gave it a quarter turn inward. I repeated a similar, smaller adjustment on the other hinge on the same door.
Closed it again. Perfect.
The gaps were uniform, the door sat flush, and the entire run of cabinets looked like it was installed by a professional. It took me maybe 10 minutes of actual turning, but it felt like a huge win. That’s the magic of properly used adjustable hinges. (See Also: A Box Without Hinges Key )
Comparison Table: Sugartune vs. Basic Hinges
| Feature | Sugartune Hinges | Basic Non-Adjustable Hinges | My Verdict |
|---|---|---|---|
| Adjustability | Yes (3-way: Up/Down, Left/Right, In/Out) | No | Sugartune wins hands down. Key for a clean look. |
| Installation Complexity | Moderate (requires adjustment) | Simple | Worth the extra effort for the final result. |
| Cost | Mid-range | Low | Price difference is justified by the functionality. |
| Durability | Generally good, depends on model | Can be variable; prone to sagging over time | Sugartune feels more solid and holds alignment better. |
| Aesthetics | Concealed, clean look | Visible, can look dated | Sugartune is far superior for modern cabinetry. |
This table really sums it up for me. The upfront effort in learning to adjust Sugartune hinges pays off in spades with the final appearance and functionality of your cabinets. If you’re doing a new build or a significant remodel, it’s a no-brainer.
Tips for Getting the Best Results
Alright, you’ve got the theory, you know the potential pitfalls. Now, how do you actually make those Sugartune hinges sing? Here are a few practical tips that have saved me time and headaches.
1. Start with the Basics: Good Mounting Plates. Before you even think about adjusting the hinges, make sure your mounting plates are installed correctly. They need to be level, plumb, and securely fastened to the cabinet frame. If the plates are crooked, your adjustments will be fighting against that misalignment from the start.
2. One Adjustment at a Time. Resist the urge to turn multiple screws at once. Make one small adjustment, then check the door. This way, you know exactly which adjustment is having which effect. If you turn three screws and the door moves, you won’t know which one did what, making it harder to fine-tune.
3. Use the Right Screwdriver. A poorly fitting screwdriver will strip those adjustment screws in a heartbeat. Make sure you have a Phillips head screwdriver that fits snugly into the screw head. Sometimes, a magnetic tip can be a lifesaver, especially when working in tight spaces.
4. Work in Increments. A quarter turn is usually a good starting point for most adjustments. You can always turn it more if needed. It’s much easier to add a quarter turn than to undo a full turn that threw everything off.
5. Check Both Hinges on the Door. Remember, a door has at least two hinges. You’ll likely need to make minor adjustments to both to get a door perfectly aligned. If one door is too high, you might need to adjust both hinges upwards slightly, or adjust one up and one down depending on the situation.
6. Don’t Be Afraid of the Manual (if you have one!). While sometimes basic, the manufacturer’s instructions can be your best friend. If you can’t find them, a quick search for the specific Sugartune model number online might pull up a PDF manual with diagrams. Knowing which screw is which is half the battle.
7. Consider a Hinge Repair Kit or Replacement. If you do strip a screw or find a hinge is damaged, don’t despair. Many hinges have parts that can be replaced. For Sugartune, you can often find replacement hinge arms or mounting plates. A full hinge replacement isn’t the end of the world, but it’s worth trying to save what you have if possible. Though, honestly, sometimes it’s faster to just buy a whole new hinge and swap it out if the old one is truly knackered. (See Also: Are Integrated Washing Machine Door Hinges Standard )
Are Sugartune Hinges Adjustable? The Faq
Do Sugartune Hinges Allow for Up and Down Adjustment?
Yes, Sugartune hinges typically offer vertical adjustment. This is usually achieved by loosening screws on the mounting plate that attaches to the cabinet frame, allowing you to slide the plate up or down, or sometimes via a dedicated screw that moves a cam mechanism within the hinge arm. This function is vital for aligning cabinet doors that are hanging too high or too low relative to their neighbors.
Can I Adjust the Side-to-Side Position of Doors with Sugartune Hinges?
Absolutely. Horizontal adjustment, or moving doors left and right, is a standard feature of Sugartune hinges. This is typically controlled by a screw on the hinge arm that allows it to slide within its mounting bracket. This adjustment is what helps you achieve consistent gaps between doors and the cabinet frame, making sure a uniform appearance.
How Do I Adjust the Depth of My Cabinet Doors with Sugartune Hinges?
Depth adjustment, controlling how far the door sits in or out from the cabinet face, is also a common capability of Sugartune hinges. This is usually handled by a specific screw on the hinge that pushes the hinge arm closer to or further from the cabinet frame. This is useful for correcting doors that are sticking out too far or are recessed too deeply, affecting the overall flushness of your cabinetry.
Is It Hard to Adjust Sugartune Hinges?
The difficulty of adjusting Sugartune hinges is moderate and depends on your familiarity with cabinet hardware and your patience. While the adjustment mechanisms are designed to be functional, it requires understanding which screw does what and making small, incremental turns. If you’re comfortable with basic tools and following instructions, it’s a manageable task. However, if you’re expecting a fully automated process or are easily frustrated, it might feel challenging.
What If My Sugartune Hinge Screws Are Stripped?
If your Sugartune hinge adjustment screws become stripped, it can be a nuisance, as that particular adjustment may no longer be possible. In some cases, you might be able to carefully extract the stripped screw and replace it with a similar one. However, if the stripping is severe or the screw is important for a particular adjustment, you may need to replace the entire hinge or at least the hinge arm or mounting plate, depending on which part is affected and available as a spare part.
Conclusion
So, to circle back to the main question: are Sugartune hinges adjustable? Yes, they are, and that adjustability is their biggest strength. It’s what separates them from cheaper, basic hardware and allows for that professional finish. But remember, they’re tools for fine-tuning, not for fixing fundamental installation errors. You still need a solid foundation.
My advice? Don’t be intimidated by the adjustment screws. Take your time, understand what each one does, and make small turns. It’s far better to spend an extra 15 minutes getting it right than to live with slightly wonky doors for years. If you’re building or renovating, investing in adjustable hinges like Sugartune is, in my opinion, absolutely worth it for the control and the finished look you get.
If you’re wrestling with a cabinet door right now, take a deep breath, grab the right screwdriver, and try those adjustments. You might be surprised at how much you can improve things with just a little patience.