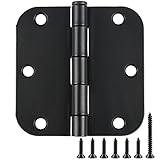
I swear, the first time I tried to replace a single hinge on my kitchen cabinets, I thought I was going to lose my mind. Little did I know that the simple question ‘are all kitchen cabinet hinges the same?’ would send me down a rabbit hole of screws, overlays, and cabinet door types. It’s not as straightforward as you’d think, and honestly, the sheer variety out there can make you want to just buy a whole new set of cabinets.
Most people assume a hinge is a hinge, right? Wrong. I learned this the hard way, trying to force a hinge that just wasn’t meant to be. It’s a small part, but it makes a massive difference in how your kitchen looks and functions. Don’t just grab the first shiny thing you see.
The Hidden World of Cabinet Hinges: Why They Aren’t All the Same
Look, nobody thinks about hinges until one breaks or the cabinet door starts sagging like a tired old man. Then, all of a sudden, you’re staring at this little metal contraption and wondering if you can just grab any old replacement. Spoiler alert: you can’t. The question ‘are all kitchen cabinet hinges the same?’ is a big fat NO, and understanding why is key to avoiding frustration and wasted money. Think of it like trying to put a square peg in a round hole, but instead of a hole, it’s your cabinet door, and the peg is a hinge that’s just… wrong.
The main reason hinges differ is how the cabinet door sits in relation to the cabinet frame. This is called the ‘overlay.’
You’ve got full overlay, where the doors almost completely cover the cabinet frame, giving you that sleek, modern look. Then there’s partial overlay, where the doors overlap the frame by a smaller amount, often leaving a visible gap between doors. And don’t forget inset doors, which sit flush inside the cabinet frame.
Each of these styles requires a specific type of hinge to make the door hang correctly and close properly. Trying to use a full overlay hinge on an inset door? It’s just not going to work. The door will either hit the frame, won’t open fully, or just look plain wonky.
Beyond overlay, there are different mounting styles. Some hinges attach directly to the cabinet frame, while others mount into a pre-drilled hole, often called a ‘cup hinge’ or ‘European-style hinge.’ These cup hinges are super common in modern kitchens because they’re often concealed, meaning you don’t see the hinge when the door is closed. They also tend to offer more adjustability, which is a lifesaver when you’re trying to get those doors perfectly aligned. I once spent an entire afternoon trying to adjust old, non-adjustable hinges on a dresser I was refinishing, only to realize new, adjustable ones would have taken me 15 minutes. That’s the difference we’re talking about.
Materials and finishes also play a role, though this is more about aesthetics and durability than function. You’ll find hinges in brass, steel, zinc alloy, and various plated finishes like brushed nickel, oil-rubbed bronze, and matte black. While a cheap, flimsy hinge might look okay for a while, it’ll likely sag or break under the weight of the door much faster. So, while the aesthetic choices are plentiful, the functional differences dictated by overlay and mounting style are the real game-changers. Getting these right prevents headaches later on.
Understanding Overlay: The Key to a Flush Fit
This is where most DIYers (myself included, early on) stumble. Overlay refers to how much the cabinet door covers the cabinet frame when it’s closed.
It’s not just about looks; it dictates the type of hinge you need. For instance, if you have a ‘full overlay’ design, your doors are designed to cover almost the entire face frame of the cabinet. This gives a clean, modern look with minimal gaps between doors and drawers.
To achieve this, you need specific full overlay hinges that allow the door to extend past the frame. If you slap a partial overlay hinge on there, the door won’t open far enough or will hit the adjacent cabinet. I learned this the hard way when I was trying to upgrade my parents’ old cabinets. I bought what I thought were standard hinges, but they were for partial overlay.
The doors wouldn’t close properly and looked like they were constantly trying to escape their frames. It was a mess, and I had to buy a whole new set of hinges, costing me an extra $80 and a whole day of work.
Then you have ‘partial overlay’ (sometimes called ‘standard overlay’ or ‘half overlay’). This is common in older or more traditional cabinets. Here, the doors overlap the frame by about half an inch to an inch, leaving a visible gap between doors. Partial overlay hinges are designed to accommodate this overlap.
They’re generally simpler and often less expensive than full overlay hinges. Finally, there’s ‘inset,’ where the door is actually set into the cabinet frame, sitting flush with the face. This is a more high-end, custom look, and it requires specialized inset hinges that allow for this recessed fit. (See Also: A Box Without Hinges Key )
If you have inset cabinets, standard overlay hinges will stick out like a sore thumb and won’t allow the door to sit correctly.
So, how do you figure out what you have? The easiest way is to look at your cabinet doors when they are closed.
Measure the gap between the edge of the door and the edge of the cabinet frame. If the door covers almost the entire frame with very little gap, you likely have full overlay. If there’s a noticeable gap, maybe half an inch to an inch, it’s probably partial overlay. If the door sits flush within the frame, it’s inset.
You can also check the back of your existing hinges; sometimes, they’re labeled, or you can look at how they attach. Understanding your overlay is the absolute first step before you even think about buying new hinges.
It’s the foundation of getting your cabinet doors to function and look right.
Hinge Types: From Old School to Euro-Style
Let’s talk about the different kinds of hinges you’ll encounter. The most basic type is the ‘butt hinge.’ This is your classic, old-school hinge, usually made of two leaves that meet when the door is closed.
They’re simple, often visible on the outside of the cabinet, and typically used for partial overlay or inset applications where the hinge itself is part of the design. They’re sturdy but don’t offer much in the way of adjustment, which means if your doors aren’t perfectly aligned during installation, you’re stuck with it. I replaced a set of these on an old pantry cabinet, and while they worked, getting the doors to hang straight without any wiggle room was a real test of patience. A slight warp in the wood, and you’re fighting it.
Then you have what are commonly called ‘European-style’ or ‘Euro-style’ hinges, also known as concealed or integrated hinges. These are the modern workhorses.
They have a ‘cup’ that gets set into a large, round hole drilled into the back of the cabinet door. The other part of the hinge attaches to the cabinet frame. The beauty of these is that when the door is closed, the hinge mechanism is almost entirely hidden.
This gives your cabinets a clean, minimalist look. They also typically come with multiple adjustment screws, allowing you to fine-tune the door’s position up, down, left, right, and even in and out. This adjustability is a lifesaver.
I once installed a full kitchen’s worth of cabinets using Euro hinges, and being able to tweak each door to absolute perfection, despite minor imperfections in the cabinet boxes themselves, was incredibly satisfying. It took longer to get them all dialed in, but the result was worth every minute.
Within Euro-style hinges, there are variations based on how they mount to the cabinet frame. ‘Face frame’ Euro hinges are designed for cabinets with a solid wood frame around the opening. ‘Frameless’ or ‘European cabinet’ Euro hinges are for cabinets that don’t have that wooden frame, where the door attaches directly to the side of the cabinet box. So, even within the ‘concealed hinge’ category, there are specific types you need to match to your cabinet construction. It’s not enough to just say ‘I need Euro hinges’; you need to know if your cabinets are framed or frameless and what your overlay is. Getting this wrong means the hinge won’t mount properly or will interfere with the cabinet structure.
There are also specialized hinges, like soft-close hinges, which are a godsend. They have a built-in mechanism that gently slows down the door as it closes, preventing that annoying slam. Many Euro-style hinges come with this feature integrated, or you can add dampeners separately. Finger-pull hinges for handleless cabinets, and other decorative styles exist, but for the vast majority of kitchen cabinets, you’re looking at butt hinges or Euro-style hinges, and the latter are overwhelmingly more common and practical for modern kitchens. (See Also: Are Integrated Washing Machine Door Hinges Standard )
What to Look for When Buying Hinges
Okay, so you know your overlay and you’re leaning towards Euro-style hinges, but what else should you be looking for? First off, material and build quality. Don’t skimp here.
Cheap hinges made of thin metal will bend, sag, and break prematurely, especially on heavier doors like those found in pantries or lower cabinets. Look for hinges made from solid steel or a high-quality zinc alloy. They should feel substantial and well-machined. I once bought a pack of super cheap hinges online for a small bathroom vanity, and within six months, the doors were visibly sagging.
I ended up replacing them with a slightly more expensive set, and the difference in stability was night and day. It cost me more in the long run to go cheap.
Next, consider the opening angle. Most standard hinges open to about 90-110 degrees, which is fine for most cabinets. However, some applications might require more. For example, if you have cabinets in a corner where two doors meet at a 90-degree angle, you might need special ‘corner’ hinges or hinges with a wider opening angle (like 170 degrees) to allow the doors to swing clear without hitting each other. Always check the specifications for the opening angle if you have any tight corners or unique cabinet layouts.
Adjustability is another huge factor, especially if you’re installing new doors or dealing with older cabinets that might not be perfectly square. As I mentioned, Euro-style hinges are your best bet here, with their multiple adjustment screws. Look for hinges that offer at least three-way adjustment: up/down, left/right, and in/out. This will allow you to perfectly align your cabinet doors, even if the cabinet boxes themselves are a little off. It saves you a ton of hassle trying to shim hinges or deal with misaligned doors. I’d rather spend a few extra bucks on adjustable hinges than spend hours trying to fix a door that’s crooked due to non-adjustable hardware.
Finally, think about the finish. While this is largely aesthetic, it needs to be durable. A cheap plated finish can wear off or chip, leaving you with unsightly hinges. Common finishes like brushed nickel, oil-rubbed bronze, and matte black are popular and usually hold up well if they’re from a reputable brand. If you’re trying to match existing hardware, take a close look at the color and sheen. Some finishes can vary significantly between manufacturers. I once bought hinges that were supposed to be ‘oil-rubbed bronze,’ but they looked more like a dark brown with red undertones, completely clashing with my existing hardware. It’s worth getting a sample or checking detailed photos if you’re ordering online.
Common Mistakes and How to Avoid Them
The most colossal mistake people make is assuming ‘are all kitchen cabinet hinges the same?’ and buying the wrong type based on appearance alone. This leads to doors that don’t fit, don’t close, or just look plain wrong. You MUST identify your cabinet type (framed vs. frameless), your overlay (full, partial, inset), and your mounting style (surface mount vs. concealed cup) before you buy. Don’t guess. Measure. Look at how your current hinges are installed. If you’re replacing hinges, take one off and examine it closely, or better yet, take a clear photo and compare it to hinge specs online. This one step saves an enormous amount of grief.
Another common pitfall is buying hinges with the wrong screw hole pattern or spacing. Many cabinet doors have pre-drilled holes for hinges, especially for Euro-style cup hinges. If your new hinges don’t match the existing hole pattern, you’ll either have to drill new holes (which can be tricky and unsightly if not done perfectly) or find hinges that are compatible. Some hinges are designed with adjustable hole spacing, which can be a lifesaver, but it’s not always the case. Always check the screw hole dimensions and spacing. For butt hinges, you need to make sure the size and shape of the hinge leaf match the cutout in the door and frame.
Overlooking the weight capacity of hinges is another error. Heavy solid wood doors, especially on base cabinets or pantries, require sturdier hinges. A hinge that’s rated for a lightweight hollow-core door might not hold up under the strain of a heavy solid wood door, leading to sagging and eventual failure. Most hinge manufacturers will specify a weight limit or at least indicate the intended use (e.g., interior doors, cabinet doors). It’s better to go slightly overkill with a stronger hinge than to have doors that droop after a year. I’ve seen this happen time and time again, and it always looks terrible.
Finally, don’t underestimate the importance of quality hardware. As I’ve said, cheap hinges are a false economy. They might save you a few dollars upfront, but they’ll likely need replacing sooner, and the hassle of replacing them outweighs the initial savings. Invest in reputable brands known for durability and good design. Look for solid construction, smooth operation, and a good warranty if possible. It’s a small component, but it has a big impact on the daily use and longevity of your kitchen cabinets. A properly functioning, well-aligned cabinet door is a small joy in the kitchen that you only appreciate when it’s not working right.
Practical Tips for Hinge Swapping and Installation
If you’re just replacing existing hinges of the exact same type and brand, it’s often as simple as unscrewing the old ones and screwing in the new. Mark the position of the old hinges with a pencil before removing them, just in case. For Euro-style hinges, make sure you buy the exact same model or one with identical cup dimensions and screw hole placement if you don’t want to drill new holes. If you are installing new hinges on new doors or cabinets that don’t have pre-drilled holes, a template can be your best friend, especially for the cup hinges.
Many hinge manufacturers offer paper or plastic templates to help you mark the exact location and depth for drilling the cup hole. This is far more accurate than freehanding it, which almost guarantees a wonky door.
For any hinge installation, especially Euro-style ones, having a drill with the right size drill bits (including a spade bit or Forstner bit for the cup hole) is key. A good screwdriver (preferably a cordless drill with clutch settings to avoid over-tightening screws) and a measuring tape will also be invaluable. When installing Euro hinges, start by attaching the hinge cup to the door. Then, attach the mounting plate to the cabinet frame. Once both are in place, you can clip the door onto the mounting plate. This modular approach makes it easier to handle the doors and make adjustments. (See Also: Are Hinges Wheeels )
Don’t be afraid to use the adjustment screws on Euro hinges. Seriously, this is what they’re there for! If your doors aren’t lining up perfectly, take the time to tweak them. Most hinges have three screws: one for in-and-out adjustment, one for up-and-down (often loosened to allow the hinge arm to slide along the mounting plate), and one for left-and-right. Make small adjustments, close the door, check the alignment, and repeat. It can be a bit tedious, but the satisfaction of perfectly aligned doors is immense. A common strategy is to get the vertical alignment sorted first, then the horizontal, and finally the depth.
A little tip: if you’re installing new hinges and doors on cabinets that have been painted over many times, you might find the old screw holes are stripped or enlarged. You can fill these with wood filler or toothpicks and wood glue to create a solid base for the new screws. For the cup holes on Euro hinges, make sure you drill to the correct depth specified by the manufacturer. Drilling too deep means the hinge won’t sit flush, and not deep enough means the door won’t close properly. Patience and precision are key here. It’s often better to drill slightly shallower and then deepen it carefully than to go too deep initially.
When to Just Call a Pro
While swapping out hinges can be a manageable DIY project for many, there are times when calling in a professional is the smartest move. If you’re dealing with an entire kitchen renovation where you’re replacing all the doors and hardware, the sheer volume of work can be overwhelming. A professional cabinet installer or carpenter has the tools, experience, and jigs to do the job quickly and efficiently, making sure everything is perfectly aligned from the start. They can also handle any unexpected issues, like warped cabinet boxes or damaged frames, that might arise during the process. I tried to do a full kitchen of cabinets myself once, and while I saved money on labor, the time it took me was insane, and I definitely made a few mistakes that I had to live with for a while before I could afford to fix them.
Another situation where professional help is advisable is if your cabinet boxes themselves are old, damaged, or not structurally sound. Installing new hinges on a weak or warped cabinet frame is like building a house on sand – it’s not going to end well. A pro can assess the condition of your cabinets and advise if repairs or even replacement of the boxes are necessary before you invest in new hardware. This can save you from wasting money on hinges that will ultimately fail due to underlying structural issues.
If you’re undertaking a complex cabinet design or have custom-built cabinets, it’s often best to consult a professional. Custom cabinetry might require specialized hinges or installation techniques that are outside the scope of a typical DIYer. For example, very heavy doors, unusual opening angles, or very specific aesthetic requirements might necessitate expert knowledge. The cost of hiring a professional can often be offset by the avoidance of costly mistakes, especially when dealing with high-end materials or intricate designs. It’s about knowing your limits and when the potential for error outweighs the savings.
Finally, if you’ve already tried to install hinges yourself and are struggling to get the doors to align correctly, or if you’ve made a mistake that you can’t fix, don’t hesitate to call for help. Sometimes, a fresh pair of eyes and experienced hands can diagnose and fix the problem much faster than you can. A carpenter or handyman can often come in and make those final, important adjustments that make all the difference. It’s better to pay for an hour or two of professional labor than to live with poorly functioning cabinets or to make the problem worse by trying to force a fix.
Are All Kitchen Cabinet Hinges the Same?
No, absolutely not. Kitchen cabinet hinges come in various types, each designed for specific cabinet constructions and door styles. The key differences lie in how they accommodate the door’s overlay (full, partial, or inset) and their mounting mechanism (e.g., traditional butt hinges vs. modern concealed Euro-style hinges). Choosing the wrong type will result in doors that don’t hang, close, or look correctly.
What Is Cabinet Hinge Overlay?
Cabinet hinge overlay refers to the amount the cabinet door covers the cabinet frame when it is closed. This is a important factor in determining the correct hinge type. Full overlay doors cover almost the entire frame, partial overlay leaves a visible gap, and inset doors sit flush within the frame, each requiring a different hinge design to function properly.
What’s the Difference Between Framed and Frameless Cabinets?
Framed cabinets have a solid wood frame around the front of the cabinet box, to which the doors are attached. Frameless cabinets (also called European cabinets) lack this front frame; the doors are typically attached directly to the sides of the cabinet box. This difference dictates the type of mounting plate used for concealed Euro-style hinges.
Can I Mix and Match Hinge Brands?
While it’s technically possible if the specifications match exactly, it’s generally not recommended. Different brands may have slight variations in dimensions, screw placement, or adjustment mechanisms, which can lead to alignment issues. For consistency and ease of installation, it’s best to stick with a single brand and model for all hinges on a particular project.
How Do I Know If I Need Soft-Close Hinges?
You don’t necessarily ‘need’ soft-close hinges, but they are a highly desirable upgrade for preventing doors from slamming shut. If you appreciate a quieter kitchen, want to protect your cabinet doors from impact damage, or have children or pets who might be prone to slamming doors, soft-close hinges are a worthwhile investment. Many modern Euro-style hinges include this feature.
Conclusion
So, to circle back to the big question: are all kitchen cabinet hinges the same? You’ve probably figured out by now that the answer is a resounding no. It’s a small component with a surprisingly complex world behind it. Getting the right hinge isn’t just about aesthetics; it’s about functionality, durability, and avoiding a whole lot of headaches.
My advice? Take your time. Identify your cabinet type, measure your overlay, and understand the hinge mechanism you need before you buy anything. Don’t be afraid to spend a little more on quality hardware; it pays off in the long run. And if you’re in doubt, a quick call to a cabinet maker or a hardware supplier can save you from making an expensive mistake.
Next time you’re looking at cabinet doors, you’ll see the hinges with new eyes. They’re not just metal bits; they’re the unsung heroes making your kitchen work. Now go forth and hinge wisely!