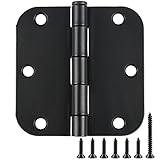
I remember the first time I really slammed my Can-Am X3 doors shut after installing some aftermarket hinges. That satisfying thud, instead of the usual clunky rattle, felt like a small victory. For years, I’d tinkered with my rig, chasing that perfect blend of performance and reliability, and the door hinges were an unexpected hurdle. So many options promised the world, but delivered… well, less than that.
The truth is, the stock hinges on these machines are often the first thing to show wear and tear, especially if you’re not just cruising groomed trails. They’re exposed, they take a beating, and when they start to sag or bind, it’s not just annoying – it can impact how your doors seal and even how they look.
This isn’t about the latest shiny gadget; it’s about figuring out what actually holds up when you’re out there, getting it dirty. We need to talk about can am x3 door hinges that don’t just look good but work.
Don’t Be Fooled by Pretty Pictures: What’s Really Going On
Let’s cut to the chase. When you start looking at aftermarket can am x3 door hinges, you’ll see a lot of chrome, a lot of billet aluminum, and a lot of marketing jargon.
Most of them are designed to look trick, and sure, some might be built a bit tougher than stock. But here’s the blunt truth: a lot of what’s out there is overpriced for what it actually does. I’ve seen more than one set of fancy-looking hinges start to creak and bind after only a season of hard riding.
They bolt on, they look good for a bit, and then they start to feel… cheap. The problem isn’t always the material; it’s often the design and the tolerances.
Stock hinges are usually pretty basic, often made of stamped steel or a similar alloy. They get the job done, but they aren’t built for extreme stress.
Think about it – they’re constantly opening and closing, supporting the weight of the door, and taking lateral forces when you’re navigating rough terrain or even just getting in and out of the cab.
The real weakness in most stock systems is the pivot point. It’s often a simple pin and bushing setup that can wear down relatively quickly.
This wear leads to sag, and that sag means your doors might not seal properly. This can let in dust, water, and noise, which, if you’ve ever ridden an X3 for a few hours, you know can be miserable.
When you’re looking at aftermarket options, you’re often paying a premium for materials like aircraft-grade aluminum or stainless steel, and sometimes for more solid pivot designs like heim joints or sealed bearings. These are generally improvements. However, the installation is also key. If the mounting points aren’t perfectly aligned or if the bolts aren’t torqued correctly, even the best hinge can fail prematurely.
I once bought a set that looked amazing online, polished aluminum with thick-looking arms. They installed fine, but within a month, one of the pivot pins had started to seize up.
Turns out, the machining wasn’t quite tight enough, and grit got in there easily. My mistake was being too swayed by the visual appeal and not digging deep enough into the actual design of the pivot mechanism. Don’t just buy the prettiest ones; look at how they’re engineered to move and handle stress.
When I finally decided to ditch the stock hinges for good, I spent way too long staring at pictures online. I saw kits that advertised ‘heavy-duty’ and ‘performance,’ but they all looked pretty similar. The key difference, I found, wasn’t always in the brand name, but in the way the pivot was constructed.
Some use thicker pins, some use bushings that are more durable, and a few even go with sealed bearings, which are usually the best but also the most expensive. My first mistake was assuming that just because something was made of thicker metal, it would last longer. That’s not always true.
The point of failure is usually where the motion happens – the hinge pin and the holes it sits in. If that area isn’t protected or made of a material that resists wear, you’re just delaying the inevitable. (See Also: A Box Without Hinges Key )
Think of it like shoes: a thick sole is great, but if the stitching comes apart, the whole shoe is useless. For can am x3 door hinges, the stitching is the pivot.
Why Your Stock Hinges Are Probably Crap (and What to Do)
Let’s be honest, the stock hinges on the Can-Am X3 are not exactly built for the apocalypse. They’re designed for a certain level of use, and if you’re pushing your machine like most of us do – through mud, over rocks, at speed – they’re going to show it.
The most common issue I’ve seen, and experienced myself, is sag. You open the door, and it just doesn’t feel as solid as it should. It might even sit a little low, making it harder to close properly. This isn’t just an aesthetic problem; it can affect how your door seals against the body, letting in all sorts of unwanted elements.
I once spent hours trying to adjust my doors, thinking I was doing something wrong. Turns out, the hinge itself had developed play.
It was like trying to straighten a bent picture frame – you can fiddle with the edges, but the frame itself is the problem.
The common advice you’ll hear is to just tighten the bolts. Sure, that might help for a little while, but if the actual pivot mechanism has worn out, tightening the bolts won’t fix the core issue. It’s like putting a band-aid on a broken bone. The wear happens on the pin and the bushings or holes where the pin sits. Over time, this creates a gap, and that gap is what causes the sag. You might also notice a rattling sound, especially when you’re going over bumps. That’s the loose hinge telling you it’s had enough.
So, what’s the fix? Replacing them. It’s not rocket science, but it does require a bit of patience. You can go with OEM replacements, but if you’re here, you’re probably looking for an upgrade.
Aftermarket options generally fall into a few categories: basic reinforced hinges, billet aluminum ones, and sometimes more exotic setups. The most important thing to look for is a solid pivot. Some use stronger pins, some use self-lubricating bushings, and the premium ones might even use sealed bearings.
I’ve found that sealed bearings offer the smoothest operation and the best protection against dirt and grime, but they also come with a steeper price tag. For my money, a good set of billet aluminum hinges with high-quality bushings or sealed bearings is the sweet spot. I paid about $180 for a set of four hinges (upper and lower, driver and passenger) that uses beefier pins and tougher bushings.
It was a noticeable upgrade, and the doors felt significantly more solid.
Common Mistakes People Make
- Ignoring the Sag: Thinking a slight sag is normal and not addressing it until it gets worse.
- Over-Tightening: Cranking down bolts excessively, which can strip threads or warp components.
- Buying Based on Looks Alone: Opting for the flashiest set without considering the pivot design and materials.
- Not Checking Alignment: Forgetting to check door alignment after installation, leading to binding or poor seals.
When I bought my first X3, the doors felt solid enough. But after a year of trail riding, I started noticing a definite droop when I opened them. It was subtle at first, but it bothered me.
I figured I just needed to adjust the door latches, a common fix for doors that don’t seal right. I spent an afternoon fiddling with those, getting them to click shut with more force, but it didn’t really solve the underlying issue. The doors still felt loose when I was driving, and I could hear more wind noise than before.
It wasn’t until I was talking to another rider who had replaced his hinges that I realized my mistake. He showed me his new setup, and the difference was night and day. His doors swung open with a smooth, controlled motion, and when closed, they felt like they were part of the body.
That’s when I finally understood that the problem wasn’t the latch; it was the foundation – the hinges themselves.
What to Look for: Beyond the Shine and Polish
Alright, so you’ve decided the stock can am x3 door hinges aren’t cutting it. What should you actually be looking for when you’re shopping? Forget the chrome plating for a second. What matters most is the pivot mechanism. Think about how a hinge works: it’s a point of rotation. On your X3 doors, that pivot is under a lot of stress from the weight of the door, side impacts, and constant opening and closing. The stock setup uses a simple pin and, usually, some kind of basic bushing or just metal-on-metal contact, which wears out fast. You want something that addresses this wear point. (See Also: Are Integrated Washing Machine Door Hinges Standard )
The best aftermarket hinges will use higher-quality materials for the pin and the pivot housing. This could mean hardened steel pins, bushings made from self-lubricating materials like Delrin or nylon, or even sealed bearings.
Sealed bearings are the gold standard here. They’re designed to keep dirt and moisture out and grease in, meaning they’ll last a lot longer and operate more smoothly. I’ve seen hinge sets that use a simple heim joint, which is a spherical bearing that allows for a good range of motion and can be quite solid, but they can also be more prone to dirt ingress if not properly protected.
My personal preference leans towards sealed bearings for general trail use, as they offer the best balance of durability and smooth operation with minimal maintenance.
Beyond the pivot, consider the material of the hinge arm itself. Billet aluminum is popular because it’s strong, relatively lightweight, and can be machined into complex shapes for a good look. However, you can also find heavy-duty steel options which might be even stronger, though heavier. For most recreational riders, a well-machined billet aluminum hinge with a superior pivot system is more than sufficient. Pay attention to the mounting points too. The holes where the hinge bolts to the door and the frame should be precisely drilled. If they’re sloppy, you’ll have alignment issues from the start.
Here’s a quick rundown of what to prioritize:
| Feature | My Verdict | Why it Matters |
|---|---|---|
| Pivot Type | Sealed Bearings/High-Quality Bushings | Durability, smooth operation, protection from elements. |
| Pin Material | Hardened Steel | Resists wear and deformation under stress. |
| Hinge Arm Material | Billet Aluminum (well-machined) | Good balance of strength, weight, and corrosion resistance. |
| Mounting Holes | Precisely Machined | Makes sure proper alignment and stress distribution. |
| Finish | Powder Coat or Anodized | Corrosion resistance and aesthetics (secondary to function). |
When I was researching, I almost bought a set that looked incredibly beefy, made of thick steel. The seller boasted about the material strength. But when I looked closely at the pictures of the pivot, it was just a simple pin in a drilled hole. No bushings, no seals. I knew from past experience that this would be a weak point, and I’d be back where I started in a year or two. It taught me that material thickness is only part of the story; the engineering of the moving parts is far more important for can am x3 door hinges.
Installation: Getting Them Right the First Time
Installing new door hinges on your X3 isn’t usually a weekend-ending ordeal, but it’s not something you want to rush either. If you do it wrong, you’ll end up with doors that don’t fit, don’t seal, or even bind up. The goal is to get them on, aligned, and functioning smoothly so you don’t have to touch them again for a long time. First, gather your tools. You’ll likely need a socket set, a torque wrench, and possibly some penetrating oil if your old hinges are seized. Most aftermarket kits come with all the necessary hardware, but double-check that.
The process generally involves removing the old hinges, one side at a time, to maintain the door’s position as much as possible. This prevents the door from falling and potentially causing damage. Start with the lower hinges, then move to the upper ones.
When you’re installing the new hinges, don’t fully tighten all the bolts immediately. Snug them up so the hinge has some play. This allows you to adjust the door’s position – forward, backward, in, or out – to get a perfect seal.
With the door closed, check the gaps all around. You want them to be consistent.
If the gap is too wide at the top and tight at the bottom, you might need to adjust the hinge position on the frame or the door. Some kits have slotted mounting holes that make this adjustment easier. My first attempt at installing new hinges took me about three hours because I was being overly cautious and kept double-checking everything.
The second time, on a different X3, I had them done in under two hours.
Once you’re happy with the alignment, you’ll need to torque the bolts to the manufacturer’s specifications. This is important. Over-tightening can strip the threads or even crack the mounting points. Under-tightening means they could loosen over time, leading to sag. A torque wrench is your best friend here. After everything is torqued down, open and close the doors a few times. Listen for any binding or scraping noises. If you hear any, you might need to slightly loosen the bolts, make a minor adjustment, and re-torque. Don’t be afraid to take your time. A properly installed set of hinges will make a world of difference in how your doors feel and function.
Here’s a simplified process:
- Preparation: Gather tools, lay out new hardware, and identify which bolts to remove.
- Remove Old Hinges: Work one side at a time, starting with the lower hinge, then the upper. Support the door.
- Install New Hinges (Loosely): Bolt the new hinges in place without fully tightening.
- Align Doors: Close the door and check for even gaps. Adjust hinge positions as needed.
- Tighten & Torque: Once aligned, tighten all bolts and then torque them to spec.
- Test: Open and close doors multiple times, checking for smooth operation and proper sealing.
I once tried to install a set of hinges with a buddy, and we were in a hurry. We got the doors back on, and they looked okay, but when it rained, water poured in around the seals. We realized we hadn’t taken enough time to get the alignment perfect, and one of the hinges was slightly off. It was a good lesson in patience. Those can am x3 door hinges are the connection point, and if that connection is weak or misaligned, the whole system suffers. (See Also: Are Hinges Wheeels )
When Things Go Wrong: Troubleshooting Common Issues
Even with the best intentions and a solid set of aftermarket can am x3 door hinges, things can sometimes go sideways. Don’t sweat it; it happens. The most common problem after installation is door alignment. You’ve got new hinges, they look great, but the door just doesn’t close right, or it binds when you open it. This almost always comes down to the adjustment phase. Remember how I said not to tighten everything immediately? That’s the key. You need to loosen the hinge bolts just enough to allow for movement, then adjust the door’s position until the gaps are even all the way around. Think of it like fitting a new puzzle piece; it has to be just right.
If you’ve already tightened everything down and are now experiencing binding, you’ll need to loosen those bolts again. Try to identify where the binding is occurring. Is the top of the door hitting the frame? Is the bottom scraping?
This will tell you which direction to adjust the hinge. Sometimes, a very minor adjustment on just one hinge can make a huge difference.
If the door feels too heavy or saggy even with new hinges, double-check that you torqued the bolts correctly. Loose bolts are a frequent culprit for new-onset sag, even on aftermarket parts.
Make sure the hinge pin is properly seated and that any bushings or bearings are installed correctly. I’ve seen people accidentally pinch or damage a bushing during installation, which can lead to premature wear and binding.
Another issue people sometimes encounter is noise. A rattling or squeaking hinge isn’t just annoying; it can indicate wear or improper lubrication. If you have hinges with sealed bearings, they typically don’t require greasing, but check the manufacturer’s instructions. If you have bushing-style hinges, a little bit of grease on the pivot pin can go a long way. Make sure you’re using a grease that’s suitable for your environment; something that can handle dirt and water is best. If a hinge starts to feel stiff, that’s a sign that dirt might be getting in, or the lubrication is drying out. A good cleaning and re-greasing might solve it, but if it’s persistent, it could be a sign of internal wear.
Here’s a quick table for common issues:
| Problem | Likely Cause | Solution |
|---|---|---|
| Door Sagging | Loose hinge bolts, worn pivot/bushings | Re-torque bolts, check pivot for wear, lubricate or replace. |
| Door Binding | Misalignment, damaged bushings, overtightened bolts | Re-adjust hinge position, check for damage, loosen and re-torque. |
| Rattling Noise | Loose hardware, worn pivot, debris in hinge | Tighten all hardware, clean and lubricate hinge, check for wear. |
| Stiff Operation | Dirt ingress, lack of lubrication, damaged bearing | Clean and lubricate, inspect bearing/bushing for damage. |
I once had a passenger door that just wouldn’t seal right after I put new hinges on. It took me ages to figure out. Turns out, the frame mounting bracket on that side was slightly bent from a previous impact I’d forgotten about. The new hinges were perfect, but they couldn’t compensate for a bent frame. It’s a good reminder that sometimes the problem isn’t the part you’re replacing, but something else on the vehicle.
The Cost of Upgrading
When it comes to upgrading your can am x3 door hinges, you’re looking at a pretty wide price range. You can find basic, reinforced steel hinges for around $80-$120 for a set of four. These are usually a step up from stock but might not have the most advanced pivot designs.
Then you move into the billet aluminum territory, which is where most people land. These typically range from $150 to $300 for a full set. The higher end of this range often includes sealed bearings or very solid bushings and a nice anodized or powder-coated finish.
If you’re looking at something truly premium, like custom-machined pieces with specialized bearings, you could easily push past $400, but honestly, for 95% of riders, that’s overkill.
I tend to fall in the $180-$250 range for a good set of billet aluminum hinges with sealed bearings. I’ve found that this price point usually gets you a product that’s well-engineered and built to last without breaking the bank. It’s an investment, for sure, but considering how much time you spend in your machine and how much a properly functioning door contributes to comfort (dust, water, noise), I consider it worthwhile. You’re not just buying metal; you’re buying reliability and a better riding experience. Trying to save a few bucks on the cheapest option usually means you’ll end up buying again sooner than you want.
Verdict
Look, nobody wants to spend money on parts that are supposed to be standard equipment. But the reality with the Can-Am X3 is that the stock door hinges are often a weak link. Investing in a decent aftermarket set isn’t just about aesthetics; it’s about function, durability, and making your ride more enjoyable. When you’re out there, bouncing around, the last thing you want is a door that’s sagging, rattling, or not sealing properly.
My advice? Don’t just grab the shiniest set. Focus on the pivot mechanism – that’s where the magic (or the failure) happens. Sealed bearings or high-quality, self-lubricating bushings are your friends. And don’t underestimate the value of proper installation; take your time, get the alignment right, and torque those bolts. It’s a small upgrade that makes a surprisingly big difference in the overall feel and comfort of your ride.
So, when you’re thinking about your next modification, don’t overlook the humble can am x3 door hinges. They’re more important than you might think, and getting them right will pay dividends on the trail.