Honestly, I’ve wasted more money on “smart home” gadgets that promised the moon and delivered a damp squib than I care to admit. The Xfinity motion sensor is one of those things that, when it works, is fine. But batteries die. And when they do, you don’t want to be fumbling around in the dark wondering what the hell to do next.
I remember the first time one of mine conked out. Panic. Followed by an hour of Googling, finding nothing but a bunch of jargon-filled manuals and links to buy a new sensor I absolutely didn’t need.
So, if you’re staring at a dead Xfinity motion sensor battery light and asking yourself how to change xfinity motion sensor battery, you’ve come to the right place. Let’s just get this over with.
The Anatomy of a Dead Sensor
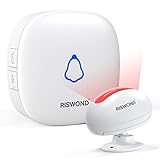
Most Xfinity motion sensors, like the Honeywell/Resideo models they often use, are pretty straightforward. They’re usually small, white plastic things that sit unobtrusively on a wall or in a corner. The magic happens inside, powered by a tiny, coin-sized battery. When that little guy gives up the ghost, your sensor goes silent, and your smart home system might start throwing a fit about a ‘trouble’ signal.
Don’t freak out. It’s almost never the sensor itself that’s broken. It’s just hungry for some fresh juice.
What You’ll Actually Need (it’s Not Much)
So, you’ve identified the culprit: the dead battery. The good news is, you probably have most of what you need lying around. I always keep a small stash of the common coin cells in my junk drawer. For the Xfinity motion sensor, you’re most likely looking for a CR2032. It’s a 3-volt lithium coin cell, and they’re everywhere. Seriously, you can find these at pretty much any grocery store, pharmacy, or even a gas station.
The only other thing you might need is something to gently pry the sensor open. Most of them have a small notch or seam where you can get a fingernail or a very small flathead screwdriver in there. Don’t go digging around with a butter knife; you’ll just scratch up the plastic and possibly damage the internal components. I’ve made that mistake before, spending an extra $30 on a replacement sensor because I was too impatient to find the right tool. A small jeweler’s screwdriver or even a sturdy guitar pick works wonders. (See Also: Will The Xbox One Be Compatible With 360 Motion Sensor )
What about those fancy sensor tools you see online? Honestly, a total waste of money. Unless you’re changing batteries on a hundred sensors a day, your fingernail or a tiny screwdriver will do the trick. Save your cash.
The Actual, No-Nonsense Process
Okay, deep breaths. This isn’t rocket science. It’s more like changing the battery in your car remote, only slightly more involved.
- Locate the Sensor: Find the specific motion sensor that’s giving you grief. It’ll usually have a blinking red light or your Xfinity app will be screaming at you.
- Gently Pry It Open: Look for the seam or notch on the edge of the sensor. Carefully insert your tool (fingernail, screwdriver, guitar pick) and gently twist or lever it open. You should hear a slight click as it separates.
- Observe the Battery: Once open, you’ll see the coin cell battery. Note its orientation – which side is facing up. This is important because you need to put the new one in the same way. I once put one in backward, and the sensor just sat there, mocking me.
- Remove the Old Battery: Carefully pop out the old CR2032 battery. Sometimes they come out with a gentle nudge; other times, you might need to use your tool again to lever it up slightly.
- Insert the New Battery: Place the new CR2032 battery into the compartment, making sure the positive (+) side is facing the correct way (usually up, but check the compartment markings). It should snap into place with a satisfying little click.
- Snap It Back Together: Align the two halves of the sensor and gently press them together until they click shut. It should feel secure.
- Test It: Wave your hand in front of the sensor. The LED should blink green or blue, indicating it’s working. Your Xfinity app should also confirm the sensor is back online.
It really is that simple. I’ve done it probably ten times now across a couple of sensors, and it’s never taken me more than five minutes. The whole ordeal feels like changing a watch battery, just on your wall.
When Things Go Sideways (they Sometimes Do)
What if it doesn’t work after you change the battery? Don’t immediately assume you bought a dud battery. I’ve had a couple of instances where I swear I bought a pack of CR2032s that were DOA — dead on arrival. It’s rare, but it happens. Try a different battery from a different pack, or even a different brand.
Another common issue is the orientation. Are you sure you got the + and – right? It sounds obvious, but in the heat of the moment, it’s an easy mistake. Double-check the markings on the battery and the compartment. It’s like trying to plug in a USB stick; you’ll try it one way, it won’t go in, so you flip it, and then it slides in perfectly. Batteries are less forgiving.
Also, sometimes the sensor needs a little nudge to reconnect with your Xfinity system. If it’s still showing as offline in the app after the battery change, try power-cycling your Xfinity gateway or modem. Just pull the power plug, wait about 30 seconds, and plug it back in. This forces all the connected devices to re-establish their connection. I’ve seen this fix more phantom ‘device offline’ issues than I can count. It’s a bit like restarting your computer when it’s acting weird – a universal fix. (See Also: Why Is Motion Sensor Not Working )
The Cr2032 vs. Other Battery Types
It’s worth noting that not all Xfinity sensors use the CR2032. Some older models or different types of sensors might use AA or AAA batteries. Always check your specific sensor model. A quick Google search of your sensor’s model number (usually printed on the back or inside the casing) will tell you exactly what kind of battery it needs. Don’t guess. Trying to jam a AA battery into a CR2032 slot is… well, it’s a good way to break things.
| Sensor Type (Common) | Battery Type | Ease of Replacement | My Verdict |
|---|---|---|---|
| Xfinity Motion Sensor (Standard) | CR2032 | Very Easy |
Standard operation. Always have a few spares. |
| Xfinity Door/Window Sensor | CR2032 or CR1632 | Easy |
Similar to motion sensors, just be mindful of the exact coin cell size. |
| Older Xfinity Keypad/Panel | AA/AAA | Moderate |
Requires a bit more disassembly, but still DIY-friendly. |
People Also Ask
How Do I Know If My Xfinity Motion Sensor Battery Is Low?
The most common indicator is a blinking red light on the sensor itself. Your Xfinity Home app will also usually send you a notification or show the sensor as being in ‘trouble’ or ‘low battery’ status. Don’t ignore these warnings; they’re there for a reason.
Can I Use a Rechargeable Battery in My Xfinity Motion Sensor?
Generally, no. Most Xfinity sensors are designed for the stable voltage of non-rechargeable lithium coin cells like the CR2032. Rechargeable batteries can have fluctuating voltages that might not be compatible and could even damage the sensor. Stick to the recommended disposable types. (See Also: Why Is My Motion Sensor Led Flood Not Turn Off )
How Often Do Xfinity Motion Sensor Batteries Need to Be Replaced?
It varies a lot depending on usage and environmental factors like temperature. However, you can typically expect a CR2032 battery to last anywhere from 2 to 5 years. If your sensor is constantly triggering or in a high-traffic area, it might be on the shorter end of that range.
What Happens If I Don’t Replace the Battery in My Xfinity Motion Sensor?
The sensor will simply stop working. Your Xfinity Home system will likely report it as offline or in trouble, and it won’t be able to detect motion or trigger any alarms or notifications. It’s like having a door without a lock; it’s just not providing the security it’s supposed to.
Where Can I Buy Replacement Batteries for Xfinity Motion Sensors?
You can find CR2032 batteries at most major retailers, including Walmart, Target, drugstores like CVS or Walgreens, and even many supermarkets. Online retailers like Amazon also sell them in multi-packs, which is usually the most cost-effective option if you have multiple sensors.
Conclusion
Look, changing the battery in your Xfinity motion sensor is about as complicated as brewing a cup of instant coffee. It’s a simple, straightforward task that requires minimal tools and a few minutes of your time. The biggest hurdle is overcoming the initial intimidation factor or the fear of breaking something.
So there you have it. You now know how to change xfinity motion sensor battery without a fuss. It’s really not a big deal once you’ve done it once. Keep a couple of spare CR2032 batteries handy, and you’ll be prepared for when the next one inevitably gives up the ghost. Seriously, just keep them in a little plastic baggie in your junk drawer or your car. It saves so much hassle down the line.
Don’t overthink it. It’s not a job for a technician; it’s something you can and should do yourself. You’ve got this.
Recommended Products