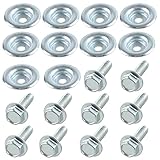
The other day, a buddy called, panicked. He’d snapped a bolt on his ’96 Miata’s cat. “Are 1996 Miata catalytic converter bolts welded?” he yelped, his voice cracking like a teenage boy’s. I told him to take a breath. No, they’re not welded, which is good news, but that doesn’t mean it’s a walk in the park. Replacing that thing can be a royal pain in the exhaust pipe, especially if those bolts have been there since Reagan was in office.
Look, I’ve been elbow-deep in my own Miatas more times than I care to admit, and I’ve learned a thing or two about what’s worth your time and what’s just a cash grab. This is one of those jobs where you think it’ll be quick, and then BAM – you’re wrestling with seized metal, contemplating setting the whole thing on fire, and cursing the engineers who designed it. Let’s just say it’s not always as simple as just unbolting and re-bolting.
Those Stubborn Fasteners: What You’re Actually Up Against
So, to get right to it: are 1996 Miata catalytic converter bolts welded? Absolutely not. They are threaded bolts, typically with nuts on the other side, designed to be removed. Mazda didn’t weld them on from the factory like some kind of permanent exhaust fixture.
If they were welded, you’d have a much bigger, much uglier problem on your hands, likely involving a grinder and a whole lot of swearing. The reality, however, is that while they aren’t welded, they are often incredibly stubborn.
These bolts are exposed to a ton of heat cycles, road salt, moisture, and general grime. Over two-plus decades, this environment attacks the threads and the bolt heads, leading to rust and corrosion. This is why many DIYers and even some shops end up snapping bolts or having to cut them off. It’s a common point of frustration for NA Miata owners.
I remember on my first ’95, I was expecting a ten-minute job to replace a rattling cat. Two hours later, covered in rust dust and shame, I’d managed to break two bolts and had to resort to extreme measures involving a reciprocating saw.
Lesson learned: expect the worst, hope for the best.
The key thing to understand is the material. These are typically steel bolts, and steel in the exhaust system is a magnet for rust.
You’ve got the flange where the manifold meets the cat, and then the cat meets the mid-pipe. Both connection points use bolts and nuts.
The bolts go through holes in the flanges and are secured by nuts. Sometimes, the nuts seize onto the bolts, and sometimes the bolt threads seize into the flange itself. The heat generated by the exhaust system causes metal to expand and contract repeatedly, which can help break down anti-seize compounds or factory coatings over time, allowing rust to take hold. (See Also: Are All Honda Atv Bolt Patterns The Same )
You’ll often find that the nuts are the first to go, seizing themselves to the bolt shank.
The good news is that there are ways to tackle this. Penetrating oil is your best friend. Applying it liberally and letting it soak in is important. I’ve found that repeating applications over several days can make a world of difference. Don’t just spray it on and expect magic. Give it time to work its way into the threads. I’ve even seen guys heat up the nuts with a torch to expand them, then spray them with penetrating oil, but that’s a bit more advanced and carries its own risks if you’re not careful with flammable materials.
Why Your Expectations Might Be Wrong (and What to Do About It)
Many people, myself included early on, underestimate just how seized these bolts can get. You might think, “It’s just a couple of bolts, I’ll grab my wrench and be done.” That’s where the trouble starts. The common advice is to use penetrating oil and a breaker bar. That’s good advice, don’t get me wrong.
But it often doesn’t account for the sheer stubbornness of thirty-year-old fasteners. People also often recommend just replacing the bolts and nuts with new ones, which is 100% the right thing to do, but getting the old ones off is the battle.
I’ve seen forums filled with people debating the merits of different brands of penetrating oil, and while some are better than others, none of them are magic potions that instantly dissolve decades of rust.
My contrarian take? Sometimes, the best approach isn’t just brute force or fancy chemicals. It’s patience and a willingness to change your plan.
If a bolt isn’t budging, don’t just keep hammering on it with a breaker bar until it snaps. You’re creating more work for yourself. Instead, try a different tactic.
Heat can be incredibly effective, but it’s also dangerous if you’re not experienced. A simpler approach that often works is using an impact driver. The rapid hammering action can shock the rust and break the bond, even when a steady force from a breaker bar fails.
I’ve also had success with a manual impact driver, the kind you hit with a hammer. It’s less destructive than an electric or air-powered one if you’re not used to them. (See Also: Are Ak Bolts Interchangeable )
Another mistake I see people make is trying to reuse the old hardware. You can sometimes clean up old bolts and nuts, but honestly, for the cost of new hardware, it’s rarely worth the aggravation. New bolts and nuts, especially stainless steel ones if you can swing it, will save you headaches down the line. When you buy a new catalytic converter, it often comes with new hardware, or you can pick up a kit. However, that new hardware is only useful if you can get the old stuff off cleanly. I always buy a new set of bolts and nuts before I even start the job, just in case, and I’ve needed them every single time.
The Actual Job: What to Expect When Replacing Your Cat
Okay, so you’ve decided to tackle this yourself, or you’re trying to figure out if it’s worth paying someone. The job itself involves accessing the catalytic converter, which on a 1996 Miata is located under the car, bolted to the exhaust manifold at the front and then to the rest of the exhaust system (usually the mid-pipe or a resonator) at the rear. You’ll need to get the car up on jack stands – safely, I must stress. Never work under a car supported only by a jack. A good set of sturdy jack stands is a must.
The process generally looks like this:
- Safely Raise and Support the Vehicle: Park on a level surface, engage the parking brake, and chock the rear wheels. Use jack stands rated for the weight of your vehicle.
- Locate the Catalytic Converter: It’s a metal box with a honeycomb-like structure inside, usually located between the exhaust manifold and the muffler.
- Apply Penetrating Oil: Spray the bolts and nuts at both ends of the converter. Let it soak for at least 15-30 minutes, or ideally, overnight if you have the time.
- Attempt Bolt Removal: Use a socket wrench and breaker bar. Start with the rear bolts connecting to the mid-pipe, as they are often easier to access and less prone to extreme heat damage than the manifold bolts.
- Deal with Stubborn Bolts: If bolts don’t budge, try an impact wrench or manual impact driver. If they snap, you’ll need to drill them out and potentially use a helicoil or tap to repair the threads.
- Remove the Catalytic Converter: Once all bolts are out, the converter should slide off. Be prepared for it to be heavy and potentially fragile if it’s damaged internally.
- Install the New Converter: Apply a thin layer of anti-seize compound to the threads of the new bolts. Install the new converter and hand-tighten the nuts first to make sure proper alignment.
- Torque Bolts to Spec: Once everything is aligned, tighten the bolts securely. Torque specifications can usually be found in a service manual, but snug is often sufficient for exhaust components.
- Lower the Vehicle and Test: Carefully lower the car and start the engine. Listen for exhaust leaks.
It’s not a terribly complex job in theory, but the seized hardware turns it into a test of patience and skill. If you’re not comfortable working under your car or dealing with potentially broken fasteners, it’s definitely a job for a professional. The cost of a shop doing it might seem high, but it often includes the cost of dealing with broken bolts and the time it takes. A good exhaust shop is worth its weight in gold for jobs like this. They have the tools and experience to handle seized bolts quickly.
Common Mistakes and How to Avoid Them
We’ve touched on some of this, but let’s really hammer home the common pitfalls. The biggest mistake is going into this job without the right mindset – assuming it’ll be easy. This leads to frustration, broken tools, and often, more damage than you started with. Another mistake is not having the right tools. A basic socket set might not have the right sizes, or the use you need. A breaker bar is almost a must-have, and having a set of impact sockets can be useful if you decide to go that route. Don’t forget safety gear: gloves, eye protection, and a respirator if you’re dealing with a lot of rust dust.
When it comes to the hardware itself, a mistake is not replacing it. As I’ve said, the old bolts and nuts are almost guaranteed to be corroded. Trying to salvage them is usually a losing battle. And when you buy new hardware, don’t cheap out. Cheap steel bolts will just rust again in a year or two. Stainless steel is more expensive upfront but lasts significantly longer and resists seizing much better. For your exhaust system, stainless steel hardware is a worthwhile upgrade. I’ve made the mistake of using regular hardware to save a few bucks, only to be back at it a couple of years later fighting the same battle.
A subtle but important mistake is not cleaning the mating surfaces properly. When you install the new converter, make sure the flanges on both the manifold and the mid-pipe are clean. Any debris or rust can prevent a good seal, leading to exhaust leaks. A wire brush and some elbow grease are usually enough. And finally, don’t overtighten the new bolts. While you want a good seal, you can strip the threads in the manifold or the nuts, creating another problem. Snug is good, but extreme force isn’t necessary once they’re seated.
What Kind of Bolts Does a 1996 Miata Catalytic Converter Use?
The catalytic converter on a 1996 Mazda Miata typically uses standard metric bolts and nuts. You’ll usually find M8 or M10 bolts, depending on the specific connection point. They are grade 8.8 or higher for good strength. The key issue isn’t the bolt type, but their condition due to rust and heat, making them seize.
Can I Use a Regular Wrench on Miata Cat Bolts?
While you can use a regular wrench, it’s highly unlikely to be effective on seized bolts. You’ll need a socket wrench with good use, ideally a breaker bar, and often an impact driver (manual or powered) to break the rust bond. Standard wrenches are more prone to rounding off the bolt heads when dealing with stubborn fasteners. (See Also: Are All Bolt Patterns The Same )
How Long Does It Take to Replace a Catalytic Converter on a 1996 Miata?
If all the bolts come out easily, the job can take as little as 30-60 minutes. However, dealing with seized or broken bolts can easily extend this to 2-4 hours, or even longer for a novice. Shops typically quote 1-2 hours of labor, but this can increase if they encounter significant issues.
Are Catalytic Converter Bolts Always Hard to Remove?
No, they aren’t always hard to remove, but on older vehicles like a 1996 Miata, they are very frequently difficult. The combination of heat, road salt, and time creates ideal conditions for seizing. It’s best to assume they will be difficult and be prepared with the right tools and techniques.
Alternatives and When to Call the Pros
So, you’ve read all this, and you’re either feeling motivated or slightly terrified. If you’re leaning towards the latter, it’s okay. Not everyone enjoys wrestling with rusty exhaust parts. There are a few alternatives. The most straightforward is taking it to a reputable exhaust shop. They’ve seen it all. They have specialized tools like exhaust pipe expanders, cutting wheels, and often, a much higher tolerance for dealing with broken bolts. They can usually diagnose the problem quickly and give you a fair quote. When I’m not feeling up to the challenge, or if I’ve tried and failed on a particularly stubborn bolt, I’ll just pay the shop. The peace of mind and saved time are often worth the expense.
Another option, if you’re just trying to pass emissions and your cat isn’t completely failing, is to use a catalytic converter cleaner additive. These are chemicals you pour into your gas tank. They’re not a permanent fix and won’t repair a physically damaged converter, but they can sometimes clean out deposits and help you squeak by on an inspection. I’ve used these on older cars with questionable success – sometimes they work wonders, sometimes they do squat. It depends on why the converter is failing. They’re cheap to try, though, so if you’re desperate for an inspection, it’s an option. Just don’t expect miracles.
When should you absolutely call the pros? If you lack a safe way to lift your car, if you don’t have the necessary tools (especially for broken bolts), or if you’ve tried and aren’t making progress. It’s also a good idea if your car is your only mode of transportation and you can’t afford to have it out of commission for an extended period due to unexpected complications. A professional mechanic or an exhaust specialist can often resolve issues much faster than a DIYer, preventing you from getting stuck in a worse situation. The cost of a shop fixing it, including potential extra labor for broken bolts, might end up being less than the cost of tools you buy, parts you break, and the time you waste if things go south.
A Table of Catalytic Converter Bolt Removal Strategies
Here’s a quick rundown of different approaches you can take to get those stubborn bolts off, with my honest opinion on each. This isn’t just about getting them off, but about doing it with the least amount of hassle and damage.
| Strategy | Description | Pros | Cons | My Verdict |
|---|---|---|---|---|
| Penetrating Oil & Patience | Liberal application of a good penetrating oil (PB Blaster, Kroil) and allowing ample soak time (hours to days). | Low cost, low risk of damage if done correctly. | Time-consuming, may not be effective on heavily seized bolts. | Always start here. It’s cheap and often works with enough time. |
| Breaker Bar & Force | Using a long-handled socket wrench to apply steady, strong torque. | Direct force, can sometimes break the rust bond. | High risk of snapping the bolt head or shank, can round off nuts/bolts. | Use with caution. Be ready to stop if it feels like it’s going to snap. |
| Impact Driver (Manual/Powered) | Tools that deliver rapid hammer blows to the socket while turning. | Effective at shocking rust bonds, less likely to strip heads than steady force. | Requires specific tool, powered versions can be expensive. | A very good option for stubborn fasteners. Manual ones are affordable. |
| Heat Application (Torch) | Using a propane or MAPP gas torch to heat the nut, expanding it and breaking the rust bond. | Can be very effective on seized nuts. | High risk of fire or damaging surrounding components, requires skill. | Only for experienced users. I’d rather use an impact driver if possible. |
| Drilling Out / Cutting | Destroying the bolt by drilling through the center or cutting the bolt head off with a grinder or saw. | Guaranteed to remove the fastener eventually. | Time-consuming, requires precision, often damages threads needing repair. | This is the last resort. It’s a sign the previous steps failed. |
After years of working on my own cars, I’ve learned that the key is to have a tiered approach. Start with the least aggressive method and escalate only as needed. Throwing every tool you own at it from the start is a recipe for disaster. And always, always have replacement hardware ready to go. For the 1996 Miata, this means having a set of new bolts and nuts, ideally stainless steel, before you even get your hands dirty.
Conclusion
So, to circle back to the original question: are 1996 Miata catalytic converter bolts welded? No, they are not. But that doesn’t mean they’ll come off with a gentle nudge. The reality of working with older cars is that corrosion is a constant battle, and exhaust fasteners are particularly prone to it. Expect them to be seized, be prepared for the possibility of breaking them, and have a plan for how you’ll deal with it if they do.
My advice? If you’re on the fence about doing this job yourself, weigh the cost of new tools and potential mistakes against the cost of professional labor. If you decide to go for it, invest in good penetrating oil, get a breaker bar and maybe an impact driver, and have new stainless steel hardware ready. Patience is your most valuable tool here, more so than any wrench. Taking your time and using the right techniques will save you a lot of headaches, and maybe a few snapped bolts.