I remember staring at a wall of cabinet hinges at the hardware store, feeling utterly defeated. My kitchen cabinet door was hanging crooked, an embarrassing testament to my DIY ambitions gone sideways. I just wanted to replace a broken hinge, a seemingly simple fix. But the sheer variety was mind-boggling. It got me thinking: are kitchen cabinet hinges universal? The short answer is a resounding ‘nope,’ and that realization cost me a good chunk of change and a few weekends of frustration.
It turns out, while they all serve the same basic purpose – holding your cabinet doors on – the devil is absolutely in the details. And if you’re not careful, you’ll end up with a drawer full of expensive, useless metal bits.
The Illusion of Interchangeability: Why ‘universal’ Is Mostly a Myth
Let’s get this straight right off the bat: the idea that you can just grab any old hinge and slap it on your cabinet door is a myth peddled by people who’ve probably never actually had to do it themselves. I learned this the hard way. I’d bought a fixer-upper, and one of the cabinet doors had a hinge that looked… well, standard. So, naturally, I assumed any hinge would do. I marched into the hardware store, grabbed what looked like the right size, and headed home, feeling like a pro.
Fast forward two hours of wrestling with it, and I had a bent screw, a slightly splintered cabinet door edge, and a hinge that still didn’t sit right. It wasn’t just about the screw holes lining up (though that’s a whole other story). It was about the depth of the mortise, the overlay of the door, the type of cabinet construction. My cheap, assumed-universal hinge was designed for a slightly different application, and it made all the difference. It’s like trying to use a Phillips head screwdriver on a flathead screw – you might get it started, but it’s going to be a messy, damaged job.
The vast majority of hinges aren’t truly ‘universal.’ There are common standards, sure, but the specific dimensions, mounting styles, and mechanisms vary significantly. This is why when you go to buy replacements, you’ll see terms like ‘overlay,’ ‘inset,’ ‘concealed,’ ‘partial overlay,’ ‘full overlay,’ and different degrees of opening angles. Each of these dictates a specific type of hinge that needs to match the existing setup. Trying to force a different type can lead to doors that don’t close properly, rub against each other, or even damage the cabinet frame. My initial assumption was a costly error, teaching me that ‘close enough’ really isn’t good enough when it comes to cabinet hardware.
Understanding the Lingo: Overlay, Inset, and How They Dictate Your Hinge Choice
This is where most DIYers (myself included, once upon a time) get tripped up. The terms ‘overlay’ and ‘inset’ are not just fancy jargon; they describe how your cabinet door sits in relation to the cabinet frame. Get this wrong, and your new hinges won’t just look wrong, they’ll function wrong, and might not even fit at all.
Overlay refers to how much the door overlaps the cabinet frame when it’s closed. Think of it like a lid that covers the opening. You’ll hear about ‘full overlay,’ where the door covers almost the entire frame, leaving minimal gaps. This is common in modern kitchens for a clean, sleek look. Then there’s ‘partial overlay,’ where the door covers only a portion of the frame, leaving a visible gap. This is often seen in more traditional cabinet styles. The amount of overlay is usually measured in inches (e.g., 1/2 inch overlay, 1-1/4 inch overlay). Your existing hinge will be designed to accommodate a specific overlay measurement.
Inset, on the other hand, means the cabinet door sits inside the cabinet frame, flush with the face of the cabinet. It’s like a drawer that slides into its opening. Inset doors are less common in mass-produced cabinets and are often found in custom or high-end cabinetry. They offer a very clean, minimalist look but require precise installation and specific types of hinges that allow for this flush fit.
Here’s a quick breakdown of why this matters:
| Term | Description | Hinge Implication | My Verdict |
|---|---|---|---|
| Full Overlay | Door covers most of the cabinet frame. | Requires hinges with a specific ‘throw’ or arm length to achieve the desired coverage. Often uses concealed (European-style) hinges. | Great for modern looks, but you MUST match the overlay spec precisely. |
| Partial Overlay | Door covers a portion of the frame, leaving a gap. | Hinges will have a shorter arm or different cup depth to achieve this. | More forgiving than full overlay, but still needs to match existing dimensions. |
| Inset | Door sits flush within the cabinet frame. | Requires specialized hinges that mount flush or have specific adjustments for this style. | Not for the faint of heart; hinges are very specific. |
When I was trying to replace my broken hinge, I didn’t even consider the overlay. I just saw a hinge and thought, ‘That’ll work.’ Big mistake. The new hinge I bought was for a full overlay door, but my cabinets had a partial overlay. The door ended up sitting too far out, and the gap was uneven. It looked like a five-year-old had installed it.
The Different Types of Hinges You’ll Encounter
Beyond overlay and inset, the world of cabinet hinges is a jungle of styles and mechanisms. Understanding the basic categories will save you a lot of confusion and, more importantly, a lot of wasted money. I’ve wasted enough for all of us, so pay attention here. (See Also: Are Spring Loaded Door Hinges Better )
The most common types you’ll find are:
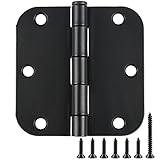
1. Butt Hinges: These are the classic, old-school hinges. They consist of two leaves that meet when the door is closed. They’re often surface-mounted or mortised into the door and frame. You’ll typically see these on older cabinets or for applications where the hinge is meant to be visible. Many butt hinges are adjustable to a degree, but they’re generally less sophisticated than their concealed counterparts.
2. Concealed Hinges (European Hinges): These are the kings of modern cabinetry. They’re designed to be hidden when the door is closed, giving that clean, minimalist look. They consist of two parts: the hinge cup that’s mortised into the door, and the mounting plate that attaches to the cabinet frame. They offer a huge range of adjustability (up, down, left, right, in, out) via screws on the hinge itself, which is a lifesaver for getting doors perfectly aligned. Brands like Blum and Salice are well-known for these. If you have modern cabinets with doors that don’t show hinges, you almost certainly have concealed hinges.
3. Surface-Mount Hinges: As the name suggests, these attach to the surface of the cabinet frame and door, rather than being mortised in. They’re often easier to install than mortised hinges but can be more visually prominent. Some decorative hinges fall into this category.
4. Specialty Hinges: This is a catch-all for hinges designed for specific applications, like corner cabinets (e.g., blind corner hinges, lazy susan hinges), appliance garages, or bi-fold doors. These are highly specialized and definitely not universal.
I once tried to replace a concealed hinge with a butt hinge on a modern cabinet because I thought it would be simpler. It was a disaster. The butt hinge didn’t have the depth or mechanism to properly support the door in its concealed position, and it looked completely out of place. The door sagged, and the aesthetic was ruined. Stick to the type of hinge that was originally installed unless you’re doing a complete remodel and know exactly what you’re doing.
People Also Ask: How Do I Know What Kind of Cabinet Hinge I Have?
The best way to figure out what kind of hinge you have is to open the cabinet door and look closely. If you see hinges that are completely hidden when the door is closed, you likely have concealed (European) hinges. If you see hinges that are visible on the outside of the cabinet, they are probably butt hinges or surface-mount hinges. Pay attention to how they attach – are they mortised into the wood, or are they screwed directly onto the surface? Also, note the general shape and mechanism. This visual inspection is your first and most important clue.
Common Mistakes and How to Avoid Them
I’ve made more mistakes than I care to admit when it comes to cabinet hardware, and I’m willing to bet you could too if you’re not careful. The biggest pitfall is assuming uniformity where there is none. Here are a few blunders I’ve personally experienced or seen others fall victim to:
1. Ignoring the Existing Hinge Type: This is my number one sin. Just because a hinge looks similar doesn’t mean it’s compatible. Replacing a concealed hinge with a standard butt hinge, or vice-versa, will almost always lead to problems. Always try to identify the exact type, brand, and model of your existing hinge if possible.
2. Not Measuring Accurately: This is a killer. You need to measure the overlay, the distance from the edge of the door to the center of the hinge cup (for concealed hinges), the diameter and depth of the hinge cup, and the distance between screw holes. Get a measuring tape and a ruler, and don’t guess. I once bought hinges that were just a millimeter too short on the arm, and the door wouldn’t close properly. Frustrating doesn’t even begin to cover it. (See Also: A Box Without Hinges Key )
3. Buying Based on Aesthetics Alone: A hinge might look pretty, but if it doesn’t function correctly with your cabinet door and frame, it’s useless. Don’t be seduced by fancy finishes or decorative designs if they don’t meet the technical requirements. Functionality trumps form here, every single time.
4. Forgetting About Undermount Slides: While not technically hinges, for drawers, undermount slides are the modern equivalent of the hinge – they need to match the drawer construction and cabinet opening precisely. Mistaking one type for another will result in drawers that stick or don’t close fully.
5. Over-Tightening Screws: This seems basic, but in soft particleboard or MDF cabinets, you can strip the screw holes easily. Use a hand screwdriver and tighten until snug, then give it just a little bit more. Power drills can be too aggressive if you’re not careful. I learned this when a hinge screw just spun and spun in its hole, rendering the mounting useless.
How Do I Fix a Sagging Cabinet Door?
A sagging cabinet door is often a hinge issue. First, check if the screws attaching the hinges to the cabinet frame and the door are tight. If they are loose, tighten them. If the screws won’t tighten because the holes are stripped, you can try filling the hole with wood glue and toothpicks or wood filler, letting it dry, and then re-drilling a pilot hole for the screw. For concealed hinges, many have adjustment screws that allow you to raise, lower, or shift the door slightly to compensate for sag. Consult the hinge manufacturer’s documentation or look for videos specific to your hinge type.
Can You Really Make Hinges Universal? (spoiler: Not Easily)
So, you’ve got a hinge that’s broken or just plain ugly, and you want to replace it. Can you just buy a ‘universal’ hinge and call it a day? As we’ve established, ‘universal’ in this context is a bit of a dirty word. However, there are some common standards and types that might be interchangeable, but it requires careful measurement and understanding.
The best bet for finding a compatible replacement is to try and identify the original hinge. Look for a brand name or part number on the hinge itself. Sometimes it’s stamped on the arm or the cup. If you can find it, search online for that specific model or brand. You might be surprised how easy it is to find replacements, even for older cabinets. I once found exact replacements for hinges on a 15-year-old IKEA cabinet by just searching the IKEA part number.
If you can’t find the original, your next best bet is to take the old hinge (or a clear photo of it from multiple angles, along with measurements) to a well-stocked hardware store or cabinet supply shop. Their experts can often help you identify a suitable alternative. You’ll need to know:
- Hinge Type: Concealed, butt, surface-mount, etc.
- Overlay Measurement: How much the door overlaps the frame.
- Cup Diameter and Depth: For concealed hinges, this is important.
- Screw Hole Pattern: The spacing and number of screw holes.
- Opening Angle: How wide the door opens (e.g., 90°, 110°, 170°).
There are some ‘universal mounting plates’ for concealed hinges, which can sometimes help if the plate on the cabinet frame is damaged, but the hinge arm itself and how it connects to the door cup is still highly specific. So, while there are commonalities, true universality is rare. My advice? Don’t go looking for a universal solution; go looking for the right solution for your specific cabinet.
What Is the Standard Cabinet Hinge Size?
There isn’t one single ‘standard’ cabinet hinge size because of the variety of cabinet styles and door overlays. However, for concealed (European) hinges, which are very common, the hinge cup typically has a diameter of 35mm. The depth of the cup can vary, but common depths are around 12-14mm. For butt hinges, sizes are often specified by the length and width of the leaves (e.g., 3-inch x 3-inch). Overlay measurements are also key, with common partial overlays being 1/2 inch and common full overlays ranging from 1 inch to 1-1/2 inches. Always measure your existing hinge and door/frame setup to be sure.
Real-World Application: My Kitchen Cabinet Hinge Saga
Let me tell you about the time I decided to update the look of my kitchen by replacing all the visible hinges. I had these dated, brass-colored butt hinges that screamed ’80s kitchen.’ I found some sleek, brushed nickel ones online that looked perfect. They were the same dimensions, same screw hole pattern – I thought I was golden. (See Also: Are Integrated Washing Machine Door Hinges Standard )
I spent a Saturday morning proudly swapping out hinge after hinge. It went surprisingly smoothly until I got to the last door. This particular door was slightly heavier, and I noticed immediately it didn’t swing quite right.
It felt… sticky. And when I closed it, the gap between the doors was noticeably wider on one side.
Turns out, the new hinges, while the same advertised size, had a slightly different pivot point or a fractionally thinner leaf. It was enough to throw off the alignment on a heavier door. I ended up having to use a shim behind one of the hinges on the cabinet frame to get it to hang straight.
It worked, but it wasn’t the clean, professional job I’d envisioned. It was a tangible reminder that even minor differences matter.
Another time, a friend asked for help with their kitchen. One of their cabinet doors was constantly popping open. They thought it was a faulty latch, but after a quick inspection, I realized the hinge itself was failing. It was a cheap, integrated concealed hinge where the spring mechanism was shot.
Because it was an older, builder-grade cabinet, finding an exact replacement was a nightmare. We ended up having to replace both hinges on that door with a slightly different model that had a similar cup size and overlay.
It took a bit of fiddling to get the alignment right because the mounting plates weren’t identical, but it eventually worked. The key takeaway? Always replace hinges in pairs on the same door, and ideally, try to match the original as closely as possible.
When in doubt, consult the pros.
When Should I Replace My Cabinet Hinges?
You should consider replacing your cabinet hinges when they are visibly damaged (bent, rusted, cracked), when doors sag or don’t close properly despite adjustments, when hinges squeak loudly and persistently (though lubrication can sometimes help), or when you’re undertaking a kitchen remodel and want to update the style or functionality. If you’re only replacing one hinge because it’s broken, try to match the existing one exactly, or replace both hinges on that door to make sure consistent operation and appearance. For concealed hinges, if the soft-close mechanism fails, you’ll likely need to replace the entire hinge unit.
Final Verdict
So, to circle back to the big question: are kitchen cabinet hinges universal? No, they are not. While there are common standards, especially with the 35mm cup for concealed hinges, the specific overlay, arm length, mounting plate, and opening angle all play a role in compatibility. Thinking you can just grab any hinge you see is a fast track to frustration and wasted money. I’ve learned that lesson the hard way, spending more time and cash than if I’d just bought the right part the first time.
Your best bet is always to identify the exact type of hinge you currently have. Look for brand names, measure everything precisely, and if you’re unsure, take your old hinge or detailed photos to a knowledgeable hardware store. It might seem like a pain, but it’s far less of a pain than trying to force incompatible parts to work, only to have doors that sag or don’t close properly. Taking the time to find the correct kitchen cabinet hinges will save you headaches down the line.