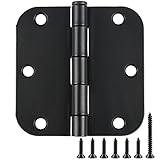
You’re staring at that wobbly door, thinking about replacing the hinges. Then the question pops into your head: are all door hinges in the same place? It seems like a simple enough query, but the answer is… complicated. I learned this the hard way trying to swap out an old, squeaky hinge on my pantry door. I grabbed a new one from the hardware store, thinking it’d be a quick swap. Spoiler alert: it wasn’t.
That moment of realizing the new hinge didn’t quite line up with the old screw holes was pure frustration. It’s the kind of DIY headache that makes you question everything you thought you knew about basic home repair.
Why Hinges Aren’t Always Where You Expect Them
Alright, let’s get straight to it. Are all door hinges in the same place? No. Absolutely not. If you’re picturing a universal hinge template that every door manufacturer and hardware maker adheres to, you’re in for a rude awakening. The ‘place’ of a door hinge – specifically, its position on the door edge and the frame – is dictated by a few key factors: the type of door, the weight of the door, the style of hinge, and honestly, sometimes just the whim of the carpenter or manufacturer decades ago.
Think about it. A solid oak, heavy interior door needs a different kind of support than a lightweight hollow-core closet door. An exterior security door has different requirements than a decorative interior room divider. These differences in function and weight necessitate variations in hinge size, number, and placement. Even within the same category, like standard interior passage doors, you’ll find subtle (and sometimes not-so-subtle) differences in how far the hinge leaf is set back from the door’s face and edge, and how the pin sits relative to the mounting screws. This is why just grabbing the ‘same size’ hinge often doesn’t cut it.
I remember trying to replace a single hinge on a rather old, solid wood bathroom door in a rental. The original hinge was brass, ornate, and clearly custom-fitted or at least very old-stock. I found what looked like an identical hinge online, same dimensions listed. When it arrived, the barrel was perfectly centered, but the leaves were slightly thicker, and the pre-drilled holes, while seemingly in the right spots, were a millimeter or two off. Enough to make drilling new pilot holes a necessity, and enough to make the door sag slightly because the new hinge wasn’t seated quite as flush as the old one.
The common advice you’ll hear is to measure your existing hinges. And yeah, that’s a good starting point. But ‘measuring’ often needs to be more granular than just the length of the barrel. You need to consider the radius of the corners (squared off or rounded), the thickness of the hinge leaf, and the spacing of the screw holes. A common mistake is assuming all hinges with the same barrel length and width will be interchangeable. They are not. The thickness of the metal, the depth of the mortise (the cutout in the door and frame where the hinge sits), and the exact placement of the screw holes are all important details that vary.
The core issue is that hinges are functional hardware. While there are industry standards for things like the swing radius and load-bearing capacity, the exact placement of the hinge leaves relative to the door edge and the frame isn’t standardized to the millimeter across every single door ever made. It’s a practical design choice made for each specific application. If you’re working with older homes or doors from different eras, you’ll encounter more variations. Modern manufacturing has brought more consistency, but even then, there are different ‘types’ of hinges designed for specific fits.
The Anatomy of a Door Hinge: What Actually Matters for Placement
So, if hinges aren’t all in the same place, what makes them fit? It comes down to a few important components and measurements that determine how a hinge functions and, importantly, how it aligns with the door and frame. Understanding these will save you a world of frustration when you’re trying to swap one out or install a new door.
First, let’s talk about the barrel. This is the cylindrical part where the pin goes through. The length of the barrel matters for stability, especially on heavier doors. But more importantly for placement are the leaves – the flat parts that screw into the door and the frame. The leaves have to sit flush in their mortises (the recessed areas cut into the wood). If the mortise is too deep or not deep enough, the door won’t hang correctly. This is where the ‘place’ really comes into play. The width and thickness of these leaves, and how they are positioned relative to the edge of the door and the edge of the frame, are most important.
Then there’s the corner radius. Hinges typically come with either squared corners or rounded corners. Most modern doors have a rounded corner on the hinge leaf where it meets the door edge. Older doors, or doors with a more contemporary, sharp look, might have squared corners. If you match a rounded hinge to a squared mortise, you’ll have gaps, and the hinge won’t sit properly. This gap is often where the problem lies when a replacement hinge doesn’t ‘fit’ perfectly. It’s not just about the screw holes lining up; it’s about the entire hinge leaf seating correctly.
The pin itself is another factor, though less about placement and more about function. Some pins are removable (often with a small hole on the bottom to insert a nail or screwdriver to tap it up), which is great for maintenance or security. Others are fixed. The diameter of the pin and barrel also determines the strength and smoothness of the swing.
Here’s a quick breakdown of what you’re actually measuring when you’re trying to figure out hinge compatibility:
| Feature | Why it Matters for Placement | My Verdict |
|---|---|---|
| Barrel Length | Affects overall door stability and how much of the door edge is covered by the hinge. | Important for support, but secondary to leaf fit. |
| Leaf Size (Width & Thickness) | Determines how much surface area is available for screws and how flush the hinge sits in the mortise. | IMPORTANT. This dictates the fit in the mortise. |
| Corner Radius (Squared vs. Rounded) | Must match the cutout in the door and frame exactly for a flush fit. | KEY. Mismatches cause gaps and poor alignment. |
| Screw Hole Spacing | Needs to align with existing holes or be suitable for drilling new ones. | Important for installation, but secondary to leaf fit and radius. |
My personal experience is that the leaf size and corner radius are the absolute make-or-break factors. I’ve wasted money on hinges that were the right ‘size’ based on barrel length but had slightly different leaf dimensions, meaning they just wouldn’t sit flush. It’s infuriating because they look right, but they don’t work right. It often means you have to chisel out a new mortise, which is a skill not everyone has, or just live with a slightly ill-fitting door.
Common Mistakes When Choosing and Installing Hinges
You’d think replacing a door hinge would be straightforward, but trust me, there are plenty of ways to mess it up. I’ve seen people, and I’ve been one of them, make assumptions that lead to doors that don’t close properly, squeak incessantly, or even sag over time. Let’s talk about the classic blunders so you can avoid them. (See Also: A Box Without Hinges Key )
The most common mistake, as I’ve touched on, is focusing solely on the overall size of the hinge (like length) and ignoring the finer details. People grab a hinge that’s 3 inches long and think, ‘great, that’s the one.’ But they don’t check the corner radius (squared vs. rounded) or the exact width of the hinge leaf where it sits in the door and frame mortise. This is why a ‘3-inch hinge’ from Brand A might not be a direct replacement for a ‘3-inch hinge’ from Brand B, or even an older hinge from the same brand.
Another big one is not accounting for the number of hinges needed. Most interior doors use three hinges.
For heavier doors, or doors that see a lot of traffic, four might be better. Using only two hinges on a standard door can lead to premature wear and sagging, regardless of how well those two hinges fit.
Conversely, if your door currently has three and they’re all fine, and you just need to replace one that’s broken, you’ll likely want to replace all three. Why? Because hinges wear out unevenly.
If one is worn, the others are likely on their way out, and a new hinge will be stronger than its aging companions, leading to an unbalanced door. I learned this when I replaced just one hinge on a closet door, and the new one would squeak against the older, slightly warped ones. It sounded like a haunted house.
People also often overlook the door swing direction. Hinges are typically designed for a specific swing. While most standard hinges work for either left or right swings, some specialized hinges might not. It’s rare for basic interior hinges, but it’s something to be aware of, especially with security or more complex door systems.
Then there’s the issue of screws. When you buy new hinges, they often come with screws. However, these screws are usually designed for new, unpainted, untreated wood. If you’re installing into an old frame that’s been painted over multiple times, or if the original screw holes are stripped, the screws that come with the new hinges might not be long enough or strong enough. You might need to buy longer, thicker screws, or use wood filler and then re-drill pilot holes. I once tried to reuse old screws with new hinges because the new ones looked cheap. Big mistake. The door felt loose almost immediately. Turns out, the old screws were slightly stripped and not providing enough grip.
Finally, there’s the assumption that the mortise (the cutout in the door and frame) is standard. While there are common depths for mortises, they aren’t universally identical. If your new hinge leaf is thicker than the original, and you try to force it, you’ll bend the leaf or damage the wood. If it’s thinner, it won’t sit flush, leaving a gap. This often leads to people skipping the mortise entirely and surface-mounting the hinge, which looks terrible and compromises the door’s integrity.
Here’s a quick checklist of what to look for to avoid these common errors:
- Measure Everything: Barrel length, leaf width, corner radius (trace it if you have to!).
- Match Corners: Squared must match squared, rounded must match rounded.
- Check Leaf Thickness: Does it sit flush in the mortise?
- Consider Replacing All Hinges: Especially if the door is old or one hinge is significantly worn.
- Use Proper Screws: Longer, stronger screws might be necessary for existing frames.
- Verify Swing Direction: Though rarely an issue for basic interior doors.
Ignoring even one of these points can turn a simple hinge replacement into a multi-hour ordeal involving chisels, wood filler, and a lot of muttered curses.
When Are All Door Hinges kind Of in the Same Place? (hint: It’s Not Really)
Okay, so we’ve established that ‘same place’ is a bit of a mythical creature when it comes to door hinges. However, there are situations and categories where hinges are more likely to be in similar positions, making replacements easier. This is where the concept of standards, even if loose, comes into play.
The biggest area of relative standardization is within modern, mass-produced interior doors and frames. Think about your typical new construction home or apartment. The doors are usually made in factories, and the frames are often installed by contractors following similar blueprints. In this environment, the mortises for the hinges are cut with much greater consistency. A standard interior door, say 32 inches wide and 80 inches tall, will almost always use three hinges of a specific size and configuration. These are often called ‘standard’ or ‘plain bearing’ hinges, typically 3.5 inches tall with a 0.375-inch radius corner.
If you have such a door, and you’re replacing a hinge on another door of the same type and age, you’re much more likely to find a direct fit. The placement of the mortises on the door edge and the frame will be very similar, if not identical. This is because manufacturers use templates and CNC machines to make sure uniformity. So, if you’re buying a replacement hinge for a door installed in the last 10-20 years in a standard residential build, your odds of ‘are all door hinges in the same place’ being a ‘yes’ are pretty good, provided you match the key specs like corner radius and leaf size. (See Also: Are Integrated Washing Machine Door Hinges Standard )
Another area where you might find some consistency is with specific types of doors that have specialized hardware. For example, some heavy-duty cabinet doors might use a particular type of European-style hinge that has a very precise mounting system. Similarly, certain types of commercial doors or fire-rated doors might adhere to stricter specifications for hinge placement to meet safety codes. In these niche applications, there’s a higher chance that hinges are designed to be in predictable locations.
However, the moment you step outside of this relatively uniform modern residential context, the ‘same place’ idea starts to break down. Older homes (pre-1960s especially) often have doors and frames that were custom-built, or hardware that is no longer in production. Carpenters of yesteryear didn’t have the same level of automated precision. They measured, marked, and cut based on the specific job. This leads to unique mortise depths and placements that can vary even from one door to another in the same house.
Also, consider custom doors, solid wood doors, or doors with unusual designs. These are often made to order, and while the carpenter will aim for functional placement, there’s no guarantee it will match a ‘standard’ size or position. If you bought a beautiful, thick, solid wood door from a specialty craftsman, its hinge mortises might be deeper or set slightly differently than what you’d find on a hollow-core door from a big box store.
My own foray into older homes proved this. I was helping a friend renovate a Victorian house. Every single door hinge was slightly different. Some were mortised deeper, some shallower. The corner radii were a mix of rounded and almost-squared. It was a nightmare. We ended up having to chisel out new mortises for almost every door to make the new, standard hinges fit correctly. This is where the ‘people also ask’ question about ‘how to make new hinges fit old doors’ really hits home. You can’t just assume they’ll fit. You often have to make the door fit the hinge, or rather, make the mortise accommodate the new hinge.
The reality is, ‘standard’ hinges are standard for a reason – they fit the most common applications. But ‘common’ doesn’t mean ‘universal.’ If you’re dealing with anything other than a relatively modern, standard interior door, prepare for some manual adjustments.
Hinge Types and How They Dictate Placement
The type of hinge you’re dealing with plays a massive role in where it’s placed and how it’s installed. It’s not just about looks; the design of the hinge dictates the depth of the mortise, the required screw pattern, and how it interacts with the door and frame. Understanding these types is key to knowing if your hinges are truly ‘in the same place’ or if you’re comparing apples and oranges.
The most common type you’ll encounter in residential settings is the butt hinge. This is what most people picture when they think of door hinges. It has two leaves that lie flat against the door and frame when closed, and a barrel with a pin. Within butt hinges, there are further variations:
- Standard Butt Hinges: These are the ones we’ve been discussing, with leaves that sit flush in mortises. They come in various sizes, corner radii, and pin types (fixed or loose pin). The placement is determined by the mortise depth, which is usually around 1/16 to 1/8 inch for the leaf to sit flush.
- Ball Bearing Hinges: These have ball bearings in the barrel to reduce friction and make heavy doors easier to swing. They are typically the same dimensions as standard butt hinges but are often thicker or have a slightly different barrel profile due to the bearings. Their placement in the mortise is still about making sure a flush fit.
- Heavy-Duty Hinges: Often used for exterior doors or very substantial interior doors, these are simply beefier versions of standard butt hinges, with thicker metal and more solid pins. They still rely on proper mortise placement for a flush fit.
Then you have specialty hinges that have entirely different placement requirements:
- Mortiseless Hinges: These are designed to be installed without cutting mortises into the door and frame. They often have a ‘surface mount’ design where the leaves attach directly to the face of the door and frame. Their ‘place’ is on the surface, not recessed. This is a completely different installation and look.
- Euro-Style Hinges (also known as concealed or cabinet hinges): While these are most common on cabinets, similar systems exist for doors. They have a complex mechanism that often involves a large cutout in the door edge for the hinge cup and a separate mounting plate on the frame. Their placement is dictated by precise measurements for the cup bore and the mounting plate. These are definitely not ‘in the same place’ as a traditional butt hinge.
- Pivot Hinges: These are often used for very large, heavy, or decorative doors that don’t have traditional side hinges. They pivot from a point at the top and bottom of the door, set into the floor and the top of the frame. The ‘place’ here is specific to the pivot point, not along the edge of the door.
- Double-Acting Hinges: Used for doors that swing both ways (like in a restaurant kitchen), these hinges have a more complex mechanism and often a specific pivot point, rather than traditional leaves set into the door edge.
The key takeaway here is that the type of hinge dictates its intended installation method and therefore its ‘place.’ If you’re comparing a standard butt hinge to a Euro-style hinge, they are in entirely different worlds of placement and installation. Even within butt hinges, variations in leaf thickness and corner radius mean that while the concept of placement (in a mortise) is the same, the exact location and fit can differ significantly enough to cause problems.
I once bought a set of ‘heavy-duty’ hinges for a garden shed. They looked like standard butt hinges, but the leaves were noticeably thicker. I didn’t realize this until I tried to install them. The mortises I had already cut were too shallow. I had to go back with my chisel and deepen them considerably. It took an extra hour and a lot of dusty work. This taught me that ‘heavy-duty’ often means ‘thicker,’ and thicker means the mortise needs to be deeper. It’s a simple physical principle, but easy to overlook when you’re just looking at the overall size.
Practical Tips for Hinge Replacement and Installation
Alright, you’ve waded through the theory, and you’re ready to tackle that hinge situation. Whether you’re replacing a faulty hinge or installing a new door, getting the hinge placement right is important. Here are some practical tips I’ve picked up from countless hours wrestling with these metal bits.
1. Document Everything Before You Buy: Before you even think about heading to the hardware store or clicking ‘buy online,’ grab your measuring tape and a notepad. Measure the existing hinge meticulously. Note the barrel length (tip to tip), the width of each leaf, the corner radius (if it’s rounded, try to gauge the radius – a quarter-inch radius is common, but it can vary), and the spacing of the screw holes. Take pictures from multiple angles. This detailed information is your best weapon against buying the wrong hinge.
2. Bring Your Old Hinge (If Possible): If you’re replacing a single hinge on an existing door and can remove it without causing structural damage, take the old one with you. Holding the old hinge next to a potential replacement in the store is the most foolproof way to spot subtle differences in leaf size, thickness, and corner shape. (See Also: Are Hinges Wheeels )
3. Focus on the Mortise Fit: This is where most people go wrong. Even if the barrel length is correct, if the hinge leaf doesn’t sit perfectly flush in the mortise, the door will bind or hang improperly. Pay close attention to the corner radius matching. If your door has rounded corners and you have squared hinges, or vice-versa, you’ll have gaps. If the new hinge leaf is thicker than the old one, you’ll need to deepen the mortise. If it’s thinner, you might need to shim it. Use a thin piece of cardboard or veneer as a shim if needed.
4. Don’t Fight the Wood: If a hinge leaf doesn’t seem to want to sit flush, don’t just force it. Forcing it can bend the hinge, strip the screw holes, or even crack the wood. Instead, gently work the mortise with a sharp chisel. Go slowly and remove small amounts of wood at a time. It’s much easier to remove more wood than to put it back.
5. Pilot Holes Are Your Friend: Always drill pilot holes for your hinge screws. This prevents the wood from splitting, especially in older wood or near the edge of the door. The pilot hole should be slightly smaller than the screw’s shank diameter. If the old screw holes are stripped, you’ll need to fill them with wood glue and toothpicks or dowels, let them dry, and then drill new pilot holes. For very heavy doors, consider using longer screws that can reach the framing studs behind the door jamb.
6. Lubricate and Align: Once the hinges are installed, apply a bit of lubricant to the pin. Graphite powder or a silicone-based spray works well. Work the door back and forth a few times to distribute the lubricant. This will help prevent squeaking and make sure a smooth swing. Check the alignment of the door. Does it swing freely? Does it close without rubbing? Are the gaps around the door even?
7. Consider the ‘Three Hinge Rule’ (for interior doors): If you’re replacing hinges on a standard interior door, and one hinge is significantly worn, it’s often best to replace all three. Hinges wear out over time, and a new hinge won’t be balanced with old, worn ones. This will save you potential issues down the road.
Here’s a quick sequence for installing new hinges:
- Remove the old hinges, carefully noting their exact placement and orientation.
- If using new hinges, test-fit them in the mortises without screws. Make sure they sit flush and the corners match. Make necessary adjustments to the mortise.
- Mark the screw hole locations on the door and frame.
- Drill pilot holes.
- Attach the hinge to the door first (if not already attached), then align the door with the frame and attach the hinge to the frame.
- Check door swing and make minor adjustments if necessary (sometimes shimming the hinge leaf slightly can correct minor binding).
- Lubricate and test.
These steps, while seemingly basic, are the difference between a DIY success and a frustrating repair job that makes you regret ever touching the door.
How Do I Know If My Door Hinges Are the Right Size?
You need to measure more than just the length. Pay close attention to the width of the hinge leaves, the thickness of the metal, and the corner radius (squared or rounded). These dimensions must match the mortise cut into your door and frame for the hinge to sit flush and function correctly. Bringing the old hinge to the store is the best way to make sure an exact match.
Can I Just Replace One Door Hinge?
You can, but it’s often not ideal, especially for interior doors. Hinges wear out unevenly. If one hinge is failing, the others are likely aging too. Replacing just one can lead to an unbalanced door or premature failure of the other hinges. For standard interior doors, it’s usually best to replace all three at once to make sure uniform wear and performance.
What If My New Hinges Don’t Fit the Old Mortise?
This is a common problem. If the new hinge leaf is thicker, you’ll need to carefully deepen the mortise using a sharp chisel. If the corners don’t match (squared vs. rounded), you’ll need to either chisel a new corner or use shims behind the hinge leaf to fill the gap and make sure a flush fit. Don’t force it; adjust the mortise to fit the hinge.
Do All Door Hinges Have the Same Screw Hole Pattern?
No, they absolutely do not. While there are common patterns for standard hinges, screw hole spacing can vary between manufacturers and hinge types. Always check the placement and number of screw holes on your existing hinge and compare it to the new one. You may need to drill new pilot holes if the pattern doesn’t match.
Verdict
So, to circle back to the original question: are all door hinges in the same place? The honest answer, after years of fiddling with them, is a resounding ‘no.’ While modern manufacturing has brought some standardization, especially for interior doors, variations abound. Old houses, custom doors, and even different brands can mean subtle (or not-so-subtle) differences in hinge placement and fit.
The real takeaway is that ‘same place’ is less about a universal blueprint and more about matching the hinge to the specific mortise in your door and frame. That means careful measurement, attention to detail on corner radii and leaf size, and sometimes a bit of manual adjustment with a chisel.
Next time you’re facing a wobbly door or a hinge that’s seen better days, don’t just grab the first one you see. Take the time to measure, compare, and understand what actually matters. Your sanity, and your door, will thank you.