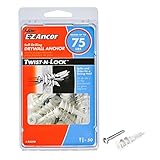
I remember the first time I tried to hang a heavy mirror in my apartment. The landlord said, “Just use those little plastic things!” So, I grabbed a handful of anchors, a hammer, and went to town. Little did I know, I was setting myself up for a minor disaster. The question is, are you supposed to hammer in drywall anchors, or is there more to it? Most folks just whack them in, but that’s where the trouble often starts.
Honestly, the sheer variety of anchors out there can make your head spin. Some look like they belong in a rocket ship, while others are just glorified plastic cones. My journey through the world of fasteners has been… educational, to say the least. I’ve seen things hang, and I’ve seen things spectacularly fail. So, let’s cut through the noise and talk about what actually works.
Why Whacking Them in Can Be a Bad Idea
Look, nobody wants to spend an hour figuring out how to hang a towel rack. The instinct is to grab the nearest tool and get it done. For many common plastic expansion anchors, that tool is a hammer. You see a hole, you see an anchor, and you see a hammer. The logic seems sound: hammer the anchor into the hole. Simple, right? Well, not exactly. When you hammer a standard plastic ribbed anchor straight into a hole that’s exactly the size recommended on the package, you’re often relying on friction and the anchor’s ability to expand after it’s seated.
The problem arises when you hammer too hard, or the hole is slightly too small or too large. Hammering can splinter the plastic, deforming it before it’s even properly seated. This deformation means it won’t expand correctly once you screw into it. I learned this the hard way trying to hang a fairly substantial shelf in a room I was renovating. I hammered those little blue plastic anchors in with gusto, feeling pretty pleased with my efficiency. But when I screwed in the shelf brackets and started loading it up with books, one side just… pulled out. The anchor came with it, looking mangled and useless. The hole was now too big for a new anchor, and I was stuck.
The common advice is often just to use the right drill bit size. And that’s part of it. But here’s the contrarian take: sometimes, even with the right drill bit, hammering can be the wrong move. For many plastic anchors, the goal is to get them flush with the wall, and then let the screw do the expanding work. Hammering aggressively can push them too deep, or worse, damage them on the way in. It’s like trying to gently persuade a stubborn kid by yelling – usually not the best approach for a long-term solution.
The real issue isn’t always the hammer itself, but how you use it and which anchor you’re using. Some anchors are designed to be tapped in with a hammer, then screwed. Others, especially the more heavy-duty ones, might require a different approach altogether. Understanding the mechanism of the anchor is key. A flimsy plastic anchor, designed for lightweight decorations, will behave very differently from a self-drilling metal anchor or a toggle bolt.
This is where the confusion starts. People see a hammer and think, “Hammer time!” but they’re often using the wrong technique for the fastener. It’s not just about brute force; it’s about precision. If you’re just hammering away, you’re basically gambling with your wall’s integrity. The goal is a secure hold, not just a hole filled with mangled plastic.
Understanding Anchor Types and How They Work
This is where most DIYers get tripped up – they think all anchors are created equal. Spoiler alert: they are not. The vast majority of common, cheap anchors you buy in a multi-pack are plastic expansion anchors. These are usually ribbed or finned and are designed to be inserted into a pre-drilled hole. When you drive a screw into them, the screw threads wedge into the plastic, forcing it outwards against the drywall. This outward pressure is what creates the grip. The ribs are supposed to stop it from spinning as you drive the screw.
Then you have self-drilling anchors, often made of metal or a harder plastic. These have a sharp point and threads that actually cut into the drywall as you screw them in. You don’t necessarily need a pilot hole for these, though pre-drilling a small guide hole can make them easier to start and prevent the drywall from cracking around the edges. The key difference here is they create their own hole or guide, rather than relying solely on a pre-drilled void.
Toggle bolts are a whole different beast. These have a spring-loaded wing that folds up to go through the hole, then springs open on the other side of the drywall. You pull the bolt back, and the wing presses against the back of the drywall, providing a very strong hold. These are definitely not hammer-in items; they require a larger hole and a specific installation process. (See Also: Are Anchors Needed For Studs )
Molly bolts are similar in concept to toggle bolts, but they have a threaded shaft that expands outwards behind the drywall as you tighten the screw. They often have a metal sleeve that expands. Again, not something you hammer in. The common plastic expansion anchors, the ones most people think of when they ask if you’re supposed to hammer in drywall anchors, are the ones that cause the most debate and the most mistakes.
I’ve found that the plastic anchors that work best are often the ones that have a slight taper. You can usually tap them in gently with a hammer to get them started, then push them the rest of the way with your hand or the handle of the screwdriver, making sure they sit flush. Aggressive hammering is almost always a mistake with these. The goal is a snug fit, not a crushed anchor.
Here’s a quick rundown of common types and my take:
| Anchor Type | How it Works | Hammer Needed? | Best For | My Verdict |
|---|---|---|---|---|
| Plastic Expansion (Ribbed) | Expands outward when screw is driven in. | Gentle tapping to start, usually not full hammering. | Lightweight items (pictures, small shelves). | Okay for light duty, but prone to failure if installed poorly. Overrated for anything substantial. |
| Self-Drilling (Metal/Hard Plastic) | Threads cut into drywall as screw is driven. | Usually no hammer needed; screw drives it in. | Medium-weight items (shelves, light fixtures). | Much better than plastic. Easier to use and more reliable for a bit more weight. |
| Toggle Bolts | Spring-loaded wings expand behind drywall. | Absolutely not. Requires drilling a larger hole. | Heavy items (large TVs, heavy shelving, cabinets). | The gold standard for serious weight. More work, but worth it. |
| Molly Bolts | Sleeve expands behind drywall as screw is tightened. | No. Requires drilling a hole and using a specific tool or screwdriver. | Medium to heavy items where a flush mount is desired. | Good alternative to toggle bolts for certain applications. Reliable. |
So, to directly answer the question: are you supposed to hammer in drywall anchors? For many types, no. For the cheap plastic ones, a gentle tap to start is okay, but aggressive hammering is usually a mistake. For anything more solid, hammering is almost certainly the wrong approach.
Common Mistakes That Lead to Falling Objects
The biggest mistake, as we’ve touched on, is the aggressive hammer approach with standard plastic anchors. It’s like trying to force a square peg into a round hole, only the peg is made of brittle plastic and the hole is your drywall. You end up with a deformed anchor that can’t grip properly. I’ve seen folks use a hammer so hard that the anchor just crumbles or gets pushed so deep it’s practically flush with the inside of the wall cavity, rendering it useless.
Another common error is using the wrong size drill bit. If the hole is too small, you’ll struggle to get the anchor in, and you’ll likely damage it trying to force it. If the hole is too big, the anchor won’t have enough friction to hold on its own, and it might just spin or fall out. The packaging for anchors usually specifies the recommended drill bit size – pay attention to it. I’ve learned to keep a set of good quality drill bits specifically for drywall handy.
Overloading the anchor is another classic. People see a plastic anchor and think it can hold anything. They’ll hang a heavy TV mount or a full bookshelf on a few of those flimsy things. It’s a recipe for disaster. Always check the weight rating for the specific anchor you’re using. And remember, those ratings are usually for ideal conditions – in older, softer drywall, the actual holding power can be significantly less.
I also see people trying to use anchors in areas where they just won’t work. Drywall is basically compressed gypsum dust with paper facing. It’s not solid wood or concrete. If you’re trying to hang something that needs to support significant lateral force (like a railing that people will lean on), drywall anchors are often not the best solution unless you can hit a stud. Even the strongest anchors have limitations.
A friend of mine once decided to hang his new, massive flat-screen TV using a bunch of those orange plastic anchors. He said, “They feel pretty solid when you hammer them in!” I warned him. Sure enough, a few weeks later, I got a panicked call. The TV was hanging at a precarious angle, with one corner starting to pull away from the wall. He’d managed to rip out half the drywall. We had to cut a whole section out and patch it. That was an expensive mistake for him, and a mortifying moment for me, having tried to warn him. (See Also: Are Anchors Needed For Drywall Shelves )
Finally, not seating the anchor flush with the wall is a common oversight. When you screw into an anchor that’s sticking out, you’re not getting the proper use. The screw is angled, and the force isn’t distributed correctly. For most anchors, the goal is to have the lip or the flange of the anchor sitting snugly against the surface of the drywall. This makes sure the screw can exert its full expanding or gripping power directly into the anchor, and thus into the wall.
When Is Hammering Acceptable? (and When to Stop)
So, let’s get specific about when hammering is actually okay. For the most common, inexpensive, ribbed plastic expansion anchors (often blue, red, or yellow), a gentle tap or two with a hammer can be used to get them started. The key word here is ‘gentle’. You’re not trying to drive them home with force; you’re just trying to get the tip into the drywall so you can then push them the rest of the way with your hand or the handle of your screwdriver until they are flush. The screw will do the bulk of the expanding work.
If the anchor starts to deform, splinter, or require excessive force to tap in, STOP. That’s your cue that the hole might be too small, or you’re just beating up the plastic. These anchors rely on their shape to expand. If you smash them, you destroy their ability to do that. Imagine trying to push a delicate piece of pottery into a tight space with a hammer – it’s not going to end well.
There are some specific types of plastic anchors that are designed with a blunt end and are meant to be tapped in more firmly. These often have a larger flange that sits on the surface of the wall. Again, the packaging is your friend here. If it shows a hammer icon and suggests tapping it in, go ahead, but still use common sense. If it feels like it’s going to break, ease up.
When should you absolutely NOT hammer? For any metal anchor that’s designed to be self-drilling, hammering is generally a bad idea. You’ll likely bend or damage the threads, making it impossible to screw in properly. The whole point of a self-drilling anchor is that the screw itself acts as the drill. For toggle bolts and molly bolts, hammering is completely out of the question. These require specific hole sizes and installation methods that don’t involve brute force with a hammer.
My personal rule of thumb is this: if I have to hit it more than a couple of gentle taps to get it started, I stop and re-evaluate. Either the hole is wrong, or I’m using the wrong anchor for the job. I’ve learned to have a good selection of drill bits and a stud finder. If I can’t find a stud and the item is anything more than a very light picture frame, I’m reaching for something better than a basic plastic anchor, and that something will not involve a hammer.
Real-World Use Cases and Practical Tips
Let’s talk about what you can actually get away with using these anchors for, and how to make them work better. For those common ribbed plastic anchors, I’ll only use them for things like hanging lightweight framed photos, small decorative items, or perhaps a very light string of fairy lights. If it weighs less than a pound or two, and a fall would cause minimal damage, a well-installed plastic anchor might suffice. That’s about it.
For anything that has a bit of weight – a medium-sized shelf, a towel rack in a bathroom that will have damp towels hanging on it, a coat hook that might hold a jacket – I’m upgrading. Self-drilling metal anchors are fantastic for this. They’re relatively inexpensive, easy to install (just screw them in with a screwdriver or drill), and offer significantly more holding power than plastic. I’ve used them for spice racks, bathroom accessories, and even a fairly substantial mirror. They don’t require hammering at all.
When you do use plastic anchors, here are a few tips: (See Also: Are Studs More Secure Than Drywall Anchors )
- Pre-drill the correct size hole. Seriously, check the package. A slightly snug hole is better than a loose one.
- Tap gently to start. Just enough to get it engaged. Then push it the rest of the way by hand or with the screwdriver handle.
- Make sure it’s flush. The lip of the anchor should be even with the drywall surface.
- Use the right screw. The screw diameter and thread pitch are designed to work with the anchor.
- Don’t overtighten. Once the anchor is snug and the item is secure, stop.
Overtightening can strip the anchor or damage the drywall.
If you’re hanging anything remotely heavy, like a TV mount, a large mirror, or a bookcase, you absolutely need to find a stud. Drywall anchors are a compromise for when you can’t hit a stud. They are not a substitute for solid wood framing.
A good stud finder is worth its weight in gold. I have a Zircon stud finder that’s been with me for years, and it’s saved me countless headaches.
For those who insist on using anchors for heavier items and can’t find a stud, consider toggle bolts or molly bolts. Yes, they require more effort – drilling a larger hole, installing the mechanism – but the holding power is vastly superior. I used toggle bolts to mount a heavy piece of salvaged architectural salvage as a shelf in my workshop, and it’s held up for years without any sign of stress. This is where the question ‘are you supposed to hammer in drywall anchors’ gets a resounding ‘no’.
Faq: Drywall Anchor Questions Answered
Can You Hammer in Drywall Anchors That Are Too Big?
No, you absolutely should not try to hammer in drywall anchors that are too big for the pre-drilled hole. This will almost certainly damage the anchor, the drywall, or both. If an anchor doesn’t fit easily with a gentle tap or by hand, the hole is either too small for the anchor, or you have the wrong anchor for the hole size. Forcing it will lead to a weak or failed installation.
What Happens If You Hammer a Drywall Anchor Too Hard?
If you hammer a drywall anchor too hard, especially the common plastic expansion types, you risk deforming or even shattering the plastic. This means the anchor won’t expand properly inside the wall when you insert the screw. It will lose its grip, and whatever you’ve hung will likely fall, or the anchor will simply pull out. It renders the anchor ineffective and can damage the drywall, making it harder to install a new anchor or screw.
Do You Need to Drill a Hole for Drywall Anchors?
Yes, for most types of drywall anchors, you need to drill a hole. The exception is self-drilling anchors, which are designed to cut their own pilot hole as you screw them in. For plastic expansion anchors, toggle bolts, and molly bolts, a pre-drilled hole of the correct size is key for proper installation and holding power. Always check the anchor’s packaging for specific instructions and recommended drill bit sizes.
How Deep Should a Drywall Anchor Go Into the Wall?
A drywall anchor should generally be installed so that its flange or lip sits flush with the surface of the drywall. You don’t want it sticking out, as this will prevent the screw from seating properly. You also don’t want to hammer it so deep that it’s recessed significantly into the wall, as this can also compromise its ability to expand or grip effectively. The screw will then take up the remaining depth and provide the holding force.
Verdict
So, to circle back to the core question: are you supposed to hammer in drywall anchors? The answer, as you’ve probably gathered, is usually not with significant force. Gentle taps to start the common plastic ones are often okay, but anything more vigorous risks damaging the anchor and compromising the hold. For the vast majority of anchors that offer real strength – self-drilling, toggle, molly – hammering is just the wrong tool for the job.
My advice? Ditch the aggressive hammering for anchors. Invest in a decent stud finder and a good set of drill bits. If you can hit a stud, do it. If you absolutely can’t, choose an anchor designed for the weight you need to support, and follow its specific installation instructions. It might take a few extra minutes, but it’ll save you a lot of headaches, damaged walls, and potentially broken belongings down the line.
Next time you’re hanging something, take a moment. Think about the weight, the type of anchor, and the best tool for the job. It’s not just about getting it up; it’s about getting it up securely.