I once bought a fancy outdoor lantern that looked incredible on the website. It promised to withstand hurricanes and look like it belonged in a Parisian garden. When it arrived, the mounting hardware felt flimsy, like something you’d use to hang a child’s drawing. I figured, it’s just a lantern, how bad could it be?
Fast forward six months, after a particularly blustery night. That lantern was gone, taking a chunk of my siding with it. It taught me a hard lesson: when it comes to hanging anything on an outside wall, assuming you don’t need anchors is a gamble you’ll likely lose. So, are anchors needed if hanging on outside wall? My answer, based on sheer, painful experience, is a resounding yes, most of the time.
Why Your Fancy Planter Might End Up in the Neighbor’s Yard
Let’s cut to the chase. When you’re hanging anything on an exterior wall – be it a planter, a bird feeder, a heavy light fixture, or even just some decorative shutters – you’re battling more than just gravity. You’re fighting wind, rain, temperature fluctuations, and the sheer annoyance of something falling off and potentially damaging property or, worse, injuring someone. This is precisely why the question of are anchors needed if hanging on outside wall is so damned important.
Most exterior walls aren’t solid brick all the way through. You’ve got siding (vinyl, wood, stucco, brick veneer), then usually a sheathing (like plywood or OSB), then the framing. The siding itself offers very little structural support. It’s designed to keep the weather out, not to hold up anything heavier than a light breeze. When you drill directly into siding and hope it’ll hold something substantial, you’re relying on a thin layer of material that wasn’t engineered for load-bearing. It’s like trying to hang a 50-pound mirror on a piece of cardboard; it’s just not going to end well.
Wind is a huge factor. Think about a sign or a hanging basket. Even if it’s not heavy, the surface area it presents to the wind can create a surprising amount of use. A 5 mph breeze might do nothing, but a sustained 30 mph gust can exert significant force, enough to rip out screws that are only biting into siding or thin sheathing. I saw a friend’s elaborate hanging herb garden, a beautiful setup with multiple pots, get torn clean off its mounting by a summer storm. The screws had pulled out of the wood studs behind the vinyl siding. It looked like a small tornado had gone through that one spot.
Temperature swings also play a role, especially with materials like wood. As wood expands and contracts with heat and cold, it can loosen the grip of any fasteners that aren’t properly secured into solid framing. This gradual loosening over time, combined with occasional weather stress, is a recipe for disaster. It’s not just about the immediate hold; it’s about long-term stability. So, if you’re looking at something that has any weight, any significant surface area, or is in an area prone to strong winds, you’re almost certainly going to need anchors. The alternative is risking damage, replacement costs, and the sheer frustration of doing the job twice.
The Screw-Into-Stud Fallacy and Why It’s Usually Wrong
This is where I see a lot of people – myself included, in my younger, more naive DIY days – make a mistake. They think, “I’ll just screw directly into the studs.” Great idea, in theory. But in practice, when you’re dealing with an exterior wall, it’s often not that simple. The studs are the structural beams behind the wall, the real heroes that hold everything up. If you can hit them directly and securely, you’ve got a much better chance of a solid mount.
The problem is, locating those studs accurately from the outside can be a pain. Exterior walls have layers: siding, vapor barriers, insulation, sheathing. You might drill a pilot hole, thinking you’ve found wood, only to realize you’re just in the OSB or plywood sheathing, not the 2×4 or 2×6 stud itself. These sheathing layers are strong, but they’re not designed to be primary load-bearing points for heavy items hanging on the exterior.
They’re a backing material. Screws or lag bolts might feel tight going into sheathing, but under load and stress, they can pull out because the sheathing itself can delaminate or tear around the fastener. I remember trying to mount a really heavy decorative iron gate on my backyard fence, which had decent-looking posts. I thought I was screwing into solid wood.
Nope. Turns out, the posts were hollow in places, and I’d only hit a thin veneer.
The gate sagged within a week and I had to reinforce the whole thing with proper bracing and larger lag bolts that actually bit into the solid core.
Even if you do find a stud, the type of siding you have matters. If you have thick, solid wood siding, you might be okay screwing directly into a stud for lighter items.
But with vinyl siding, you’re drilling through the vinyl first. The screw then has to pass through the vinyl, potentially a house wrap, and then the sheathing to reach the stud. This adds complexity and points of failure. The vinyl itself can crack around the screw head if it’s too tight or if the material is brittle.
Moreover, the sheer act of screwing into a stud through multiple layers can sometimes compromise the weatherproofing of your wall if not done with extreme care and the right sealing washers.
This is where anchors shine. They are designed to create a secure hold even when you can’t perfectly align your fastener with a stud, or when you need extra holding power in materials that aren’t solid wood. They distribute the load better and provide a more reliable anchor point. Relying solely on hitting studs, especially on exterior walls with their multiple layers and potential for hidden voids or weaker sheathing, is often a false economy and a recipe for future headaches. (See Also: Can Concrete Anchors Be Used In Brick )
Types of Anchors for Exterior Walls: What Actually Works
Okay, so we’ve established that anchors are generally a good idea. But not all anchors are created equal, especially when they’re going to live outside. You need anchors that can handle moisture, UV exposure, and significant load. Here’s a breakdown of what I’ve found works and what’s usually a waste of money:
1. Lag Screws with Washers (When You Hit a Stud): This isn’t strictly an ‘anchor’ in the traditional sense, but it’s the gold standard if you can hit a solid wood stud. Use thick, galvanized or stainless steel lag screws (at least 1/4 inch, preferably 3/8 inch or larger for anything heavy). Always use a large, thick washer between the screw head and the item you’re hanging to distribute the pressure and prevent the item from digging into the wall. This is your best bet for maximum strength, but it requires accurate stud finding.
2. Expansion Anchors (Wedge Anchors, Sleeve Anchors): These are your go-to for mounting heavy items into solid masonry (concrete, brick). You drill a hole, insert the anchor, and as you tighten the bolt, the anchor expands, creating a very strong grip. For exterior use, make sure they are made of galvanized steel or stainless steel to resist rust. They are overkill for wood-framed walls but excellent for brick or concrete walls.
3. Tapcon® Screws (Masonry Screws): These are specialized screws designed to tap directly into pre-drilled holes in concrete, brick, or block. They’re easier to install than expansion anchors and work well for medium-duty applications. Again, make sure they are the type rated for exterior use, which usually means a ceramic or special coating. I used these to mount my exterior motion-sensor lights directly into a brick facade, and they’ve held up perfectly for three years.
4. Toggle Bolts (for Hollow Walls): These are fantastic for hollow walls, like a section of brick veneer that has a large air gap, or certain types of pre-cast panels. They have a spring-loaded “wing” that you push through a hole. Once inside, the wing flips open, providing a large surface area to grip the back of the material. They’re surprisingly strong but require a larger hole, and the wings need sufficient material to grab onto. For outdoor use, you’ll want heavy-duty, galvanized steel versions. They’re not for brick-solid walls, but brilliant for engineered hollow systems.
5. Heavy-Duty Screw-in Anchors (for Siding/Sheathing): These are designed to screw directly into wood or even some types of composite siding and sheathing, expanding as you screw them in. Brands like “ONSET” or similar often offer these. They look like a screw but have a more complex expanding head. They are designed to provide a better grip than a standard screw when you can’t reach a stud. However, their holding power varies greatly depending on the siding material and how well they bite. I’ve had mixed results; some held like a champ, others loosened up over time. Use these with caution for heavier items and be prepared to check them periodically.
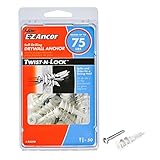
What to Avoid: Plastic anchors (the cheap, flimsy kind) are almost useless outdoors. They degrade in sunlight and moisture, and their holding power is minimal. Drywall anchors? Forget it. They’re for interior, low-stress applications only.
Here’s a quick comparison:
| Anchor Type | Best For | Pros | Cons | Verdict |
|---|---|---|---|---|
| Lag Screws (into Studs) | Wood-Framed Walls (hitting studs) | Highest strength, proven reliability | Requires accurate stud finding, not always possible | ★★★★★ (If you can hit a stud) |
| Expansion Anchors | Solid Masonry (Concrete, Brick) | Extremely strong, very secure | Requires precise hole drilling, can be difficult to install | ★★★★★ (For masonry) |
| Tapcon® Screws | Masonry, Block | Easier installation than expansion anchors, good strength | Can strip out if over-tightened, not for very heavy loads | ★★★★☆ (Great for medium loads on masonry) |
| Toggle Bolts | Hollow Walls, Brick Veneer | Excellent holding power in hollow spaces, wide grip | Requires larger hole, needs solid backing to grip | ★★★★☆ (For specific hollow wall situations) |
| Heavy-Duty Screw-in Anchors | Siding/Sheathing (when studs missed) | Can be installed without stud finder, provides better grip than standard screws | Holding power varies, may loosen over time, not for very heavy loads | ★★★☆☆ (Use with caution for lighter items) |
| Plastic Anchors | N/A (for exterior) | Cheap | Degrade easily, minimal holding power, unreliable outdoors | ★☆☆☆☆ (Avoid for exterior use) |
Common Mistakes That Lead to Disaster
You’ve decided you need anchors, which is smart. But just buying a box of ‘heavy-duty’ anchors isn’t a guarantee of success. I’ve seen plenty of DIYers make the same few blunders that turn a seemingly solid mount into a disaster waiting to happen. Understanding these pitfalls can save you a lot of trouble and money.
The first, and perhaps most common, mistake is underestimating the weight and wind load of what you’re hanging. People see a pretty birdhouse and think, “Oh, that’s light.” But then they add a bag of seed, and it rains, and the wood gets waterlogged. Suddenly, that ‘light’ birdhouse weighs 10 pounds.
Then a gust of wind hits it. That’s a lot of force on a small anchor.
Always err on the side of caution. If the product description says ‘medium duty,’ and you’re hanging it outside where wind is a factor, double it. If it says ‘heavy duty,’ consider if you need ‘extra heavy duty’ or if you should be screwing into studs. I once bought a set of exterior wall sconces that looked substantial.
The instructions called for 3/16-inch anchors. After a minor storm ripped one off, I replaced it with lag bolts into studs and stronger mounting plates.
Lesson learned: manufacturer recommendations are often a minimum, not an ideal. (See Also: Can Cords Be Used To Make Anchors Climbing )
Another mistake is using the wrong type of anchor for the wall material. Buying expansion anchors for a wood-framed wall is pointless; they need solid masonry to expand against. Similarly, using a plastic anchor in brick is just asking for trouble. You need to know what your exterior wall is made of (brick, stucco over block, vinyl siding over wood studs, etc.)
and choose anchors designed for that specific material and load. A quick tap with a hammer can often tell you if you’re hitting solid brick or a veneer over an air gap.
If you’re unsure, it’s better to do a little research or ask at the hardware store. They might look at you funny, but a confused hardware store employee is better than a damaged wall.
Over-tightening is another silent killer. With some anchors, especially plastic ones or those that rely on expansion, cranking down too hard can strip the threads, crack the material, or prevent the anchor from expanding properly. With lag screws, you want them snug and secure, but not so tight that you’re visibly deforming the washer or the mounting bracket. Conversely, under-tightening is also an issue; the item will wobble and eventually loosen. The goal is a firm, secure fit where the anchor is doing its job of distributing the load effectively.
Finally, not properly sealing the installation point is a major oversight, especially with wood-framed walls. When you drill a hole for an anchor, you’re creating a potential entry point for water. If water gets behind your siding and into the sheathing or framing, you’re looking at rot, mold, and structural damage that’s far more expensive to fix than new anchors. Always use weather-resistant washers, and for larger holes or important mounts, consider using a silicone sealant or exterior caulk around the anchor head and where the item meets the wall to create a watertight seal. This step is often overlooked but is vital for the longevity of your exterior installations.
Real-World Use Cases and My Own Blunders
I’ve hung enough stuff on enough walls over the years to have a pretty solid grasp of what works. My garage is a testament to trial and error. I’ve got shelves holding hundreds of pounds of tools, heavy-duty racks for lumber, and various contraptions for organizing my chaos. Most of that is mounted directly into studs with hefty lag bolts and structural screws because, well, it’s a garage, and I can see the framing.
But the exterior is a different beast. My first house had a small, cute porch light I wanted to replace with something more modern.
The old fixture was mounted with two screws. I bought a new, slightly heavier fixture and figured the same mounting points would work. I used the screws that came with the new light, assuming they were adequate.
They went into what felt like solid wood behind the siding. A few weeks later, after a pretty decent thunderstorm, the fixture was hanging by one screw, tilted at a jaunty angle, with water pooling in the fixture’s housing. It turned out the original holes had been slightly enlarged by moisture over time, and the new screws, while the right length, weren’t substantial enough to grip the slightly compromised wood. I ended up having to remove the siding in that small area, install a solid blocking piece of wood between the studs, and then remount the fixture with proper lag screws.
Cost me about $30 in materials and a whole afternoon I didn’t want to spend.
Then there was the time I tried to hang a large, decorative metal sign on the side of my shed. It was maybe 2 feet by 3 feet, ornate, and surprisingly heavy. The shed is metal siding over a metal frame.
Standard wood anchors or toggle bolts were out. I ended up using heavy-duty self-tapping metal screws with oversized washers. For the really heavy items, like the sign, I went a step further and used a product called a “rivnut” or “nutsert.”
This is a metal sleeve that gets installed into a drilled hole and creates an internally threaded hole you can screw into. They are incredibly strong for metal or composite materials. The process is a bit more involved, requiring a special tool, but for something that large and potentially wind-catching, it was worth it. The sign is still there, solid as a rock.
For lighter things, like hanging a small wreath on a brick wall or mounting a basic hose reel, I’ve had good luck with heavy-duty adhesive hooks designed for exterior use. These are adhesive-backed and often have a plastic or metal hook. They are rated for specific weights and, if the surface is clean and dry, they can be surprisingly effective for items that aren’t going to be yanked on or subjected to constant wind. I used a couple to hold up a string of fairy lights along my fence line, and they’ve stayed put through rain and sun for two seasons. But for anything substantial, you’re looking at mechanical fasteners. (See Also: Can Anchors In Your Shoulder Break )
When to Splurge vs. When to Save on Mounting Hardware
Let’s talk brass tacks: cost. You can spend anywhere from a few dollars for a pack of basic plastic anchors to $50 or more for a specialized heavy-duty mounting system. Knowing when to splurge and when you can get away with something more budget-friendly is key to a successful and cost-effective DIY project. The general rule of thumb I live by is: if it can fall and hurt someone, damage property, or cause me significant inconvenience and cost to replace, I splurge.
So, what warrants a splurge? Anything that’s high up, heavy, or could be a projectile in high winds. This includes:
* Large or heavy light fixtures: A fancy hanging pendant light over an outdoor dining area, for instance.
If it falls, it could smash, injure someone, and damage the table.
* Heavy planters or hanging baskets: Especially if they are large and filled with soil. Waterlogged soil is surprisingly heavy.
* Anything that protrudes significantly: Like a large bird feeder or a decorative sign that catches a lot of wind.
The use is amplified.
* Anything that could cause significant damage if it fell: Think about a heavy trellis, a porch swing bracket, or even a substantial set of outdoor speakers mounted high up.
* Items mounted on structurally questionable walls: If you’re not 100% sure about the integrity of your exterior wall material or framing, invest in the best anchors you can find.
For these situations, you want galvanized steel or stainless steel lag screws, solid expansion anchors, high-quality Tapcon screws, or heavy-duty toggle bolts designed for the specific wall type. These might cost $10-$30 for a small pack, but they offer peace of mind and a secure hold that will last. I’d rather spend $20 on the right anchors than $200 on repairs and replacement parts.
When can you save a bit? For lighter items where failure isn’t a major catastrophe.
This might include:
* Small, lightweight decorations: Like a small metal house number or a very light decorative wreath.
* Items mounted low to the ground: Where a fall wouldn’t be dangerous.
* Temporary installations: If you’re just hanging something for a season and plan to take it down.
* Using existing, solid mounting points: If a previous installation was very solid, you might be able to reuse its hardware if it’s still in good condition and suitable for your new item.
* Lightweight items on very solid surfaces: For example, a small, plastic bird feeder on a solid, well-maintained wooden fence post where you can get a decent screw bite into solid wood.
Even for these lighter items, I still tend to avoid the absolute cheapest plastic anchors. A step up to a better-quality screw anchor designed for the material, or a sturdy exterior-grade screw from a reputable brand, is usually still a worthwhile small investment. Saving a dollar here might cost you more in frustration later if the item falls. It’s about balancing the cost of the hardware against the potential cost and hassle of failure.
Frequently Asked Questions About Exterior Wall Hanging
Can I Hang a Shelf on an Outside Wall?
Yes, you can hang a shelf on an outside wall, but it requires careful planning and the right hardware. You absolutely need to make sure you are mounting into solid studs or masonry with appropriate heavy-duty anchors. The shelf itself and whatever you place on it will add weight, and exterior conditions like wind and moisture can put additional stress on the mounting. Always use galvanized or stainless steel hardware and consider using sealing washers or caulk to protect the wall from water intrusion.
What Is the Strongest Type of Wall Anchor?
For solid masonry (concrete, brick), expansion anchors and wedge anchors are generally considered the strongest, providing exceptional holding power by expanding within the drilled hole. For wood-framed walls, lag screws or heavy-duty structural screws that bite deeply into solid studs are the strongest option. For hollow walls, heavy-duty toggle bolts with large wings can offer surprisingly strong support by distributing the load over a wide area on the back of the wall material.
Do I Need Anchors for Vinyl Siding?
You will likely need anchors for vinyl siding, but not typically anchors that go into the vinyl itself. You’ll need to drill through the vinyl siding and into the sheathing and framing (studs) behind it. For lighter items, specialized screws designed to pass through siding and grip sheathing might work. For anything heavier or that needs to be very secure, you’ll need to find the studs and use appropriate lag screws or heavy-duty mounting brackets that are designed to be installed through siding and into solid framing. Always use rubber or sealing washers to prevent water from getting behind the siding.
What Can I Use Instead of Wall Anchors?
Instead of traditional wall anchors, you can use other mounting methods depending on the wall material and what you’re hanging. If you can locate studs in a wood-framed wall, you can use lag screws or heavy-duty construction screws directly into the studs. For metal structures, self-tapping metal screws or rivnuts (nutserts) can be used. For very light, temporary items, high-strength exterior-grade adhesive hooks might suffice, but they are not a substitute for mechanical fasteners for anything substantial or heavy. Ultimately, the best alternative is secure fastening into the structural elements of the wall.
Final Verdict
So, to circle back to the original question: are anchors needed if hanging on outside wall? For anything beyond a flimsy decoration, the answer is almost always yes. I’ve learned the hard way that skimping on mounting hardware for exterior projects is a false economy. You’re not just hanging an object; you’re fighting against the elements, gravity, and the structural limitations of your wall. Investing in good quality, appropriate anchors and fasteners is the difference between something that stays put for years and something that becomes a costly, frustrating repair job after the first strong wind.
Before you drill that first hole, take a good look at what you’re hanging and where. Consider its weight, its potential to catch wind, and the material of your exterior wall. Don’t be afraid to ask for advice at the hardware store, and always, always err on the side of stronger, more reliable hardware. Your future self, enjoying a securely mounted item instead of cleaning up a mess, will thank you.