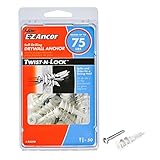
I remember the first time I tackled hanging a heavy mirror in my old apartment. I grabbed a handful of what looked like sturdy metal things from the hardware store, figuring they’d do the trick. Fast forward a few hours, and that mirror decided gravity was more important than my drywall. It came crashing down, taking a chunk of plaster with it. That’s when I started asking myself, ‘Are knurled anchors good?’ Not all anchors are created equal, and some are downright terrible.
The experience taught me a hard lesson: cheaping out or just grabbing whatever looks strong can lead to more expensive repairs down the line. I’ve since tried a ridiculous number of different wall anchors, from the basic plastic ones to some pretty fancy metal contraptions. Some have held up like champs, others have failed spectacularly. So, let’s cut through the marketing hype and talk about what actually works for hanging stuff on your walls.
What’s the Deal with Knurled Anchors Anyway?
Alright, let’s get down to brass tacks. When people ask ‘are knurled anchors good,’ they’re usually talking about those metal anchors with a rough, diamond-patterned surface. They’re often made of zinc-plated steel or brass and come in a few different styles, but the core idea is the same: that knurling is supposed to give them more grip. Unlike plain smooth ones, the ridges dig into the drywall, plaster, or even sometimes into the stud if you’re lucky enough to hit one. The most common type you’ll see is the expansion anchor, where you drill a hole, tap the anchor in, and then screw a bolt or screw into it, which forces the anchor to expand and grip the wall material.
I’ve found that the knurling does make a difference, but it’s not a magic bullet. Think of it like the tread on a tire. A smooth tire is going to slip on wet pavement, right? The knurling on an anchor is supposed to do the same thing in your wall – give it something to bite into. This is especially true in softer materials like drywall. If you just jam a smooth metal anchor into drywall, it can sometimes just spin and tear up the hole, making it useless. The knurling helps prevent that initial sliver or tear.
However, there’s a catch. The effectiveness of that knurling depends a lot on the material behind your wall and how well you install the anchor.
If you’re drilling into solid wood studs, the knurling is less important because the wood itself provides the primary grip. But for drywall-only applications, where you’re relying solely on the anchor’s ability to hold its ground against the crumbly gypsum, that rough surface is your best friend. I’ve had cheap, smooth metal anchors just pull right out of drywall under load, while a knurled version of the same size might hold.
It’s not about the metal itself as much as how it interacts with the wall surface. I’ve personally seen a knurled anchor hold a shelf that my smooth counterpart just couldn’t manage, even with the same screw driven in.
The reason they’re popular is their relatively straightforward installation for a metal anchor. You drill a hole that’s the right size, tap it in flush, and then screw your fastener.
For heavier items than a simple picture frame but maybe not quite as heavy as a full-size cabinet, they can be a good middle ground. They feel more substantial than plastic anchors, and when installed correctly, they can provide a pretty solid hold.
I’ve used them for things like hanging a heavy antique mirror (after my first disaster!), a substantial pot rack in my kitchen, and even some heavier shelving units. The weight limits advertised are often optimistic, but in my experience, they do offer a better load-bearing capacity than many basic plastic anchors when you’re dealing with hollow walls.
The key is understanding what you’re putting them into.
When Knurled Anchors Shine (and When They Don’t)
So, where do these knurled fellows really earn their keep? They’re generally best suited for medium-duty applications in drywall or plaster.
If you’re hanging something that’s a bit too heavy for a simple nail or a basic plastic anchor – think a medium-sized TV mount, a substantial mirror, a heavy shelf loaded with books, or even some light-duty workshop organizers – a knurled anchor can be a solid choice. The increased surface area and grip from the knurling help distribute the load better, preventing the anchor from pulling out of the material. I’ve used them successfully for hanging my old shop vise onto a thick piece of plywood backing I installed between studs, and it held firm even with a good bit of force applied during use.
That’s a scenario where you need something that won’t budge.
However, there are definite limitations. For extremely heavy items, like full-size kitchen cabinets or very large, heavy artwork, you really need to find wall studs. Anchors, no matter how knurled, are ultimately relying on the integrity of the wall material itself when there’s no stud.
Drywall, even with the best knurling, has its limits. I once tried to hang a large, unwieldy antique armoire using a series of these on a drywall-only wall (a mistake, I know).
While they initially held, over time, the constant slight movement and weight caused the drywall to crumble around the anchors, and the whole thing sagged alarmingly. That was a loud, expensive lesson. If the manufacturer’s rating for a knurled anchor is, say, 50 pounds, I wouldn’t trust it for 50 pounds in drywall alone.
I’d shave that number down by at least half to be safe, especially for anything that’s going to be jostled or put under dynamic load. For heavier loads, you’re better off with toggle bolts, molly bolts, or, ideally, screwing directly into studs. (See Also: Can Concrete Anchors Be Used In Brick )
Another area where they can be disappointing is in very old, crumbly plaster walls. While the knurling might bite initially, if the plaster is already weakened or has started to detach from the lath, the anchor can just tear through it like it’s tissue paper.
I had a similar experience in a pre-war apartment; the plaster was beautiful but brittle, and even the knurled anchors I tapped in just disintegrated the wall material around them. This is where a more solid solution, like a toggle bolt that can grab behind the lath, or finding studs, becomes key. So, while they’re good for a lot of common household tasks, it’s important to know what you’re dealing with behind the surface.
Don’t assume knurled means invincible.
Here’s a quick rundown of where I’d lean on using them:
| Application | Verdict on Knurled Anchors | Why |
|---|---|---|
| Medium-weight shelves (books, decor) in drywall | Good | Knurling helps grip drywall effectively for static loads. |
| Heavy mirrors (over 15-20 lbs) in drywall | Fair to Good | Can work, but always err on the side of caution and use more than one. |
| Light-duty workshop items (tool holders) | Good | They provide a solid grip for things that won’t be constantly yanked. |
| Mounting a TV bracket (light/medium TVs) | Fair | Better than basic plastic, but for larger TVs, studs are key. |
| Full-size cabinets or very heavy artwork | Poor | Always use studs. Anchors alone are not rated for this kind of load. |
| Old, crumbly plaster walls | Poor | Plaster integrity is too questionable; they tend to tear through. |
Common Mistakes That Lead to Anchor Failure
You’d think hanging something with an anchor would be straightforward, but I’ve seen – and made – enough mistakes to fill a toolbox. The most common blunder is using the wrong size drill bit. Seriously, this is where most projects go south before they even begin. If the hole is too small, you’ll struggle to get the anchor in, potentially damaging the anchor or the wall.
If it’s too big, the anchor won’t have anything to grip onto, and it’ll just spin freely. The packaging for the anchors usually tells you the exact drill bit size to use. Follow it.
I once got cocky and eyeballed it, using a bit that was slightly too large. The knurled anchor went in with zero resistance, and when I put the screw in, it just spun. The anchor was useless. It was a simple shelf for my entryway, but it ended up just lying on the floor a week later.
Another big one is not fully seating the anchor. That means not tapping it in all the way until it’s flush with the wall surface.
If the anchor sticks out even a little bit, you won’t be able to get your screw or bolt started properly, and it won’t engage the expansion mechanism or the knurling correctly. This leaves the connection weak and prone to failure. I’ve seen people try to force a screw into a proud anchor, which just strips the screw head or damages the anchor itself. You need that snug, flush fit for it to work as designed.
Take a few extra seconds to tap it in with a hammer until it’s sitting flush. It makes all the difference.
Over-tightening the screw is another classic error. Once the anchor is expanded and feels snug, stop. Just because you can crank on it harder doesn’t mean you should.
Over-tightening can strip the threads inside the anchor, damage the wall material further, or even crack the anchor itself. You want it secure, not so tight that you’re deforming the wall. I’ve been guilty of this myself, thinking ‘more is better.’
I was trying to hang a relatively heavy set of hooks for my dog leashes, and I just kept tightening the screw. I felt a little give, kept going, and suddenly the screw just spun freely. The anchor had been over-expanded and stripped internally. Had to patch the hole and start over with a different anchor.
Finally, and this is important, not understanding the weight rating and the wall material. People see ‘holds 50 lbs’ and think that means they can hang 50 lbs of anything. That rating is usually for a static load, directly into solid wood or concrete.
In drywall, that number is often halved, or even less, especially for items that might experience movement or vibration. Always check the manufacturer’s recommendations, and then be conservative. If the item you’re hanging is precious or heavy, and you’re unsure, err on the side of caution. Find a stud, use a heavier-duty anchor like a toggle bolt, or just don’t hang it that way.
For instance, I once saw someone try to hang a full-size, fully loaded medicine cabinet solely with drywall anchors. It was a disaster waiting to happen, and it eventually did.
Real-World Use: My Experience with Knurled Anchors
Let’s talk about what I’ve actually used these things for. The first time I intentionally used a knurled anchor, it was for hanging a set of fairly heavy floating shelves in my living room. (See Also: Can Cords Be Used To Make Anchors Climbing )
The instructions specified drilling a 5/16-inch hole. I measured twice, drilled once with the correct bit, tapped the knurled anchors in until they were perfectly flush, and then screwed in the shelf brackets. They felt rock solid.
I loaded them up with books, photo frames, and a small decorative statue – probably pushing close to 30 lbs total across the two shelves. They’ve been up for over two years now without any sign of loosening or sagging.
That was a win, and it definitely made me a believer in their usefulness for medium-duty drywall applications when installed properly.
Another time, I was helping a friend mount an old, heavy framed picture. It was probably around 25 pounds, unframed weight. We couldn’t find studs in the exact spot she wanted it.
We opted for two decent-sized knurled anchors. The trick here, which I learned from experience, is to distribute the weight.
Instead of one anchor, use two or even three for heavier items. We placed them about 16 inches apart, making sure they were perfectly level and flush. The picture hangs there beautifully, and it’s been over a year.
This isn’t something I’d do with a super valuable antique, but for a sentimental piece, it worked out well. It’s that balance of practicality and risk assessment that comes with experience.
However, not all knurled anchors are created equal. I bought a cheap, off-brand pack once that looked identical to the good ones. They were softer metal, and the knurling felt shallow. When I tapped them in, they just sort of compressed rather than biting. Installing the screws felt loose, and I immediately knew they weren’t going to hold. I ended up pulling them out and using a better-quality brand. That’s a hard lesson – sometimes paying a dollar or two more for a reputable brand makes a huge difference in performance and reliability. You get what you pay for, and with wall anchors, that’s often the difference between a secure hold and a trip to the hardware store for spackle.
One situation where I was thoroughly unimpressed was trying to hang a lightweight but awkward-shaped coat rack on a slightly textured plaster wall. The knurling on the anchors I used just couldn’t get a good bite on the uneven surface. They spun a bit on installation, and while they held a couple of light jackets, I never felt truly confident in them. I ended up having to remove them, patch the holes, and use a different system that involved finding studs. It highlighted that even with knurling, if the surface itself is problematic or inconsistent, the anchor’s effectiveness plummets. So, yes, they’re good, but they’re not universal problem solvers.
Tips for Getting the Most Out of Knurled Anchors
If you’re going to use knurled anchors, let’s make sure you do it right. First off, always, always, always use the recommended drill bit size. I cannot stress this enough. It’s usually printed right on the packaging.
If you don’t have the exact size, it’s worth a trip to the store to get it. Using a bit that’s too large is a death sentence for the anchor’s grip. Once you’ve drilled the hole to the correct size, drive the anchor in with a hammer until it’s perfectly flush with the wall surface. No part of the anchor should be sticking out.
A slight tap with the hammer is usually all it takes. If you’re having trouble, check if your hole is truly round or if the anchor is somehow deformed.
When you’re screwing into the anchor, go slowly and steadily. You’ll feel resistance as the anchor expands. Once you feel it get snug and secure, stop. Don’t try to force it any further. Over-tightening can strip the anchor’s threads or damage the surrounding wall material, compromising its holding power. If the screw starts spinning freely, you’ve gone too far. This is a good time to back out the screw, perhaps try a slightly larger screw if the anchor is still intact and the hole isn’t too compromised, or more likely, you’ll need to replace the anchor and possibly patch the hole if the damage is too severe.
For heavier items or just for peace of mind, consider using more anchors than you think you need. If an anchor is rated for, say, 30 pounds in drywall, and you’re hanging something that weighs 25 pounds, don’t just use one anchor. Use two, spaced appropriately. This distributes the load and provides redundancy. If one anchor were to fail, the other might still hold. This is especially true for things like shelves where the load is distributed along a length, or for pictures where you can use two hanging points. I’ve found that using two anchors for a medium-sized mirror is far more secure than relying on a single, larger anchor.
Know your wall material. Are you drilling into drywall, plaster, concrete, or wood?
Knurled anchors are primarily for drywall and plaster. If you’re drilling into concrete or brick, you’ll need a different type of anchor designed for masonry. If you hit a wood stud, congratulations!
You generally don’t even need an anchor; you can screw directly into the stud for maximum holding power. Learning to locate studs using a stud finder or the old-fashioned tap-and-listen method will save you a lot of headaches and failed anchor attempts. When in doubt, err on the side of caution and choose a stronger fastener or find a stud. (See Also: Can Anchors In Your Shoulder Break )
My rule of thumb is if it weighs more than a few pounds and I can’t find a stud, I’m looking at toggle bolts or similar for hollow walls.
When to Just Find a Stud Instead
Let’s be brutally honest: while knurled anchors can be perfectly adequate for a lot of jobs, there’s one solution that’s almost always superior when you can achieve it: hitting a stud. Studs are the wooden or metal framing members that form the skeleton of your walls. When you can drive a screw directly into a stud, you’re creating a connection that is exponentially stronger and more reliable than any drywall anchor can provide. I’ve spent years trying to make anchors work for situations where I should have just spent five minutes locating a stud. It’s a bit like trying to build a sturdy shelf on a Jell-O mold versus a solid brick wall.
The reason stud mounting is so much better is simple physics. Drywall is basically compressed gypsum dust sandwiched between paper. It’s brittle and crumbly.
Anchors, even the knurled ones, rely on gripping that crumbly material or expanding within it. The load is always transferred through the drywall itself. When you screw into a stud, the screw is going directly into solid wood (or metal), which is dense and strong. The load is supported by the framing of the house, not the flimsy wall surface.
This means you can hang much heavier items, and the connection is far less likely to fail over time due to vibration, settling, or sheer weight. For anything that is a significant weight or has the potential to be bumped – like a heavy mirror, a TV mount, or shelving that will hold a lot of books – finding a stud is the preferred method.
Learning to find studs is a skill worth developing. A good electronic stud finder is a worthwhile investment. They work by detecting density changes behind the wall. You sweep it across the wall, and it usually beeps or shows a light when it finds a stud.
Practice with it – sometimes they can be a bit finicky, so learning their quirks is important. The old-fashioned method is to tap the wall with your knuckle.
A solid thud usually indicates a stud, while a hollow sound means you’re between studs. You can also look for clues: electrical outlets and light switches are almost always mounted to the side of a stud. Measure 16 inches (or sometimes 24 inches) from that known stud location; that’s a common spacing for wall studs. Once you find one, mark its edges lightly with a pencil.
Then, drill a small pilot hole with a thin drill bit to confirm you’ve hit solid wood before you drive your main screw or bracket.
So, when should you absolutely prioritize finding a stud over using an anchor? Anytime the item weighs more than, say, 15-20 pounds. Anytime the item is valuable, irreplaceable, or potentially dangerous if it falls (think TVs, heavy furniture components). Anytime the item will be subjected to movement or vibration (like a bike hook or a heavy coat rack that gets yanked). And honestly, anytime you’re not 100% confident in the anchor’s ability to hold the load in the specific wall material you have. While knurled anchors are good for many things, they are a compromise. A direct connection to framing is the gold standard.
People Also Ask:
What Is a Knurled Anchor Used for?
Knurled anchors are primarily used for hanging medium-weight items on drywall or plaster walls. Their rough, diamond-patterned surface provides better grip than smooth anchors, helping to prevent them from pulling out of the wall material. They are suitable for things like mirrors, shelves, light-duty brackets, and decorative items where a standard nail or plastic anchor might not be sufficient.
Can You Use Knurled Anchors in Concrete?
While some knurled anchors might be made of steel that could technically be driven into softer concrete, they are not designed for it. Concrete requires specialized anchors like wedge anchors, sleeve anchors, or concrete screws, which are designed to withstand the shear and tensile forces in masonry. Using a knurled anchor in concrete will likely result in poor holding power and a failed installation.
Are Knurled Anchors Stronger Than Plastic Anchors?
Generally, yes, knurled metal anchors are stronger and can hold more weight than most basic plastic drywall anchors. The metal construction and the gripping surface of the knurling provide superior load-bearing capacity and durability, especially in hollow wall applications. However, very heavy-duty plastic anchors or specialized toggle bolts can sometimes outperform basic knurled anchors.
How Do You Remove a Knurled Anchor?
Removing a knurled anchor can sometimes be tricky, but you can usually do it with a pair of pliers or a pry bar. Grip the protruding part of the anchor firmly with the pliers and try to wiggle it back and forth while pulling outwards. If that doesn’t work, you can try using a pry bar to gently lever it out. Be careful not to damage the wall excessively. If it’s really stuck, you might need to break it apart or cut off the screw head and then push the anchor into the wall cavity.
Final Verdict
So, to wrap it all up, are knurled anchors good? My honest answer is: yes, they have their place, and they can be quite effective when used correctly. They’re a step up from your average plastic anchor for medium-duty tasks in drywall and plaster, offering a better grip thanks to that textured surface. I’ve successfully used them for shelves, mirrors, and various hanging items, and they’ve held up well.
However, they are absolutely not a universal solution. For anything truly heavy, or for peace of mind on valuable items, your best bet is always to find a stud. Don’t get caught out by thinking the knurling is magic; it’s still dependent on the integrity of your wall material. Pay attention to drill bit sizes, installation depth, and don’t overtighten. If you do that, you’ll likely have a secure hold for years to come.
If you’re hanging something that’s more than just a picture frame but less than a full kitchen cabinet, and you can’t find a stud, a good quality knurled anchor is a solid contender. Just remember to buy decent ones and install them properly. It’s better than having your stuff end up on the floor.