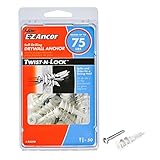
I remember the first time I tried to hang a heavy mirror in my apartment. The landlord had plastered these little plastic doodads into the wall – drywall anchors, I later learned. They looked sturdy enough, so I confidently screwed right into them. Fast forward six months, and that mirror decided to take a nosedive, taking a chunk of my wall with it. That day, I learned a hard lesson about anchors and their permanence. It’s a question many DIYers wrestle with: can drywall anchors be removed without turning your wall into a disaster zone?
The truth is, most of us just shove them in and forget about them. But when you’re moving, redecorating, or just plain made a mistake, that question pops up. It’s not always as simple as unscrewing a picture hook. Some anchors are designed to be a more permanent fixture than others, and the method of removal really depends on the type you used.
Let’s cut to the chase: you can remove them, but the process varies wildly. Don’t just yank and hope for the best. That’s how you end up with bigger holes and more repair work than you started with.
The Great Anchor Escape: Why Removal Isn’t Always Easy
Look, nobody likes admitting they messed up, but I’ve been there. Hanging a heavy shelf, I used what I thought were the best anchors. They looked solid, sort of like little plastic barrels with threads. Three months later, the shelf started to sag, and I decided it was time for an upgrade. That’s when I discovered that some drywall anchors are like stubborn houseguests – they don’t want to leave. My initial attempts to just unscrew them resulted in the anchor spinning endlessly in the wall, effectively doing nothing but making a sad squeaking noise. It felt like a personal insult from a piece of plastic.
The main reason removal gets tricky is how the anchor works. Most common plastic expansion anchors rely on friction and expanding within the drywall’s cavity. When you insert them, they wedge themselves into place.
Some, like the ribbed plastic ones, are designed to bite into the drywall as you screw into them, making them even harder to dislodge without causing damage. Then there are the molly bolts and toggle bolts, which have wings or legs that spread out behind the drywall. These are a whole different beast when it comes to getting them out cleanly.
The common advice you’ll find online, often just saying ‘unscrew it,’ is dangerously oversimplified for half the anchors out there. It’s like telling someone to ‘just turn the key’ to start a jet engine – technically true, but massively incomplete.
The other factor is the drywall itself. If you’ve got thin, cheap drywall, or if the area around the anchor is already weakened from previous holes or moisture, removal becomes a high-stakes operation. You’re basically asking a fragile material to hold its ground against a foreign object trying to tear its way out. Understanding the type of anchor is the first, and arguably most important, step. Blindly attacking it will almost certainly lead to a bigger repair job, and trust me, patching drywall is a skill I’ve had to hone far more than I ever wanted to.
Plastic Ribbed Anchors: The Ubiquitous, Annoying Ones
Let’s start with the most common offenders: the ubiquitous plastic ribbed anchors. You know the ones – usually white or beige, with fins or ribs running down their sides. They come in a million sizes and are often packaged with screws. They work by expanding as you screw into them, creating outward pressure that wedges them against the drywall. They’re cheap, readily available, and generally fine for lightweight stuff like small pictures or fairy lights. But when you need to take them out, especially if they’ve been in for a while or you overtightened them, they can be a real pain.
My first instinct, like most people’s, is to just grab the screw and try to unscrew it. If the anchor is sitting flush and hasn’t been stressed, this sometimes works. But more often than not, the anchor just spins in place. The ribs that were supposed to hold it tight now just grind against the drywall, making the hole bigger. If you’ve ever experienced that frustrating, fruitless spinning, you know what I mean. It’s the drywall equivalent of a stripped screw head.
So, what do you do when unscrewing fails? My go-to method, which has saved me countless drywall patches, is to use a pair of needle-nose pliers. You want to grip the head of the anchor firmly.
Sometimes, you can gently wiggle it side-to-side while pulling outwards. If that doesn’t work, try pushing in slightly on the anchor while you unscrew. (See Also: Can Concrete Anchors Be Used In Brick )
This can sometimes help disengage the ribs from the drywall and give you a chance to pull it out. Another trick I’ve learned is to use a utility knife to carefully score around the base of the anchor where it meets the drywall.
This can break the seal and loosen its grip. If all else fails, you might have to resort to a slightly more aggressive approach: driving the anchor into the wall.
This sounds counterintuitive, but sometimes using a hammer to gently tap the anchor further into the wall cavity, followed by trying to pry it out or patching over it, is the least damaging option. It’s not ideal, but it beats a gaping hole.
The Mighty Toggle and Molly Bolts: Tougher Nuts to Crack
Toggle bolts and molly bolts are the heavyweights of the drywall anchor world. They’re designed for serious loads, like large mirrors, heavy shelving, or even televisions. Toggle bolts have a spring-loaded wing that folds to get through a hole and then springs open behind the drywall. Molly bolts have a sleeve that expands and braces against the back of the wall. Because of how they work – by anchoring behind the drywall – they present a unique challenge when it comes to removal. You can’t just pull them out like a simple plastic anchor.
For toggle bolts, the process usually involves removing the screw, then collapsing the wings and pulling the entire mechanism out through the hole. This sounds simple, but the hole needs to be large enough for the wings to pass back through. If the hole isn’t big enough, you might need to carefully enlarge it slightly with a utility knife or a drill bit. This is where precision matters; you don’t want to go hog wild and create a massive hole that requires extensive repair. Once the wings are through, you can often just pull the whole thing out.
Molly bolts are a bit different. After removing the screw, the sleeve remains.
You typically need to use pliers to grip the sleeve and wiggle it out. Sometimes, you can push the sleeve further into the wall cavity, allowing you to then grab it from the slightly larger opening you created.
I once spent a good twenty minutes wrestling with a molly bolt that refused to budge. I tried everything – wiggling, prying, even a bit of gentle hammering. Finally, I realized the sleeve had deformed slightly. I had to use a small flathead screwdriver to carefully pry the edges of the sleeve outwards while pulling with pliers.
It eventually came out, but it left a rather unsightly hole that needed significant patching. This taught me that with molly bolts, patience and the right tools (like a good set of pliers and maybe a small pry bar) are key. Don’t force it, or you risk tearing a much larger chunk out of your drywall.
Self-Drilling Anchors: The ‘easy’ Ones That Can Be Tricky
Self-drilling drywall anchors are often marketed as the easiest solution. They have a sharp point and screw directly into the drywall, eliminating the need for a pilot hole. For lighter loads, they can be a decent option, and their installation is certainly quick. But when it comes to removal, they can sometimes be more stubborn than their purely plastic counterparts. The screw threads that are designed to bite into the drywall can also make them difficult to back out cleanly, especially if you’ve put a significant load on them or if the drywall material around them has compressed over time.
The primary method for removing these is, predictably, to unscrew them. However, just like the ribbed plastic anchors, they can spin. (See Also: Can Cords Be Used To Make Anchors Climbing )
If it’s spinning, you’re not making progress, and you’re likely just widening the hole. My first experience with a stubborn self-driller involved a coat hook that I’d overloaded. When I tried to remove it, the anchor just spun. I tried pulling while unscrewing, wiggling, the whole nine yards.
What finally worked for me was using a flathead screwdriver to carefully wedge under the lip of the anchor while unscrewing. The goal is to create just enough outward pressure to allow the threads to disengage from the drywall.
It’s a delicate balance; too much pressure and you rip the drywall, too little and it just keeps spinning.
Another tactic that can work is to gently tap the anchor further into the wall cavity with a hammer and then try to pry it out. This is similar to the method for stubborn plastic anchors, but you need to be careful not to damage the surrounding drywall. If the anchor head is slightly proud of the wall surface, you might be able to grip it with locking pliers (like Vise-Grips) and apply steady outward pressure while slowly turning it counter-clockwise.
This provides a much stronger grip than regular pliers. It’s a bit of a brute-force method, but sometimes that’s what’s needed.
Remember, the goal is to remove the anchor with minimal collateral damage, but sometimes a little wall repair is inevitable.
The ‘when It All Goes Wrong’ Scenario: Patching Up Your Mistakes
So, you’ve tried everything, and the anchor is either stuck, spinning, or has taken a chunk of drywall with it. Welcome to the club. This is where the less glamorous, but equally important, skill of drywall repair comes in. For most minor anchor removal incidents, you’re looking at filling a small hole. The key is to make the hole a bit cleaner before you patch it.
If you’ve got a spinning anchor, the best approach is often to push it in slightly, then use a drywall saw or utility knife to cut away the damaged drywall around it. This creates a clean edge to work with. For larger holes left by molly bolts or toggle bolts, you might need to cut out a small square of damaged drywall and insert a drywall patch.
These patches often come with a metal mesh backing and adhesive, making them relatively easy to apply. Once the patch is in place, you’ll need to apply drywall compound (spackle or joint compound) over the patch and any surrounding imperfections.
This typically takes multiple thin coats, allowing each to dry and sanding it smooth before applying the next. It’s not difficult, but it does require patience and a bit of finesse to make it look smooth. I’ve found that using a flexible putty knife or a drywall knife helps in getting a smooth, even finish.
The actual process of patching involves applying the compound, feathering the edges so it blends into the existing wall, letting it dry completely, and then sanding it smooth. You’ll likely need a fine-grit sandpaper. After sanding, wipe away the dust with a damp cloth. (See Also: Can Anchors In Your Shoulder Break )
You might need a second or third coat of compound to get it perfectly flush. Once it’s smooth and dry, you’ll be ready to prime and paint. My own disastrous mirror incident resulted in a hole about the size of a golf ball, which took two rounds of patching and sanding to get it looking like new. The trick is to not rush the drying and sanding steps.
You can always add more compound, but you can’t easily take it away once it’s dried hard.
Faq: Your Burning Drywall Anchor Questions Answered
Can I Remove Any Drywall Anchor?
Generally, yes, you can remove most types of drywall anchors. The ease and method of removal depend heavily on the specific type of anchor used (plastic expansion, toggle, molly, self-drilling, etc.) and the condition of the surrounding drywall. Some are designed for easier removal, while others can be quite stubborn and may require more aggressive techniques that could necessitate wall repair.
Will Removing Drywall Anchors Damage My Wall?
It’s highly probable that removing drywall anchors, especially those that have been in place for a while or were overtightened, will cause some level of damage. The extent of the damage can range from a small, easily patchable hole to a larger tear in the drywall paper. The goal is to minimize this damage through careful removal techniques, but some patching is often unavoidable.
How Do I Remove a Drywall Anchor That Just Spins?
If an anchor is spinning, it’s not engaging with the drywall and won’t back out. Try pushing in slightly while unscrewing, or use a flathead screwdriver or thin pry bar to apply outward pressure under the anchor’s lip as you turn it counter-clockwise. Sometimes, gently tapping the anchor further into the wall with a hammer and then trying to pry it out can work.
What’s the Best Way to Remove a Molly Bolt?
After removing the screw, use pliers to grip the sleeve of the molly bolt and wiggle it out. You may need to push the sleeve further into the wall cavity first. If the sleeve is deformed, carefully use a small flathead screwdriver to pry its edges outwards while pulling with pliers. Patience is key to avoid tearing out a large section of drywall.
Can I Just Patch Over a Stubborn Anchor?
While it’s technically possible to patch over some types of anchors, especially smaller plastic ones that can be pushed into the wall, it’s generally not recommended for larger or metal anchors. Leaving them in can create an uneven surface and potentially cause issues later. It’s better to remove the anchor as cleanly as possible and then patch the resulting hole for a smooth, stable wall finish.
Final Verdict
So, to circle back to the main question: can drywall anchors be removed? The answer is a resounding yes, but with caveats. You’re not just undoing a screw; you’re often dislodging something designed to grip and hold. Be prepared for the possibility of some drywall repair. It’s not the end of the world, and with a little spackle and sandpaper, you can usually make it look like that anchor never even existed.
My advice? Always identify the type of anchor before you start yanking. A quick search online for ‘types of drywall anchors’ can give you a visual guide. Understanding what you’re up against will save you time, frustration, and potentially a much larger repair bill. And remember, for anything heavier than a picture frame, consider screwing directly into a stud if at all possible. It’s the most secure method and avoids the anchor removal debate altogether.
Next time you’re hanging something, take a moment to think about the anchor. And if you ever have to remove one, take another moment to breathe and approach it methodically. It’s rarely as simple as it looks, but it’s almost always doable with the right approach.