I remember the first time I tried to hang a heavy mirror. The instructions said, ‘Use the provided anchors.’ Simple enough, right? Wrong. I hammered them in, screwed the mirror bracket, and within a week, the whole thing was sagging. It looked like it was about to take a nosedive. That experience taught me a valuable, albeit frustrating, lesson: not all anchors are created equal, and their relationship with the wall surface matters more than you might think. So, let’s get down to brass tacks: are anchors supposed to be flush with the wall? The short answer is complicated, and the real-world application is even more so.
For years, I’ve dealt with drywall, plaster, and every other kind of wall surface imaginable, trying to hang everything from shelves to TVs. I’ve bought the cheap plastic ones, the fancy metal ones, and even the ones that promised to hold a small car. Through trial and error, and a fair bit of wasted money, I’ve figured out what actually works and what’s just marketing fluff. This isn’t about fancy jargon; it’s about practical, hard-won advice from someone who’s been there.
Why ‘flush’ Isn’t Always the Goal
Look, the idea that every anchor should be perfectly flush with the wall is a common one, and it makes intuitive sense. You want things to look clean, professional, and not like you just jury-rigged something together. But the reality of how anchors work is a bit more nuanced. Different types of anchors are designed to function in specific ways, and forcing them to be flush can sometimes compromise their holding power.
Take the simple plastic expansion anchor, the kind you get for free with cheap picture frames. These work by expanding behind the drywall as you screw into them. If the flange, the little rim around the top, is sitting proud of the wall, it’s a sign it hasn’t seated correctly or the hole is too big.
In that case, you want it flush, or at least as close as possible without damaging the wall. But then you have toggle bolts, which are a whole different beast.
Toggle bolts have those big wings that spring open behind the wall. When you tighten the screw, these wings pull the anchor tight against the back of the drywall. The idea is to get the base of the toggle mechanism snug against the wall surface, not necessarily the entire anchor head buried. If the whole thing is flush, it means the wings might not have fully deployed or the material you’re screwing into is too thin.
I once tried to install a heavy spice rack using toggle bolts, and I got them so tight they were almost flush. Big mistake. A few weeks later, one of the wings broke off behind the wall, and the rack came down, scattering jars everywhere.
The anchor itself had been pushed too far in, and the screw had stripped the hole it was meant to be holding tight.
It’s this variability that trips people up. They see a picture in an instruction manual or on a box that shows a perfectly smooth surface and assume that’s the universal standard. But the engineering behind each anchor type dictates its ideal seating. Some are designed to have their head slightly recessed, others to sit flush, and a few might even benefit from a tiny bit of the flange showing if it means better material engagement.
The key is understanding the mechanism of the anchor you’re using. For standard plastic or ribbed anchors, yes, you generally want that little rim to be flush or very slightly proud to make sure it’s seated correctly and not wobbling.
If it’s sticking out more than a millimeter or two, it’s usually a sign of trouble. On the other hand, with something like a molly bolt, the sleeve is meant to expand and press against the wall, and you tighten the screw until the sleeve is flush, not the entire head. It’s a subtle but important distinction.
The common advice is often to aim for flush, but I’ve learned that this is more of a guideline than a hard rule. It’s like saying all screws need to be driven to the exact same depth – it depends on the material and the screw itself. The visual cue of a flush anchor is appealing, but it’s the holding power that truly matters. I’ve had anchors that looked slightly proud but held rock solid for years, and others that were perfectly flush and failed within months. So, while aiming for a clean look is fine, don’t sacrifice structural integrity for aesthetics. Always consider the anchor’s design.
The Anatomy of Anchor Failure (and Success)
Failure isn’t always about a dramatic crash to the floor. Sometimes it’s a slow, insidious creep of a shelf that starts to tilt, or a hook that gradually loosens. I learned this the hard way when I was hanging a set of heavy-duty shelves in my garage for all my tools. I used what I thought were bomb-proof concrete anchors, but I didn’t drill the holes quite deep enough.
The anchors went in, and the heads looked okay, maybe a millimeter proud. I loaded them up with my wrenches and sockets, and for about six months, they held strong. Then, one by one, they started to loosen. It wasn’t sudden; it was a gradual give.
I’d tighten them, and they’d loosen again. Eventually, one shelf sagged so much it became unusable. The problem? The anchor wasn’t fully seated in the concrete, and the vibrations from me moving around the garage were enough to work it loose.
The ‘proud’ anchor head was a symptom, not the cause.
What you’re aiming for is maximum engagement with the wall material. For drywall, this means the anchor needs to expand or grip behind the sheet. (See Also: Can Concrete Anchors Be Used In Brick )
If the hole is too large, or the drywall is crumbly, the anchor won’t have enough material to bite into. This is where the ‘flush’ rule can become misleading. If an anchor is technically flush but not gripping anything, it’s useless. Conversely, sometimes an anchor might sit slightly proud because the flange is designed to rest on the surface, providing a stable base for the screw, and this is exactly what you want.
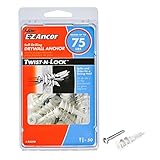
Think about a self-drilling drywall anchor. These have a screw tip and drill their own hole.
When you drive them in, the threaded portion goes into the drywall. The collar should ideally sit flush or very close to it. If it’s sticking out, it means you haven’t driven it in far enough, and it won’t have its full grip.
If you drive it too far, you can strip the hole and damage the drywall, making it impossible for the anchor to hold anything substantial.
My own worst experience involved a TV mount. I was confident, I used heavy-duty anchors, and I thought I was being careful. The instructions showed the anchor sleeve being flush with the wall. I screwed it in, and it looked perfect.
Then I hung the TV. It was a 65-inch beast, and I was nervous.
For a few days, it was fine. Then, one evening, I heard a creak. I looked up, and the whole TV was tilting precariously.
The anchor I had thought was perfectly flush had actually stripped the drywall behind it. The sleeve was flush, but there was nothing for it to grip. The TV, thankfully, didn’t fall, but I had to take it down immediately, patch the wall, and use much larger, more appropriate anchors that involved drilling into the studs.
The visual cue of ‘flush’ had completely misled me about the actual integrity of the connection.
The key takeaway is to understand how your specific anchor works. Are you dealing with plastic anchors that expand? Toggle bolts that flip open? Self-drilling anchors that create their own threads? Each has its own ideal seating. For most common plastic anchors, a flush flange means it’s seated properly. For toggle bolts, the goal is to have the sleeve flush. For self-drilling, the collar should be flush. If it doesn’t look right, or feels loose, it’s probably not right. Don’t just go by the ‘flush’ rule; go by the ‘solid grip’ rule.
When Common Advice Gets It Wrong
Here’s a contrarian take for you: the common advice that anchors MUST be flush with the wall is often overly simplistic and can lead to poor installation. Why? Because it ignores the mechanical differences between anchor types and the variability of wall materials. Everyone sees a smooth, clean surface in product photos and assumes that’s the only acceptable outcome. But I’ve seen plenty of anchors that weren’t perfectly flush but held for years without a hitch, and others that were meticulously flush and failed spectacularly. The real goal isn’t a visually perfect surface; it’s a secure fastening. Focusing solely on the ‘flush’ aesthetic can make you over-tighten an anchor, stripping the hole, or under-tighten it, leaving it loose and ineffective.
Take, for instance, some of the heavier-duty screw-in drywall anchors, the ones that look like a metal screw with a wide head. They have sharp threads that cut into the drywall.
When you drive them in, the base of the head should be sitting firmly against the wall surface. If it’s too proud, it means you haven’t driven it in far enough. If you drive it in too far, you’ve basically created a larger hole than the threads can adequately grip, and it will likely fail. For these, the ‘flush’ rule generally applies.
However, then you have toggle anchors again. The idea here is that the sleeve expands and presses against the back of the drywall. You tighten the screw until the sleeve is snug against the wall.
The head of the screw might sit slightly proud, depending on the design, but the important part is the sleeve being flush and compressed. If you drive the entire thing flush, you might be over-tightening and damaging the drywall or not allowing the toggle mechanism to fully seat.
I once spent an entire afternoon trying to get some very expensive, heavy-duty picture hooks perfectly flush on a wall. I was using plaster and lath, which is notoriously brittle. (See Also: Can Cords Be Used To Make Anchors Climbing )
I kept hammering and pushing, trying to get them flush. The heads looked fantastic, perfectly flat.
Then I hung a moderately heavy framed print. Within an hour, it had dropped about half an inch.
The plaster had crumbled around the anchor, and the ‘flush’ anchors were just sitting there, held by nothing. I should have stepped back, realized the material was the issue, and used a different approach, maybe even gone into the lath itself or used a different type of anchor that didn’t rely on the plaster’s integrity. The ‘flush’ ideal had blinded me to the real problem.
The common advice often stems from the most basic, common anchors. For those, flush is usually a good indicator. But when you move to more specialized anchors, or deal with older or less solid wall materials, you need to understand the why behind the installation, not just the visual outcome. The true measure of success is not whether the anchor head is perfectly flush, but whether the object it’s holding is secure. If your anchor sits slightly proud but is rock solid, and the object isn’t going anywhere, that’s a success. If it’s perfectly flush but wiggles, it’s a failure.
Practical Tips for Getting Anchors Right
Forget the ‘flush’ fetish for a minute and focus on what actually makes an anchor work. First, always match the anchor to the job.
Don’t use flimsy plastic anchors for anything heavier than a small picture frame. For shelves, mirrors, or anything that could cause injury if it falls, use anchors designed for heavier loads, and for heaven’s sake, try to find a stud. Most wall anchors are a compromise when you can’t hit a stud, but they are not a substitute for solid wood or metal.
If you’re hanging something heavy, like a TV mount or a large cabinet, and there’s no stud available where you need it, you need solid anchors like toggle bolts or snap toggles. These have a much larger surface area behind the wall to distribute the weight.
Second, drill the right size hole. This is HUGE. The anchor packaging will almost always tell you what drill bit size to use.
If you use a bit that’s too small, you’ll struggle to get the anchor in, and you’ll likely damage the wall or the anchor itself. If you use a bit that’s too big, the anchor won’t have enough material to grip, and it will be loose. I’ve learned to measure the anchor shaft before drilling. Some anchors have a slight taper, so measure the widest part that will be inserted.
If you’re unsure, err on the side of slightly smaller, and you can always ream the hole out a bit if needed. But you can’t un-enlarge a hole once it’s too big.
Third, feel the resistance. When you’re screwing in a drywall anchor, pay attention to how it feels. Does it go in smoothly? Does it get progressively tighter? If it feels loose from the start, or if it suddenly gets very easy to turn, that’s a red flag. For plastic anchors, you want a firm, consistent resistance as it expands. For toggle bolts, you want that smooth pull as the wings engage. If something feels wrong, stop. It’s better to remove the anchor and try again, possibly with a different size hole or a different type of anchor, than to force it and create a useless hole.
Here’s a quick checklist I run through:
| Anchor Type | Ideal Seating | Verdict |
|---|---|---|
| Plastic Expansion (Ribbed) | Flange flush or very slightly proud | Good for light to medium loads. Flush is usually best. |
| Self-Drilling Drywall | Collar flush with the wall | Convenient, but make sure hole isn’t stripped. |
| Toggle Bolts (Standard & Snap) | Sleeve flush against the wall surface | Excellent for heavy loads, but hole needs to be right. |
| Molly Bolts | Sleeve expanded and flush; screw head may be slightly proud | Strong, but requires careful installation. |
Finally, test the connection. Once your anchor is in and the item is attached, give it a gentle tug. For shelves, put a little weight on them. For hooks, hang something light from them first. If anything feels loose, take it down and re-evaluate. Don’t assume because it looks ‘right’ that it is right. Trust your senses and the material itself.
The ‘why’ Behind Wall Anchors: Beyond Just Holding Stuff
We use wall anchors because, let’s face it, hitting a stud isn’t always an option. You want to hang that beautiful piece of art, or install that much-needed shelf, but the wall stud finder is giving you the silent treatment, or the stud is just in the wrong place. Wall anchors are the bridge between our desire to decorate and the structural limitations of our walls. They basically create a secure point of attachment in materials like drywall, plaster, or even hollow masonry, where a simple screw would just spin freely or pull right out. The magic is in the design: they either expand behind the wall, like plastic anchors, or they have a wider surface area that distributes the load on the backside, like toggle bolts.
Understanding the different types is key to not wasting your money or your time. The cheap plastic ones are fine for a framed photo that weighs next to nothing. They work by creating a larger surface area behind the drywall as the screw pushes them in. The ribs on the outside prevent them from spinning as you tighten.
They’re ubiquitous, and frankly, often overused for tasks they’re not suited for. Then you have the self-drilling drywall anchors. These are metal or plastic screws with wide threads that cut their own hole. They’re faster to install than traditional plastic anchors because you don’t need a separate drill bit, but they can also be easier to strip the hole if you over-tighten them. (See Also: Can Anchors In Your Shoulder Break )
They offer better holding power than basic plastic anchors, but again, they’re still limited by the integrity of the drywall itself.
For heavier items, you step up to toggle bolts or molly bolts. Toggle bolts are fantastic. They have a spring-loaded mechanism with wings that open up behind the wall.
You drill a hole, insert the folded toggle, and then tighten the screw, which pulls the wings flat against the back of the drywall, creating a very secure hold. Snap toggles are a more modern, often easier-to-use version of this.
Molly bolts are similar in concept, with a sleeve that expands behind the wall, and you tighten the screw until the sleeve is flush. These are excellent for significant weight, but they require a larger hole and more careful installation. The common thread here is creating a larger footprint or more significant grip on the backside of the wall material than a simple screw can provide on its own.
The question of whether anchors are supposed to be flush with the wall often arises because people are looking for a visual cue that the anchor is installed correctly. A flush anchor looks professional.
However, as we’ve discussed, the mechanical function is more important than the flushness. For a plastic anchor, the flange being flush means it’s seated correctly.
For a toggle bolt, it’s the sleeve being flush. But the fundamental ‘why’ of an anchor is to provide a secure attachment point where direct fastening to a stud isn’t feasible. They are a compromise, a clever engineering solution to a common problem, and when installed correctly, they can be incredibly effective. Ignoring their design principles in pursuit of a perfect aesthetic is a recipe for disaster.
Faq: Your Anchor Questions Answered
Do I Need to Use Anchors If I Can’t Find a Stud?
Generally, yes. If you’re trying to hang anything with more than a pound or two of weight and you can’t secure it to a stud, you’ll need wall anchors. Simple screws alone will just pull out of drywall. Anchors provide the necessary grip and support by expanding or distributing weight on the backside of the wall material.
Can I Use Anchors in Plaster Walls?
Yes, but with caution. Plaster walls, especially older ones, can be brittle and prone to crumbling. Standard plastic anchors can work, but they might not hold as well as in drywall. For heavier items, toggle bolts or specialized plaster anchors are often a better choice to make sure a secure hold without damaging the plaster.
What Happens If an Anchor Is Sticking Out Too Much?
If an anchor’s flange or head is sticking out significantly from the wall, it usually means it’s not seated properly. This could be due to a hole that’s too large, the anchor not being fully driven in, or the wall material being too weak to hold it. An anchor that’s too proud will likely not have its full holding power and could eventually fail.
Should I Use Glue with Wall Anchors?
For most standard wall anchors, glue is not recommended and can actually hinder their performance. Anchors rely on mechanical expansion or gripping behind the wall. Adding glue can interfere with this process or make the anchor impossible to remove later if needed. Stick to the manufacturer’s instructions.
How Do I Know If I’ve Used the Right Anchor?
The best indicator is security. Once installed and the item is attached, give it a gentle tug. If it feels solid and doesn’t wiggle, you’ve likely used the right anchor for the job and installed it correctly. If there’s any looseness or movement, it’s best to remove it and try a different anchor or method.
Verdict
So, to circle back to the main question: are anchors supposed to be flush with the wall? The answer is: it depends on the anchor and the material. For many common types, like plastic expansion anchors, a flush flange is a good sign of proper installation. But for others, like toggle bolts, the goal is the sleeve being flush, not necessarily the entire mechanism. What’s more important than a perfectly flush appearance is a secure, solid connection that won’t fail.
My biggest takeaway from years of hanging things is to understand the mechanics of the anchor you’re using. Don’t just follow a visual guide; understand why it’s supposed to look that way. Trust your instincts – if something feels loose or wrong, it probably is. Better to spend a little extra time troubleshooting than to deal with a fallen shelf or a damaged wall later.
When in doubt, err on the side of caution. If you’re dealing with something heavy or valuable, consider using stronger anchors, finding a stud, or even consulting a professional. Don’t let the desire for a perfectly flush finish compromise the safety and integrity of your installations. The real success is in the holding power, not just the look.