I remember staring at a picture frame that had decided to stage a dramatic solo descent from the wall. It wasn’t just the frame that hit the floor; it was my confidence in my DIY skills. The culprit? A wall anchor that, in hindsight, was anything but flush. It stuck out like a sore thumb, a constant reminder that I hadn’t really understood what I was doing. So, let’s cut to the chase: are wall anchors supposed to be flush? The short answer is usually yes, but the real story is a bit more nuanced, and getting it wrong can lead to more than just a wobbly shelf.
For years, I just jammed them in and hoped for the best. Sound familiar? It’s a common mistake, and one that cost me time, money, and a few bruised knuckles. Understanding how these little guys are supposed to work is key to not having your stuff end up on the floor. It’s not rocket science, but it’s definitely more than just banging a plastic plug into drywall.
Why ‘flush’ Is Usually the Goal (and When It’s Not)
Look, when you’re hanging something on your wall – be it a heavy mirror, a shelf loaded with books, or even a TV mount – the last thing you want is for the anchor to be sticking out. Most of the time, the goal of a wall anchor is to provide a secure, stable point of contact for your screw or bolt. If the anchor isn’t flush, it means the screw can’t get a proper grip. Imagine trying to screw something into a piece of wood, but the screw head is already past the surface; it just spins uselessly. That’s what happens when an anchor is too proud.
For standard plastic expansion anchors, the kind you twist or tap into drywall, the ideal scenario is that the lip or flange of the anchor sits snugly against the wall surface. This makes sure that when you drive the screw in, it’s threading into the anchor’s body behind the drywall, not just pushing the anchor further in or pulling it out.
This snug fit means the anchor can do its job: expand behind the drywall to create a strong grip. I learned this the hard way when a floating shelf I installed, which I thought was perfectly secure, started to sag after only a few weeks. Turns out, the plastic anchors were sticking out by about a millimeter, just enough for the screw to lose its purchase under load. It was embarrassing, and frankly, a little dangerous if a kid had bumped into it.
There are different types of anchors, and the ‘flush’ rule applies more strictly to some than others. For toggle bolts, the wings fold to go through the hole, and then they spring open behind the wall. Once the bolt is tightened, the plate or flange of the toggle should sit relatively flat against the wall, or at least very close to it.
This creates a large surface area of support. If it’s not flush, it means the toggle might not have fully engaged behind the drywall, or the hole might be too large.
I once spent a good twenty minutes trying to get a toggle bolt to sit flush for a heavy mirror. It felt like wrestling an octopus, but finally, with a bit of wiggling and making sure the bolt was properly seated, it pulled in tight. The difference in perceived stability was night and day.
However, there are exceptions. Some specialized anchors, particularly those designed for very specific materials or heavy-duty applications, might have a slightly different design. For instance, some screw-in anchors that are basically metal threads molded into a plastic body might have a small, raised collar. In these cases, the collar might be designed to sit slightly above the surface to guide the screw. But for the vast majority of common drywall anchors – the plastic expansion types and toggle bolts – flush is the aim. It’s a simple visual cue that tells you the anchor is properly seated and ready to hold weight.
The Anatomy of a Secure Anchor: What to Look For
So, what does a properly installed, flush wall anchor actually look like? It’s all about creating a solid connection. When you insert a plastic expansion anchor, you’re aiming for the rim or the collar of the anchor to be right up against the drywall surface.
It shouldn’t be recessed into the wall, and it definitely shouldn’t be sticking out. Think of it like a perfectly fitted button on a shirt – it’s there, it does its job, but it doesn’t protrude awkwardly. The screw then goes into this anchor, and as you tighten it, the anchor expands behind the wall, gripping the drywall from the inside. A flush anchor means the screw is driving directly into the expanded anchor, transferring the load evenly.
For toggle bolts, the principle is similar, but the mechanism is different. These anchors have wings that fold to pass through a drilled hole, then spring open on the other side of the wall. As you tighten the bolt, the toggle plate is drawn up against the back of the drywall. Ideally, this plate should sit as flush as possible against the drywall. If it’s angled or sticking out significantly, it means the toggle isn’t sitting flat, and the load isn’t being distributed across a large enough area. This is a common pitfall with heavier items; you might think it’s secure because the bolt is tight, but the uneven pressure from a non-flush toggle can eventually tear drywall. (See Also: Can Concrete Anchors Be Used In Brick )
I learned this the hard way trying to hang a decent-sized whiteboard in my garage. I used toggle bolts, and after I thought I’d tightened them down, the plate on the back of the toggle was angled weirdly. I figured it was fine. Big mistake. A few weeks later, when I leaned on it to write something, the whole thing came down with a crash. Turns out, one of the toggles had pulled through the drywall because it wasn’t sitting flush and evenly. I had to patch the wall and start over, this time making sure the toggle sat flat before I put any weight on it. It took a bit more fiddling, but the result was rock solid.
Another thing to look for is the hole size. The anchor needs to fit snugly in the hole. If the hole is too big, the anchor won’t have enough material to expand against, and it won’t sit flush. If it’s too small, you’ll have a devil of a time getting it in, and you might end up damaging the anchor or the surrounding drywall. Manufacturers usually specify the drill bit size needed for their anchors. Following these recommendations is important. It’s like using the right size Allen wrench for a bolt; too small and you strip it, too big and it doesn’t engage.
Common Mistakes That Leave Anchors Proud (and What to Do)
The most common mistake people make when it comes to wall anchors and them being flush is simple impatience. You drill the hole, you jam the anchor in, you drive the screw. Boom.
Done. Except, not really.
Often, that plastic anchor doesn’t magically expand perfectly. It needs a little help, or sometimes, it just isn’t the right anchor for the job. For those cheap plastic expansion anchors, sometimes they just don’t seat themselves properly.
They might go in crooked, or the internal threads don’t bite into the drywall effectively. If you’ve hammered it in and it’s still sticking out, or it feels loose, don’t just leave it. You might need to wiggle it out and try again, perhaps with a slightly different angle, or if the hole is already a bit wallowed out, you might need to use a slightly larger anchor.
I’ve definitely had to go up a size on occasion when the hole I drilled was just a hair too big.
Another frequent error is over-tightening. You keep twisting that screw, thinking you’re making it more secure, but you end up stripping the plastic anchor’s internal threads or, worse, crushing the drywall around it. When this happens, the anchor might spin freely or get pushed further into the wall, losing its ability to expand correctly. This is especially true with screw-in anchors that have fine threads. You can feel them get snug, and then you just need to stop. Pushing past that point is asking for trouble and a non-flush anchor, or worse, no anchor at all.
Then there’s the issue of using the wrong type of anchor. People see a load rating and think, “Great, this will hold.”
But they don’t consider the wall material. A plastic anchor that works fine in standard drywall might crumble in plaster or fail in a hollow-core door. For heavier items, especially those that experience stress or vibration (like a towel rack in a bathroom that gets tugged), toggle bolts or molly bolts are often a better choice because they distribute the weight over a larger surface area behind the wall.
If a toggle bolt isn’t sitting flush, it could be that the hole is too large, or the drywall is too weak to support the toggle’s plate. In these situations, you might need to patch the hole and use a larger toggle, or even consider a heavier-duty anchor like a snap toggle, which often provides a more secure and flush installation. (See Also: Can Cords Be Used To Make Anchors Climbing )
My personal ‘aha!’ moment came when I was trying to hang a fairly substantial medicine cabinet in a bathroom with plaster walls. The cheap plastic anchors I’d used for years in drywall just wouldn’t hold. They’d go in, I’d screw them in, and they’d feel loose, sticking out a bit. After a frustrating hour, I ended up at the hardware store and picked up some heavy-duty toggle bolts specifically designed for plaster.
The difference was remarkable. The hole was a bit bigger, but the toggle wings opened up much wider behind the plaster, and when tightened, the plate sat nearly flush. The cabinet has been solid ever since.
It taught me that the ‘flush’ look isn’t just about aesthetics; it’s a sign of proper mechanical engagement.
Real-World Use: When ‘close Enough’ Might Actually Be Fine
Okay, so we’ve established that for most common applications, a flush wall anchor is the ideal. But let’s be honest, DIY rarely involves perfect conditions. Sometimes, you get an anchor that’s almost flush. Maybe it’s sticking out by a hair, or it’s recessed by a millimeter. Does this automatically mean failure? Not necessarily. The real test is whether the screw can still engage properly with the anchor and if the overall installation feels solid under load. For lighter items, like a small picture frame or a lightweight shelf holding a few paperback books, an anchor that’s off by a millimeter or two might be perfectly acceptable. The screw head still makes good contact, and the weight is minimal.
I once had to hang a very light decorative piece on a wall that had been patched and re-patched multiple times. No matter what I did, the anchor just wouldn’t sit perfectly flush; it always seemed to have a slight gap. I was hanging something that weighed maybe a pound. I decided to go with it, making sure the screw was well-engaged and the piece itself wasn’t putting any undue stress on the anchor. It’s been up for two years without an issue. The key here was the very low load and the fact that the screw was still making a solid connection with the anchor’s internal mechanism. It wasn’t ideal, but it worked for the specific, low-stress situation.
However, this ‘close enough’ mentality should be applied with extreme caution, especially for anything heavier or anything that could cause damage if it falls. Think about hanging a TV mount, a heavy mirror, or a shelf that will hold a lot of weight. In these scenarios, even a small protrusion or a slight recess can compromise the anchor’s ability to bear the load.
A non-flush anchor means the force isn’t being distributed as intended. It creates a potential weak point. That slight angle on a toggle bolt might seem minor, but under the stress of a TV, it can lead to the anchor tearing through the drywall.
It’s better to be safe than sorry, and that often means taking the extra five minutes to re-do the anchor until it’s properly flush.
The material of your wall also plays a role. In solid wood, you’re not using anchors at all, but screws directly. In concrete, you use masonry anchors, which behave differently. But for drywall, the integrity of the plasterboard itself is the limiting factor. If the anchor isn’t flush, it’s often a sign that the drywall isn’t providing adequate support behind it, or the anchor isn’t seated correctly to expand into that support. My rule of thumb is this: if it feels wobbly, or if there’s a visible gap that compromises the screw head’s contact with the anchor, don’t risk it. For anything that matters, aim for that clean, flush fit. It’s the hallmark of a secure installation.
Practical Tips for Achieving a Flush Anchor Every Time
Getting your anchors flush consistently is more about technique and using the right tools than sheer luck. First off, always use the drill bit size recommended by the anchor manufacturer. I know, it’s tempting to just grab any old drill bit, but these dimensions are there for a reason. Too large a hole and the anchor won’t have enough drywall to grip. Too small and you’ll struggle to insert it, potentially damaging the anchor or the wall. If you’re unsure, err on the side of a slightly smaller bit and gently enlarge the hole if needed. A small pilot hole can be expanded, but a wallowed-out hole is a pain to fix.
Second, when inserting plastic expansion anchors, try to insert them straight and gently. Some people like to tap them in with a hammer, which can work, but be careful not to hit them too hard, which can crack them or drive them in at an angle. Others prefer to twist them in by hand or with pliers. If the anchor has a flange, make sure it stays flat against the wall as you insert it. If it starts to go in crooked, pull it out and try again. A slightly angled anchor is almost guaranteed to be non-flush and ineffective. (See Also: Can Anchors In Your Shoulder Break )
For toggle bolts, the trick is often in how you insert the bolt through the anchor body. Make sure the toggle wings are folded compactly, and that the bolt threads smoothly into the toggle head. Once the toggle is through the hole and springs open, hold the bolt head steady and tighten the nut or screw that draws the toggle plate against the wall. You want that plate to sit flat. If it’s angled, you might need to slightly loosen the nut, jiggle the toggle to get it to seat properly, and then retighten. Patience is key here.
Here’s a quick comparison table I put together based on my own experiences:
| Anchor Type | Ease of Installation | Typical Load Capacity | Flush Installation Verdict | Best For |
|---|---|---|---|---|
| Plastic Expansion Anchor | Easy | Light to Medium (up to ~20 lbs) | Usually flush if hole is correct size and anchor is inserted straight. Can be tricky if hole is too big. | Drywall; light shelves, pictures. |
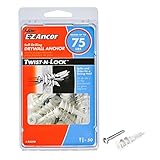
| Screw-in Anchor (e.g., E-Z Ancor) | Very Easy | Medium (up to ~30 lbs) | Typically flush or slightly proud (collar) for screw guidance. Reliable. | Drywall; medium-weight items. |
| Toggle Bolt (Spring-Loaded) | Moderate | High (up to ~100+ lbs) | Requires careful installation; plate should sit flat. Can be non-flush if drywall is weak or hole too big. | Drywall; heavy items, mirrors, TVs. |
| Molly Bolt (Sleeve-Type Toggle) | Moderate | High (similar to toggle) | Sleeve should compress and sit flush against the wall. Good for heavier items. | Drywall; heavier decor, cabinets. |
Finally, always test your anchor before fully loading it. Once the anchor is in and the screw is tightened, give it a good tug. If it feels solid and the anchor is flush (or acceptably close), you’re likely good to go. If it wiggles or pulls out easily, it’s time to start over. Don’t be afraid to admit a mistake and fix it. That’s part of learning.
The Faq: Answering Your Burning Questions About Anchors
Are Wall Anchors Supposed to Be Flush?
Generally, yes, wall anchors are supposed to be flush with the wall surface. This makes sure that the screw or bolt can properly engage with the anchor and transfer the load effectively without wobbling or pulling out. An anchor that sticks out too far means the screw head has poor contact, and an anchor that is too recessed means it might not have properly expanded behind the wall.
What Happens If a Wall Anchor Is Not Flush?
If a wall anchor is not flush, it means it’s not installed correctly. An anchor sticking out will prevent the screw from seating properly, reducing its holding power. An anchor that is too far in might not have expanded behind the wall, offering minimal support. This can lead to whatever is attached becoming loose or falling off, potentially damaging the item and the wall.
Can I Use a Wall Anchor That’s Sticking Out Slightly?
For very light items where the screw still makes good contact, a slight protrusion might be acceptable. However, for anything of moderate to significant weight, or for items that might be bumped, it’s not recommended. A non-flush anchor creates a weak point and increases the risk of failure. It’s always best to try and achieve a flush installation for maximum security.
How Do I Fix a Wall Anchor That’s Sticking Out?
If a plastic anchor is sticking out, you can try gently wiggling it out and reinserting it straight. If the hole is too large, you might need to fill it (e.g., with spackle or wood filler), let it dry, and then drill a new, correctly sized hole. For toggle bolts, you may need to loosen the nut, make sure the toggle plate sits flat against the wall, and then retighten. Sometimes, using a slightly larger anchor is the best solution.
Should the Screw Head Be Flush with the Anchor?
Yes, the screw head should ideally be snug against the anchor’s flange or collar, which should itself be flush with the wall. This indicates the screw is properly threaded into the anchor and the anchor is securely seated against the wall surface, maximizing the grip and load-bearing capacity.
Verdict
So, to circle back to our original question: are wall anchors supposed to be flush? For the most part, absolutely. That flush fit is your visual confirmation that the anchor is seated correctly and ready to do its job. I’ve learned over the years that cutting corners with anchors is a recipe for disaster, whether it’s a wobbly shelf or a picture frame taking an unplanned dive. It’s usually just a few extra minutes of careful work that separates a secure hang from a potential repair job.
My advice? Don’t eyeball it. Use the right drill bit, insert anchors straight, and take the time to make sure they sit snugly against the wall. If something looks off, don’t ignore it. That little plastic plug or metal toggle is the unsung hero of your wall decor, and it deserves to be installed properly. A flush anchor is a happy anchor, and a happy anchor means your stuff stays put.
Next time you’re hanging something, take a moment. Check the fit. Does it look right? Does it feel solid? If the answer is yes, great. If not, do it again. Your walls (and your belongings) will thank you for it.