Look, we’ve all been there. You’re in the middle of a gig, a important home theater setup, or just trying to fix a cable that’s gone rogue, and you need to make a quick splice or secure a connection. The question pops into your head: can electrical tape be used on audio wires? I’ve definitely reached for it in a pinch, more times than I care to admit, usually with a healthy dose of skepticism and a prayer.
My first experience with DIY audio repair involved a beloved vintage turntable. One of the phono cables frayed, and in my youthful haste, I grabbed the first tape I saw – a roll of black electrical tape. It seemed like a solid, insulating solution at the time. Spoiler alert: it was a temporary fix at best, and a lesson learned the hard way.
So, let’s cut through the noise and talk about what really happens when you use electrical tape on your precious audio connections.
Why You Might Think Electrical Tape Is the Answer
Alright, let’s be honest. Electrical tape is cheap, readily available at literally any hardware store, and it feels like it’s designed for exactly this kind of thing. It’s black, it’s flexible, and it stretches. When you’re looking at exposed wires on an audio cable, the immediate thought is ‘insulation.’
Electrical tape’s primary job is to insulate electrical conductors, preventing shorts and protecting the wire. Audio cables, even though they carry low-voltage signals, are still electrical conductors. So, on the surface, it seems like a perfectly logical choice.
You’ve got your speaker wire, maybe the shield is damaged, or you need to join two sections of a headphone cable temporarily. You strip back the outer jacket, see the thin conductors or shielding, and think, ‘Perfect, a wrap of this stuff will hold it all together and keep it safe.’ It’s the go-to for quick fixes on household wiring, appliance cords, and yes, even car stereos in a pinch.
The adhesive sticks reasonably well, and it provides a decent barrier against dust and moisture, at least for a while. Plus, who hasn’t seen it used on countless generic extension cords or charging cables? It feels like the default solution for any wire-related problem when you’re not looking for something super professional.
My own reasoning back in the day was pretty straightforward: it insulates, it holds things together, and it’s readily available. I remember a particularly frustrating afternoon trying to repair an old set of powered computer speakers. The power cord had a nasty nick near the plug, and I needed to get them working so I could actually hear the music I was trying to mix.
I didn’t have any specialized splicing tape or heat shrink tubing handy, but I did have a roll of that ubiquitous black tape. I carefully wrapped it around the damaged section, pulling it taut. It looked… functional.
The wires were covered, and it felt secure enough. For a few weeks, it worked fine. But then, the crackling started.
And the intermittent signal. It was a stark reminder that ‘functional’ and ‘reliable’ are two very different things, especially when dealing with sensitive audio signals.
The Not-So-Pretty Reality: Where Electrical Tape Falls Short
Here’s the blunt truth: while electrical tape can be used on audio wires in a desperate, temporary situation, it’s almost never the right tool for the job, especially for anything permanent or important. The biggest issue is that standard electrical tape isn’t designed for the flexing, bending, and potential temperature fluctuations that audio cables often endure.
Over time, the adhesive breaks down. It gets sticky, gummy, and can actually start to ooze, leaving a mess on your cables and potentially attracting dirt and debris. This sticky residue can be a nightmare to clean up later. Furthermore, the tape itself can become brittle, crack, and lose its insulating properties, especially if exposed to sunlight or significant temperature changes.
I’ve pulled old electrical tape off cables that looked like they’d been attacked by a particularly aggressive squirrel – all dried out, cracked, and ready to fall apart. (See Also: Can I Use Electrical Tape To Connect Wires )
Another major problem is that electrical tape doesn’t offer much mechanical strength. If you’re trying to secure a splice or reinforce a strain-relief point, electrical tape alone is going to fail. It doesn’t have the tensile strength to prevent wires from pulling apart under tension.
This is where things get really dicey for audio. A loose connection or a short circuit caused by a failed tape job isn’t just annoying; it can damage your equipment.
Imagine a speaker cable shorting out – you could fry your amplifier’s output stage. Or a signal cable failing intermittently, causing dropouts and noise. I once had a headphone cable, repaired with electrical tape, start to fail during a recording session.
The intermittent signal was maddening, and I spent more time troubleshooting the cable than actually recording. It was a costly lesson in using the right materials, even for seemingly minor repairs.
The common advice you’ll find is that it’s a temporary fix at best, and that’s a generous assessment. It’s more like a band-aid on a bullet wound. It might stop the immediate bleeding, but it doesn’t address the underlying problem and can often make things worse in the long run.
What to Look for: Better Alternatives for Audio Cable Repair
So, if electrical tape is a no-go, what’s the better way to handle those frayed wires and broken connections on your audio cables? You need materials that are specifically designed for flexible, durable, and electrically sound connections. The go-to for most professional and serious DIY audio work is heat-shrink tubing. This stuff is fantastic. You slip a piece of the tubing over the wire or splice, apply heat (from a heat gun, or even a lighter in a pinch, though be careful!), and it shrinks down tightly around the connection, creating a solid, insulated, and mechanically strong seal. It’s flexible, durable, and looks incredibly clean. You can even get it in different colors, which is surprisingly useful for labeling cables.
Another excellent option, especially for more significant repairs or building custom cables, is specialized audio cable splicing tape or high-quality vinyl splicing tape. These are designed to maintain their adhesion and insulating properties under various conditions. They’re often more flexible and less prone to drying out than standard electrical tape. For joining wires that will be inside a connector or under a housing, things like self-amalgamating silicone tape are also superior. It bonds to itself to create a solid, watertight, and electrically insulating layer without any sticky residue. It’s a bit more fiddly to apply than electrical tape, but the result is far more reliable.
For speaker cables, especially thicker ones, you might even consider using a solid cable tie or a dedicated strain-relief grommet after making a proper splice. The goal is to prevent the wire from being pulled at the connection point, which is often where failures begin. I invested in a decent heat gun and a variety pack of heat shrink tubing a few years back, and it’s paid for itself tenfold in saved cables and reduced frustration.
It feels professional, it works, and it lasts. It’s a small cost for peace of mind and reliable audio connections. When you’re dealing with anything from your turntable’s phono cables to your studio monitor interconnects, using the right materials makes a world of difference in sound quality and longevity.
My Own Horrible Mistake: The Great Cable Fiasco
Let me tell you about the time I tried to ‘upgrade’ some old, but perfectly functional, RCA interconnects. They were decent cables, nothing high-end, but they did the job. One of the connectors was a bit loose, so I figured, ‘Easy fix!’
I carefully cut away the outer jacket, exposed the two signal wires and the shield, and decided to reinforce them with electrical tape before re-soldering the connector. My thinking was that the tape would provide a nice, firm base for the solder joint and prevent any stray strands from causing issues. It seemed so logical at the time. I wrapped it tightly, then proceeded to reattach the RCA connector.
The sound was… weird. Thin.
Lacking any bass. I spent hours convinced my soldering was bad, or I’d somehow damaged the cable itself. (See Also: Can Electrica Tape Catch On Fire )
I re-soldered, I replaced the connector, I even tried a different cable. Nothing.
Finally, in sheer frustration, I started to unwrap the electrical tape. And that’s when I saw it.
The tape’s adhesive, heated by the soldering iron (even though I thought I was being careful), had seeped into the delicate strands of the signal wires. It had basically created a gummy, semi-conductive mess that was choking the signal. The shield was also compromised in a way that was creating micro-shorts and impedance issues.
It wasn’t just a bad connection; the tape itself had actively degraded the cable’s performance. It was a humbling moment, a vivid reminder that sometimes the simplest-looking solutions are the most deceptive. That experience solidified my stance: electrical tape is for electricians tidying up junction boxes, not for audio enthusiasts trying to preserve signal integrity.
The sheer amount of time and money I wasted trying to fix what I broke with that damn tape was infuriating.
A Contrarian View: When maybe It’s Okay?
Okay, I know I’ve been pretty hard on electrical tape for audio use. And for 95% of situations, I stand by that.
However, there’s a tiny, almost insignificant corner case where it might not be the absolute worst thing in the world. This is where I go against the grain a bit.
Everyone will tell you to never use it. Period. But what if you have a non-important, low-signal cable, like a simple mono TS instrument cable for a keyboard that’s just for practicing at home, and the outer jacket has a small tear?
And you don’t have anything else? In that very specific scenario, a neat, clean wrap of high-quality electrical tape, applied without excessive stretching, might keep the inner conductors from being exposed to dust and minor abrasion for a short while. It won’t improve the sound, it won’t make it more durable, and it will likely fail eventually. But if you absolutely must keep playing that keyboard for an hour and have no other option, and the tear is minor and away from the connectors?
I’m talking about something like a ProCo Sound Stage Series cable that’s seen better days, where the shielding is mostly intact but the outer jacket has a small abrasion. You’re not plugging this into a high-gain guitar amp that will reveal every nuance of noise.
You’re not connecting it to a mixing desk in a pro studio. It’s purely utilitarian, for personal use, and the risk of signal degradation or damage to other gear is minimal. Even then, I’d be reaching for a bit of fabric tape or even some duct tape first if I had it, just because their adhesive properties can sometimes be more forgiving.
But if all you have is electrical tape, and the damage is superficial on a non-important cable, a very careful application might get you through a very short period. It’s like using a paperclip to hold your car’s exhaust pipe on – it’s a terrible idea, it’s going to fall off, but if you’re a mile from a garage and it just fell off, it might get you there. The key is understanding its limitations and knowing when it’s truly a last resort on something you don’t care about.
Practical Tips & Common Mistakes to Avoid
Let’s get down to brass tacks. If you’re tempted to use electrical tape, or if you find yourself in a situation where it seems like the only option, here are some practical tips to minimize the damage, and more importantly, common mistakes to avoid. (See Also: Can I Substitute Duct Tape For Electrical Tape )
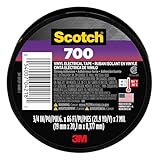
First, always use the best quality electrical tape you can find. Cheaper brands dry out faster, have weaker adhesives, and are generally less forgiving. Brands like 3M Super 33+ or 3M Temflex are generally considered the gold standard for a reason.
They offer better flexibility and adhesion than bargain-bin options. When applying, don’t stretch it too thin. Excessive stretching can weaken the tape and make the adhesive more prone to failure. Apply it with consistent tension, overlapping each layer by about half the width of the tape to create a secure, smooth barrier.
Aim for a clean, smooth finish.
Second, and this is important, consider what you’re actually trying to achieve. If you need to insulate exposed conductors in a permanent splice, electrical tape is a poor choice for long-term reliability. If you’re trying to reinforce a strain-relief point, it will fail.
The most common mistake I see people make is using electrical tape as a substitute for proper connectors, solder joints, or solid cable housing. It’s seen as a quick fix, but it’s often a precursor to a bigger problem. Another mistake is using it on high-end or important equipment.
The potential for signal degradation, noise introduction, or even equipment damage is far too high to risk it on your primary recording setup or your prized vintage amplifier. Always think about the signal path and the potential consequences of a failed repair.
Here’s a quick table of common repair scenarios and my verdict on using electrical tape:
| Scenario | Verdict on Electrical Tape | Why/Better Alternative |
|---|---|---|
| Temporary fix on a non-important, low-volume cable (e.g., practice keyboard cable) | Last Resort – Maybe | Minimal risk, but will fail. Use heat shrink or dedicated splicing tape if possible. |
| Permanent splice on speaker wire or interconnects | No | Adhesive degrades, poor mechanical strength. Use WBT connectors, Neutrik connectors, or solid soldering with heat shrink. |
| Reinforcing strain relief on a guitar or mic cable | No | Will not hold under tension. Use cable ties, heat shrink, or dedicated strain relief boots. |
| Insulating a minor nick in a power cord | Temporary Emergency Only | Risk of shock or fire. Use proper electrical tape rated for the voltage, or ideally replace the cord. |
| Securing a loose connector housing | No | Will become sticky and unreliable. Use epoxy, hot glue (carefully), or replace the connector. |
The general rule of thumb is this: if the repair is something you want to last, or if the cable is connected to something valuable, steer clear of electrical tape. Invest a few bucks in the right materials. It’ll save you headaches, money, and potential equipment damage down the line. Even for simple headphone cable repairs, a tiny bit of heat shrink and some solder will make a repair that lasts for years, not weeks.
What Is the Best Tape for Audio Cables?
The best tape for audio cables is usually not tape at all, but rather heat-shrink tubing for insulation and protection of splices. For securing cable bundles or reinforcing strain relief, strong cable ties or velcro straps are excellent. If you absolutely need tape for insulation, look for high-quality vinyl splicing tape specifically designed for electrical insulation and flexibility, or self-amalgamating silicone tape. Avoid standard cloth or duct tape for signal-carrying wires.
Can You Use Electrical Tape on Speaker Wire?
You can use electrical tape on speaker wire as a very temporary, emergency measure to cover exposed conductors, but it’s strongly advised against for any permanent or long-term solution. Electrical tape’s adhesive breaks down, it lacks mechanical strength, and it doesn’t offer the best long-term insulation for the flexing and potential environmental stresses speaker wires endure. Better options include proper wire connectors, soldering with heat shrink tubing, or dedicated speaker wire splices.
Final Verdict
So, to bring it all back: can electrical tape be used on audio wires? Technically, yes, in a dire emergency on something you don’t care much about. But should it be? Almost always, no. My personal journey, filled with crackling speakers and dead audio channels, has taught me that the few dollars saved on proper materials are dwarfed by the cost of troubleshooting, potential equipment damage, and the sheer frustration of a failed repair. The common advice is often right, and in this case, it’s pointing you towards better, more reliable solutions.
For anything more than a fleeting, non-important fix, reach for heat-shrink tubing, proper splicing tape, or even consider replacing the cable entirely if it’s heavily damaged. Your audio gear, and your sanity, will thank you for it. Don’t let a cheap roll of tape become the weakest link in your sound chain.
What’s the worst cable repair disaster you’ve ever experienced?