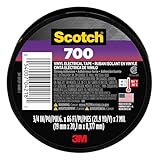
So, you’ve got a Game Boy Color that’s seen better days, maybe a wire’s come loose, and you’re staring at your toolbox, wondering, ‘Can I electrical tape wires in Game Boy Color?’ I’ve been there. Staring at a perfectly good, albeit dusty, handheld, contemplating the quickest fix. Before you reach for that roll of black goo-tape, let me tell you, it’s a question that deserves a more nuanced answer than a simple yes or no. It’s about understanding the risks and the alternatives before you potentially turn a minor repair into a bigger headache.
I remember the first time I had to solder a tiny wire back onto a motherboard – for a different console, mind you, but the panic was the same. Quick fixes seemed so tempting. Electrical tape feels like the ultimate quick fix, right? It’s cheap, readily available, and doesn’t require a soldering iron. But when it comes to delicate electronics like your beloved GBC, speed and price aren’t always the best guides.
Why Electrical Tape Seems Like a Good Idea (but Usually Isn’t)
Look, I get it. The lure of electrical tape is strong. It’s flexible, it’s insulating, and it sticks. For a quick fix on a loose wire that’s just flopping around, it seems like the obvious choice. You can twist the wire back in place, slap some tape on it, and boom – you’re back in business, right? I’ve definitely used it in a pinch for, say, holding a battery cover on something that’s lost its clip. It’s got its place in the general DIY world.
But here’s the blunt truth: for internal electronics, especially in a vintage handheld like the Game Boy Color, electrical tape is generally a bad idea. Why? For starters, the adhesive on electrical tape isn’t designed for long-term, high-reliability use inside sensitive electronics. Over time, it can degrade, become brittle, or even melt slightly from the minimal heat generated by the console’s components. This can leave a sticky, conductive residue behind, which is the opposite of what you want. Plus, it’s not mechanically secure. Those little wires inside a GBC are often connected by tiny solder joints. Tape doesn’t provide any structural support to that connection.
I once tried to jury-rig a power button connection on an old portable CD player with electrical tape. It worked for about two days. Then, the tape adhesive started oozing, making the button sticky and unreliable.
I ended up having to clean off this gooey mess before I could even attempt a proper repair. It was a frustrating waste of time and honestly, it made the final repair more difficult. The common advice to just ‘use electrical tape for a quick fix’ needs a big asterisk when you’re dealing with anything more complex than, say, securing a loose battery compartment in a toy.
The risk of it failing, or worse, causing a short circuit, is just too high for something as beloved and irreplaceable as your Game Boy Color. (See Also: Can I Use Electrical Tape To Connect Wires )
What You’re Actually Dealing with Inside a Game Boy Color
When you open up a Game Boy Color, you’re not met with thick, heavy gauge wires like you might see in home wiring. Instead, you’re dealing with very fine, delicate wires, often referred to as ‘ribbon cables’ or single-strand wires soldered onto PCBs (Printed Circuit Boards). These connections are precise and easily damaged. The solder joints themselves are tiny points of metal that create the electrical pathway. If one of these breaks, it’s not just a loose connection; it’s a broken link in a very intricate chain.
The power and connection points are particularly sensitive. A loose wire in the power delivery system, for example, could cause intermittent power or prevent the console from turning on at all. If a wire connected to the cartridge slot comes loose, your GBC might not recognize games. These aren’t situations where a bit of sticky tape can reliably bridge a gap or hold things in place. Think of it like trying to mend a broken watch spring with chewing gum – it might hold for a moment, but it’s not the right tool for the job and it’s likely to fail spectacularly.
The real issue is conductivity. While electrical tape itself is an insulator, the adhesive underneath it is often not. If the tape shifts or the adhesive oozes out, it can come into contact with adjacent wires or solder points. This can create unintended pathways for electricity, leading to short circuits. A short circuit can fry components, rendering your Game Boy Color permanently dead. I’ve seen people accidentally bridge connections with stray strands of wire or even conductive dust, and it’s never a good outcome. The goal is clean, isolated connections, and tape is the enemy of that.
The Right Way to Fix Loose Wires: Soldering and Heat Shrink
Okay, so if electrical tape is out, what’s the proper fix? For internal Game Boy Color repairs involving loose wires, soldering is almost always the answer. Now, before you freak out and think you need to be a soldering guru, it’s not as intimidating as it sounds, especially for basic wire reattachment. You’ll need a decent, low-wattage soldering iron (something around 25-40 watts is plenty for this kind of work), some solder (a thin gauge is best), flux, and ideally, a desoldering braid or pump for cleaning up any mistakes.
The process usually involves carefully stripping a tiny bit of insulation from the end of the wire, tinning it (applying a thin layer of solder to the wire itself), and then carefully soldering it back onto its original spot on the circuit board. If the original solder pad has lifted, you might need to find an alternative nearby connection point, which is where things get a bit trickier and might require more advanced knowledge. This is why identifying the exact point of failure is so important.
After soldering, the real hero for securing and insulating the connection is heat shrink tubing. This is a plastic sleeve that you slip over the wire and the soldered joint before you solder. Once the solder is done and cooled, you use a heat gun or even the side of your soldering iron (carefully!) to shrink the tubing. It tightens around the wire and connection, providing excellent insulation and mechanical strain relief. It looks professional, it’s durable, and it’s the standard for a reason. I’ve invested probably $180 across a few soldering kits and supplies over the years, and it’s paid for itself a hundred times over in repairs. (See Also: Can Electrica Tape Catch On Fire )
| Method | Pros | Cons | Verdict for GBC Wires |
|---|---|---|---|
| Electrical Tape | Cheap, readily available, easy to apply | Adhesive degrades, can melt/ooze, not mechanically secure, risk of short circuits | Avoid! High risk, low reliability. |
| Soldering + Heat Shrink | Permanent, secure, professional finish, excellent insulation and strain relief | Requires tools and some skill, can be intimidating for beginners | Recommended. The best long-term solution. |
| Other Specialty Tapes (e.g., Kapton) | High-temperature resistance, good insulation | Can still be fiddly to apply, adhesive may still degrade over time, less mechanically supportive than solder | Use with caution. Better than standard electrical tape, but not a substitute for proper soldering for important connections. |
When a Quick Fix Might seem Okay (and Why I Still Say No)
Let’s be honest, sometimes you’re in a situation where you really want to use electrical tape. Maybe you’re on vacation, miles from any decent electronics store, and a wire comes loose on your Game Boy Color just as you’re about to embark on a long train journey. The urge to just wrap it up and keep playing is almost overwhelming. I’ve been there with other devices, and in truly desperate, temporary situations, I might have used electrical tape to prevent something from shorting out immediately, like covering exposed wire ends before I could get them properly insulated. But I always made a mental note – or a physical one – to fix it properly as soon as humanly possible.
The key here is “temporary” and “preventing immediate disaster.” For a Game Boy Color, where the wires are small and tightly packed, even a temporary fix with electrical tape carries a significant risk. The tape can snag on other components, the adhesive can spread, and the insulation it provides is not as reliable as you might think. It’s like putting a band-aid on a deep cut; it might stop the bleeding for a minute, but it’s not addressing the underlying problem and could even make it worse by trapping dirt or bacteria.
My contrarian take? Everyone says electrical tape is the go-to for quick fixes. I disagree. For anything electronic that you actually care about, it’s often a shortcut that leads to more trouble than it’s worth. The cost of a basic soldering iron and some heat shrink tubing is minimal compared to the potential cost of replacing a Game Boy Color or other delicate electronics that you’ve damaged with a makeshift repair. Think about the time you’ll spend troubleshooting the problems caused by the tape later – it’s usually far more than the time it would have taken to do it right the first time.
Common Mistakes When Repairing Gbc Wires
The biggest mistake, obviously, is reaching for the electrical tape when a more permanent and reliable solution is needed. But even when people do attempt proper repairs, like soldering, there are pitfalls. One common error is using too much heat. The circuit boards in a Game Boy Color are not industrial-grade. Overheating a solder joint can lift the pad right off the board, which is a much harder fix. You want to heat the joint itself, not the components around it, and apply the solder quickly.
Another mistake is poor solder joint quality. A good solder joint looks shiny and smooth, like a tiny volcano. A bad one is dull, lumpy, or looks like a ball of solder. These ‘cold joints’ are unreliable and can cause intermittent issues. They might work for a while, but they’re prone to failing. People also sometimes forget to clean the area before working. Dust, grime, or old residue on the circuit board can interfere with solder adhesion and cause problems down the line. A quick clean with isopropyl alcohol (90% or higher) and a cotton swab is often a good first step.
Finally, there’s the issue of wire strain. Even if you solder a wire back on perfectly, if it’s left to dangle or is pulled on, the new solder joint will eventually break. This is where heat shrink tubing is invaluable, as it provides mechanical support. Without it, you’re basically relying solely on the solder point, which is often not enough for wires that might experience even the slightest movement. I’ve seen repairs fail because someone forgot to secure the wire properly after soldering, and the stress just ripped it right off the board again. (See Also: Can I Substitute Duct Tape For Electrical Tape )
Alternatives to Soldering (for the Truly Terrified)
Okay, so soldering scares you. I get it. The idea of melting metal near your precious Game Boy Color can be nerve-wracking. Are there any other options if you absolutely cannot or will not solder? Well, they exist, but they come with their own caveats, and none are as solid as a proper solder joint.
One option is conductive glue or paste. This is basically glue with tiny conductive particles mixed in. You can use it to bridge small gaps or reattach wires. However, it’s often not as strong mechanically as solder, and its conductivity can be variable. It’s also prone to drying out or degrading over time. For a Game Boy Color, I’d be very hesitant to rely on this for anything important like power or ribbon cable connections. It might work for a very minor signal wire, but even then, I’d be watching it closely.
Another method, though less common for internal GBC repairs, involves specialized connectors or crimp-style connectors. These are usually for thicker wires and aren’t really practical for the tiny connections inside a handheld. You might see them used in larger electronics or external cabling. For the Game Boy Color, the internal wiring is just too fine for most of these solutions.
There are also things like ‘solder-like’ epoxies. These cure hard and are conductive. They can be an option for reinforcing a weak solder joint or for specific repairs where a wire has completely broken off its pad. However, they can be messy, and once applied, they are very difficult to remove if you need to rework the area. My advice? Bite the bullet and learn to solder. It’s a skill that will serve you well, and for Game Boy Color repairs, it’s truly the best way forward. Honestly, I bought a cheap soldering practice kit for about $30 and spent an afternoon learning the basics. It wasn’t that bad.
Final Verdict
So, to circle back to the original question: can I electrical tape wires in Game Boy Color? The short, blunt answer is: you can, but you really shouldn’t. The risks of damaging your console with conductive adhesive oozing, short circuits, or a failed repair are just too high. Electrical tape is a temporary fix for something like securing a battery cover, not for the delicate internal circuitry of a handheld console.
If you’re facing a loose wire in your Game Boy Color, the best course of action is to embrace the proper repair methods. Learning to solder, while it might seem daunting, is a valuable skill that offers reliable, long-term solutions. Investing in a basic soldering iron and some heat shrink tubing will likely save you money and heartache in the long run compared to attempting a shoddy fix that could fry your console. It’s about respecting the electronics and giving them the care they deserve.
Ultimately, your Game Boy Color is a piece of history and a source of countless hours of fun. Treating its internal components with the right tools and techniques will make sure it keeps running for years to come. If soldering feels completely out of reach, consider looking for a reputable retro console repair shop in your area. They’ll have the expertise and tools to get the job done right, so you can get back to playing without worrying about your tape-job failing.