I remember the first time I tried to hang a heavy mirror in my old apartment. Armed with what I thought were the latest and greatest wall anchors – those plastic doodads that promise the world – I confidently hammered them in. Fast forward six months, and that mirror needed to move. Pulling those anchors out felt like trying to evict a tenant who refused to leave, leaving behind gaping holes and frustration. It made me seriously question: are wall claws anchors easy to remove?
The promise of easy installation often masks the reality of removal, and believe me, I’ve learned this the hard way through countless DIY projects gone slightly sideways. Many anchors are designed to bite and hold, and that’s great for security, but not so much when you’re packing up or rearranging your living space.
The Big Lie: ‘easy to Install’ vs. ‘easy to Remove’
Look, most wall anchors are sold on the back of how simple they are to put in. A few taps with a hammer, maybe a twist of a screwdriver, and boom – you’ve got a secure spot for your shelf, your TV mount, or that ridiculously heavy picture frame you impulse-bought. And yeah, for the most part, they are easy to install. The problem isn’t getting them in; it’s getting them out without turning your drywall into Swiss cheese. So, are wall claws anchors easy to remove? The answer, like most things in DIY, is ‘it depends,’ and often, ‘not as easy as you’d think.’
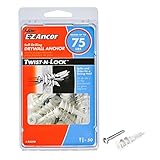
When we talk about wall claws, we’re often talking about self-drilling anchors. These little guys screw directly into the drywall.
They have a pointed tip and threads that grab onto the gypsum. The idea is that they’re supposed to be quick and efficient. And they are, for installation. But when it comes to removal, those same threads that grip the drywall can become a real pain.
You try to unscrew them, and sometimes they just spin, refusing to budge. Other times, they come out, but they tear a bigger chunk of drywall out with them than you anticipated. I once spent a solid twenty minutes trying to get a single self-drilling anchor out of a wall because it had somehow lodged itself in there at an angle.
It felt less like DIY and more like a wrestling match with my own wall.
The core issue is the friction and the material they’re gripping. Drywall is basically compressed gypsum plaster sandwiched between paper. It’s not exactly the most solid material. When you insert a self-drilling anchor, the threads create stress points. If you try to pull it straight out, those threads can strip the paper and gypsum around them, making the hole bigger and the anchor looser, which ironically makes it harder to get a good grip to unscrew it. It’s a bit of a catch-22. I’ve found that plastic anchors, while sometimes needing a pilot hole drilled first, can sometimes be easier to remove because they don’t typically have aggressive screw threads digging into the drywall.
Then there are the toggle bolts and molly bolts. These are a different beast entirely. They’re designed for heavier loads and involve a mechanism that expands behind the wall. Installing them is usually more involved – you need a bigger hole, and you have to maneuver the toggle.
Removing them is also a different process. Often, you have to push the bolt through and then retrieve the toggle from the other side, or cut the bolt off flush. It’s definitely not a ‘yank it out’ situation.
So, while ‘wall claws’ often refers to the self-drilling kind, it’s worth remembering the broader category of anchors and how their removal varies wildly. The real trick is choosing an anchor that’s appropriate for the load and, importantly, one you’re confident you can deal with later.
What to Look for in an Anchor (if You Plan on Moving Later)
If you’re anything like me, you like to rearrange your living space or maybe you’re renting and know you’ll have to patch things up before you move out. In those scenarios, the question ‘are wall claws anchors easy to remove?’ becomes most important. You don’t want to leave a disaster zone behind. So, what should you be looking for? Forget the fancy packaging and the bold claims of ‘super strong hold.’ Think about the mechanism of the anchor.
For sheer ease of removal, my personal go-to, especially for lighter to medium loads where I know I might have to patch, are the simple plastic expansion anchors that require a pilot hole. You drill a hole of the correct size, tap the anchor in, and screw in your screw. When it’s time to remove, you just unscrew the screw, and the plastic anchor usually comes out with it, or at worst, you can wiggle it out with a pair of pliers without much drama. The hole left is generally clean and easy to spackle over. (See Also: Can Concrete Anchors Be Used In Brick )
I used these extensively when I was decorating my daughter’s room, moving shelves and picture rails around every few months. The process was always: unscrew, pull out anchor, spackle, sand, paint.
Done.
Another type that can be manageable is the “strap toggle” or “butterfly anchor.” These have a plastic wing that folds up to go through the hole and then springs open behind the drywall. You often just unscrew the bolt, and then you can pull the strap back through. The hole left is relatively small, just the size of the bolt, and easy to patch.
They hold quite a bit of weight too, which is a bonus. I put up a fairly substantial bookshelf with these in my home office, and when I decided to sell the house, I was able to disassemble it and remove the anchors without leaving any major scars on the walls. It took maybe five minutes per anchor.
What to avoid if removal is a concern? The aggressive self-drilling anchors, especially the metal ones with sharp, deep threads. They are fantastic for a permanent installation, but their grip on the drywall can be tenacious. Also, the large, heavy-duty toggle bolts that have a separate metal toggle piece.
While they offer incredible holding power for very heavy items like large TVs or cabinets, removing them often involves either cutting the bolt flush or trying to retrieve a piece of metal from behind the wall, which can be fiddly and create a mess. I learned this lesson the hard way when I tried to remove a molly bolt that had been installed for years.
It fought me tooth and nail, and I ended up having to cut the head off the bolt and then push the whole assembly into the wall cavity. Not ideal for someone who likes clean removals.
Consider the material of the anchor too. Plastic is generally more forgiving than metal when it comes to removal from drywall. Metal anchors, especially those with fine threads, can sometimes seize up or strip the surrounding drywall more aggressively. It’s about finding that balance between holding power and the ability to undo your work cleanly when you need to.
Common Mistakes That Make Removal a Nightmare
You asked if wall claws anchors are easy to remove. Well, let me tell you, the way people try to remove them is often the biggest mistake. It’s not just about the anchor itself; it’s about the technique – or lack thereof. I’ve seen people just yank, twist violently, or try to pry them out with a screwdriver, all of which are recipes for disaster. Let’s talk about what not to do.
The most common blunder is the brute force approach. You’ve installed an anchor, and it’s being stubborn. Your first instinct might be to just give it hell.
You grab a pair of pliers and yank, or you put a screwdriver in the screw head and twist like you’re trying to start a lawnmower. This is where you usually end up with a ripped-out chunk of drywall, a mangled anchor, and a hole twice the size it needs to be.
The anchor might come out, but the wall surrounding it looks like it lost a fight. I’ve definitely been guilty of this when I was younger and more impatient. Trying to hang a speaker system, one of the anchors just wouldn’t budge. (See Also: Can Cords Be Used To Make Anchors Climbing )
I ended up ripping a section of drywall about the size of my fist out. Took forever to patch properly.
Another mistake is not using the right tool. If it’s a screw-in anchor, use a screwdriver or drill that fits the screw head properly. Don’t strip the head. If you’ve stripped the head, you’re in a world of pain. For anchors that need to be pulled out, using a claw hammer to gently lever them out is sometimes an option, but you have to be careful not to gouge the wall. A small pry bar can also work, again, with extreme caution and maybe a piece of cardboard or a putty knife behind it to protect the wall surface. Just jamming any old tool in there is a bad idea.
Over-tightening during installation is another sneaky problem. When you screw in a self-drilling anchor, or screw into a plastic anchor, you can over-tighten it. This can strip the threads in the drywall or the plastic anchor itself. When this happens, the anchor just spins freely. It’s not gripping anything anymore, but it’s also not coming out because the threads are basically damaged. You’re left with a spinning, useless anchor embedded in the wall. The only real solution then is often to try and cut it flush with the wall and then spackle over it, which isn’t ideal.
Finally, trying to remove an anchor that’s been painted over multiple times. The paint acts like a cement, sealing the anchor to the surrounding wall. You’ll try to unscrew it, and the paint will crack and peel, but the anchor won’t move. You might need to score around the edge of the anchor with a utility knife to break that paint seal before you can even attempt to unscrew it. It’s tedious, and you still risk damaging the wall. So, patience and the right tools are key. Don’t be in a rush, and always think about what you’ll do if it doesn’t come out easily.
| Anchor Type | Ease of Removal (Opinion) | Notes |
|---|---|---|
| Self-Drilling (Plastic) | Moderate | Can be easy if they don’t strip, but sometimes pull out drywall. |
| Self-Drilling (Metal) | Difficult | Threads grip hard; often leave larger holes or spin. |
| Plastic Expansion (with pilot hole) | Easy | Generally pull out cleanly with the screw or wiggle out. |
| Toggle Bolts (Molly Bolts) | Difficult/Messy | Often require cutting bolt or pushing through for retrieval. |
| Strap Toggles | Moderately Easy | Can usually be pulled back through the hole. |
| Heavy Duty Screw-in (e.g., E-Z Ancor) | Moderate | Similar to plastic expansion, but can sometimes be tighter. |
Real-World Use Cases: When Removal Matters
I’ve been in situations where the question of ‘are wall claws anchors easy to remove?’ wasn’t just about tidiness; it was about practicality and even saving money. Think about renters, for instance. You hang that heavy flat-screen TV, maybe a few shelves, and then your lease is up. You can’t just leave a wall full of holes and mangled anchors. Landlords notice. And fixing significant drywall damage can cost you your security deposit, and then some. So, for renters, choosing anchors that are designed for easier removal is not just a preference; it’s a necessity.
I had a friend who rented a nice apartment and wanted to hang a large, custom-built entertainment center. The landlord was pretty strict about modifications. We opted for a system that used strap toggles. When it was time to move out, we carefully disassembled the unit, unscrewed the bolts, and pulled the strap anchors through. The holes were minimal, easily patched, and you could barely tell anything had been there. That saved her a ton of hassle and probably a few hundred bucks on repairs. It was a textbook example of thinking ahead about removal.
Then there’s the homeowner who likes to constantly refresh their decor. I’m one of those people. I’ll hang a gallery wall, live with it for a year, then decide I want something completely different. If I’ve used anchors that are a nightmare to remove, I’ll often delay the change because the thought of patching up the resulting damage is just too much. It’s easier to live with something I’m tired of than face the demolition. That’s why I’ve gravitated towards anchors that promise a cleaner exit. It makes redecorating less of a chore and more of an enjoyable process.
Consider a scenario where you’re mounting something temporarily. Maybe you’re hosting a party and need to hang some decorations, or you’re setting up for a holiday display. You don’t want to commit to a permanent fixture that’s a pain to take down. For these situations, anchors that can be removed with minimal fuss are gold. I’ve used those small, self-adhesive hooks for temporary things, but for anything that needs actual anchoring, I look for the ones that unscrew easily or can be pulled out without collateral damage. It saves you time and effort in the long run, and prevents those little annoyances that can build up in any DIY project.
Ultimately, the ‘real-world use cases’ boil down to whether your installation is intended to be permanent or temporary, and your tolerance for wall repair. If you’re building a custom built-in bookshelf that will stay with the house, you might prioritize absolute holding power and not worry too much about removal. But if you’re hanging a picture frame, a shelf, or anything that might move, the ease of removal becomes a significant factor. It’s about planning for the future, even if that future is just a few months away.
Practical Tips for Easier Anchor Removal
So, you’ve installed your anchors, and now it’s time for the dreaded removal. Whether you’re dealing with wall claws or any other type of anchor, a little bit of technique can save you a world of pain and drywall patching. The key is to be patient and work with the anchor, not against it. Let’s get into some practical tips that have saved my walls (and my sanity) more times than I can count.
First off, always, always try to unscrew it. If it’s a screw-in anchor or a screw that goes into an anchor, use the correct screwdriver.
If the screw head is stripped, don’t despair immediately. You can try using a rubber band between the screwdriver and the screw head; the rubber can sometimes give the screwdriver enough grip to turn a slightly damaged screw. If that fails, you might need a screw extractor kit, which is a specialized tool for removing stripped screws. For anchors themselves, if they have a protruding head or flange, you might be able to get a pair of pliers on it and gently twist and pull. (See Also: Can Anchors In Your Shoulder Break )
But again, gentle is the keyword. Aggressive yanking is your enemy.
If you have a plastic anchor that’s proving stubborn, try wiggling it side-to-side gently while pulling. Sometimes, just slightly shifting its angle can break the friction holding it in place. For self-drilling anchors that are spinning uselessly, sometimes pushing in slightly while you try to unscrew can help re-engage any remaining threads. It sounds counterintuitive, but I’ve had success with this. It’s like you’re trying to give it something to grip onto as you pull it out.
For anchors that you absolutely cannot unscrew or pull out cleanly, the next step is often to cut them flush with the wall. You can use a small hacksaw blade (just the blade, not the whole saw) or a multi-tool with a flush-cut blade. Carefully saw the anchor off at the surface of the drywall. This leaves the shank of the anchor embedded in the wall, but at least it’s not protruding. You can then spackle directly over the flush-cut anchor, or fill the hole around it. It’s not the neatest solution, but it’s better than leaving a jagged piece sticking out.
If you’re dealing with the more complex toggle bolts, like molly bolts, where the toggle sits behind the wall, removal can be trickier. Sometimes, you can push the bolt through the wall and retrieve the toggle from the other side if there’s access (like in a closet or attic space). If not, you might have to cut the bolt flush and accept that the toggle is now loose in the wall cavity. This is why choosing these types of anchors for non-permanent installations is generally not recommended unless you know how to deal with them.
Finally, after the anchor is out (or cut flush), you’ll have a hole. For small holes, joint compound (spackle) is your friend. For larger ones, you might need a drywall patch kit. Apply the compound, let it dry, sand it smooth, and then prime and paint. A smooth finish is the ultimate sign that the anchor removal process was successful, or at least that you managed to cover up the evidence effectively. Taking your time with the patching is just as important as taking your time with the removal itself.
Faq: Your Burning Questions About Anchor Removal
Are Wall Claws Anchors Easy to Remove From Plaster?
Removing wall claws or any anchor from plaster is generally more difficult and can cause more damage than from drywall. Plaster is often harder and more brittle, and its keys (the plaster that goes through the lath) can break off easily. Self-drilling anchors, especially metal ones, can strip the plaster around them very aggressively. If you must remove them, score around the anchor first, try to gently unscrew, and be prepared for significant patching. Often, a smaller hole is created with a pilot hole anchor which is easier to deal with.
Can You Remove Wall Anchors Without Damaging the Wall?
It’s possible to remove some wall anchors with minimal damage, but it’s not guaranteed, especially with aggressive self-drilling or older anchors. Plastic expansion anchors that require a pilot hole are your best bet for damage-free removal. If you’re using self-drilling anchors, be extremely careful, use the correct tools, and try to ease them out. For anything more stubborn, expect at least a small amount of patching to be necessary.
What’s the Best Way to Remove a Stripped Anchor Screw?
If the screw head is stripped, try using a rubber band between the screwdriver and the screw to gain extra grip. If that fails, a screw extractor kit is your best bet. These kits have specialized bits that bite into the stripped screw head and allow you to unscrew it. If all else fails, you might have to carefully cut the screw head off with a rotary tool or a Dremel, and then deal with the anchor itself separately, potentially cutting it flush with the wall.
Do Wall Anchors Leave Permanent Holes?
Yes, all wall anchors will leave a hole when removed. The size and severity of the hole depend on the type of anchor, how it was installed, and how it’s removed. Simple plastic anchors leave small holes that are easily patched. Aggressive self-drilling or toggle bolts can leave larger or more complex damage that requires more significant repair. The goal of ‘easy removal’ is to minimize this damage, not eliminate it entirely.
How Do You Remove a Wall Anchor That Won’t Budge?
If an anchor won’t budge, don’t just keep yanking or forcing it, as this will likely cause more damage. Try applying a little penetrating oil around the edges if it’s a metal anchor, and let it sit for a while. Sometimes, gentle wiggling while unscrewing can help. If it spins freely, you might try pushing in slightly while unscrewing. For stubborn anchors, cutting them flush with the wall and then patching over is often the most practical, albeit less ideal, solution.
Final Verdict
So, the million-dollar question: are wall claws anchors easy to remove? The short answer is: some are, some aren’t, and often, the removal process requires more finesse than installation. My experience has taught me that while self-drilling anchors are quick to put in, they can be a real headache to get out cleanly. If you know you’ll be moving things around or are renting, lean towards anchors that require a pilot hole and offer a simpler removal process.
Don’t underestimate the power of patience and the right tools. Yanking and forcing will almost always lead to more drywall repair than you bargained for. It’s better to spend a few extra minutes carefully trying to unscrew or wiggle an anchor out than to spend hours patching a giant hole later. Always have spackle and a putty knife handy, just in case.
Ultimately, it’s about making informed choices at the hardware store. Read the packaging, consider your future needs, and don’t be afraid to try a less aggressive anchor if you anticipate needing to remove it down the line. Your future self will thank you for it, especially when it’s time to patch and paint.