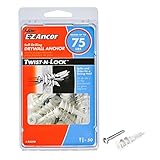
I stared at the wall, a frustrating mess of half-in, half-out metal and plastic. I’d thought it would be a simple job: hang a few shelves. Turns out, removing old anchors from brick is way more involved than it looks in those slick DIY videos. They just keep breaking off, leaving bits of themselves stuck deep in the mortar or, worse, the brick itself. It’s enough to make you want to just plaster over the whole darn thing.
So, can anchors be taken out of brick? The short answer is yes, but it’s rarely as easy as a quick twist and pull. If you’ve ever found yourself in this situation, you know the pain. We’re going to break down how to actually get them out without turning your wall into a crater.
The Stubborn Reality of Brick Anchors
Look, nobody wants to deal with stubborn anchors. You’ve probably seen those little plastic or metal bits you hammer into brick or concrete.
They’re meant to hold things up, right? And they do a bang-up job of it, sometimes too good. When it’s time to take them out, whether you’re redecorating, moving something, or just realizing that shelf was a terrible idea, they can be a real pain in the rear.
I once spent an entire Saturday afternoon trying to remove a single, old toggle bolt anchor from a garden wall. It snapped off, flush with the surface. I ended up having to chisel around it, making a mess I then had to repair.
That was a wake-up call that brute force often isn’t the answer.
Understanding how these anchors work is key to figuring out how to remove them. Most common brick anchors rely on friction or expansion. Plastic plugs, often called wall plugs or rawlplugs, are designed to wedge themselves into a pre-drilled hole.
When you screw something into them, the plastic expands slightly, gripping the sides of the hole. Metal anchors, like sleeve anchors or lag shields, work similarly but often expand more forcefully. Sleeve anchors have a metal sleeve that compresses and expands as you tighten the bolt, forcing it against the brick.
Lag shields are similar but often rely on the bolt itself to deform the metal shield to create friction. Then there are the toggle bolts, which have wings that fold out behind the brickwork, creating a very strong hold.
Removing these is a whole different ballgame, often requiring you to get the whole mechanism out.
The material of your brick and the mortar play a huge role too. Old, crumbly mortar is much easier to work with (or damage) than dense, modern mortar. Similarly, softer, older bricks can chip or crumble if you’re not careful, which is definitely not what you want. The hole drilled for the anchor is the main point of contact, and if that hole gets enlarged or compromised during removal, you might have trouble getting a new anchor to hold securely.
Sometimes, the anchor itself is just rusted or corroded, making it even harder to budge. You might be tempted to just grab a bigger hammer, but trust me, that’s usually where more problems start. Precision and the right tools are your friends here.
When thinking about how to get these out, consider the type of anchor and how it’s seated. A plastic plug that’s just jammed in there might be easier to grab and twist than a metal anchor that’s expanded significantly. The depth of the hole and the condition of the surrounding material are also big factors. If the anchor is really deep, or if the brick is already showing signs of wear and tear, you’ll need to be extra gentle. It’s a balance between applying enough force to get it out and not so much that you damage the wall. I’ve learned that patience is practically a required tool when dealing with stubborn brick anchors.
Tools of the Trade: What You Actually Need
Forget those fancy, single-purpose gadgets you see advertised. For most anchor removal jobs on brick, you’ll want a solid, basic toolkit. First up, a good set of pliers. Needle-nose pliers are fantastic for getting a grip on anything sticking out, even just a little bit. If you have a bit more to grab onto, regular slip-joint pliers or even locking pliers (Vise-Grips) can give you the use you need. I keep a pair of stout slip-joints in my toolbox specifically for this kind of grunt work. They’ve saved me from chewing up my hands more times than I can count.
Next, you’ll need something to dig out any stubborn bits or debris. A sturdy utility knife or a chisel and hammer can be your best friends. For plastic anchors that have broken off flush, a small chisel can help you carefully chip away the mortar around the plastic without damaging the brick too much. Be gentle! You’re not trying to demolish the wall. A flathead screwdriver, especially one with a good, strong shaft, can also be used as a lever or a prying tool. Sometimes, you can get the tip under the edge of the anchor and carefully work it loose.
A drill and drill bits are also key, though maybe not in the way you’d expect. You might need to drill around a stubborn anchor to loosen its grip, or to create a new pilot hole if the old one is too damaged. A masonry bit is a must for brickwork. (See Also: Can Concrete Anchors Be Used In Brick )
If the anchor is metal and really stuck, sometimes drilling a hole slightly larger than the anchor itself, but carefully staying away from the edges, can help break its hold. I’ve also had luck using a screw extractor. If there’s even a tiny bit of the anchor sticking out, you can sometimes drill a pilot hole into the anchor itself and then use an extractor bit to screw it out.
It’s a bit of a gamble, but it works surprisingly often. Don’t underestimate the humble hammer either – a few sharp taps can sometimes shock a stubborn anchor loose, but always pair it with a prying tool.
Here’s a quick rundown of what I find most useful:
| Tool | Best For | My Verdict |
|---|---|---|
| Needle-nose Pliers | Grabbing small protruding bits, wiggling. | Key for precision work. |
| Slip-Joint Pliers | General grip and pulling. | Good all-rounder, provides decent use. |
| Locking Pliers (Vise-Grips) | Really stubborn anchors, provides maximum grip and use. | Your go-to for the really tough ones. |
| Chisel (small, sharp) | Carefully chipping mortar, loosening edges. | Use with a light hammer for controlled force. |
| Flathead Screwdriver (heavy-duty) | Prying, levering, scraping. | Can often get under an edge when pliers can’t. |
| Screw Extractor Set | Removing broken-off screw shafts or stubborn anchors. | A bit of a long shot, but can be a lifesaver. |
| Hammer | Tapping chisel, shocking anchors loose. | Use with caution; control is key. |
| Masonry Drill Bit | Drilling around or into stubborn anchors. | Needed if you have to drill new material. |
Having these on hand makes the whole process less of a headache. It’s about having options when one method doesn’t work. I learned this the hard way by trying to make do with just one pair of pliers for a long time. It just leads to frustration and potentially more damage.
The ‘how-To’: Getting Anchors Out Without Damaging Your Wall
Alright, let’s get down to business. First, assess the situation. How much of the anchor is sticking out? Is it plastic or metal? What’s the condition of the brick and mortar around it? This will dictate your approach. If there’s a good chunk of anchor sticking out, your first step is almost always to try and grab it firmly with pliers. Needle-nose pliers are great for those fiddly bits, while larger slip-joint or locking pliers will give you more torque. Once you have a good grip, try to wiggle it back and forth while pulling outwards. Sometimes, a little side-to-side motion is all it takes to break the seal. Don’t yank hard immediately; try to loosen it progressively.
If wiggling and pulling with pliers doesn’t work, it’s time for a more direct approach. For plastic anchors that have broken off flush or are just below the surface, you can try to use a utility knife or a small chisel to carefully score around the edge of the plastic where it meets the mortar. The goal is to create a small gap. Once you’ve made a little space, try inserting the tip of your flathead screwdriver or chisel under the edge and gently pry it out.
Work your way around the anchor, applying steady pressure. If you’re using a chisel and hammer, be very light with your taps.
You want to loosen the anchor, not chip the brick. I once tried to chip away a stubborn plastic anchor and ended up with a divot in the brick that was almost bigger than the anchor itself.
It looked terrible and took a lot of patching compound to fix.
For metal anchors, especially those that have expanded, things can get tougher. If you can get pliers on it, try twisting it counter-clockwise first, as if you were unscrewing it. This might help collapse the expansion mechanism. If that doesn’t work, and if you can’t pry it out with a screwdriver, you might need to consider drilling.
For sleeve anchors or lag shields, if you can’t pull them out, you might have to drill a hole slightly larger than the anchor diameter, carefully centered on the anchor. The idea here is to drill away the material holding it in place.
Use a masonry bit and a drill set to a moderate speed. Go slowly and wear safety glasses – brick dust is no joke. Be aware that this process can enlarge the hole significantly, meaning you’ll need a larger anchor or filler to secure anything new in that spot.
A contrarian take: Many online guides suggest drilling out the center of the anchor and then using a screw extractor. While this can work, I’ve found it’s often more trouble than it’s worth on brick. The anchor material can be harder than the extractor, it can spin uselessly, or you can end up drilling too far and damaging the brick behind. Unless it’s a very specific type of metal anchor and you have a good set of extractors, I’d usually try prying or carefully drilling the surrounding material first. It’s less precise but often more successful for the average DIYer.
Sometimes, when an anchor is truly stubborn and flush with the surface, I’ve found success by carefully cutting a small ‘X’ into the exposed top of the anchor with a metal cutting disc on a Dremel or angle grinder. Then, I’ll try to use a screw extractor in that ‘X’. This creates a better purchase point. However, this requires extreme care not to damage the surrounding brick. It’s a last resort for me.
If the anchor is a toggle bolt, you often have to push the mechanism through the hole if it’s still attached to the bolt. If the bolt has broken off, you might be left with the wings inside the wall. In that case, you’re often best off trying to push them through the hole or carefully chiseling around the hole to expose and remove them. This is one of the trickier types to remove cleanly. (See Also: Can Cords Be Used To Make Anchors Climbing )
Common Mistakes and How to Avoid Them
The biggest mistake people make is assuming all anchors come out the same way, and that brute force is the answer. I’ve seen people absolutely demolish brickwork trying to yank out a stubborn anchor with a pair of pliers and a lot of sweat. This usually results in a bigger problem than the anchor itself – a damaged wall that needs serious repair. Always assess the anchor type and the material first. A plastic anchor in soft mortar needs a different approach than a corroded metal anchor in a hard brick face.
Another common error is using the wrong tools or using them incorrectly. Trying to pry out a metal anchor with a flimsy screwdriver can bend the tool and won’t budge the anchor. Using a hammer too aggressively with a chisel can chip or crack the brick. You need tools that are up to the task and the patience to use them methodically. Remember that one time I ended up with a divot in my brick? That was from using a chisel like a wrecking ball. Gentle, controlled taps are the way to go. It’s like surgery, not demolition.
People also often forget about the condition of the brick and mortar. If it’s old and crumbly, you have to be extremely delicate. Aggressive prying or drilling can cause the surrounding material to crumble away, making the hole larger and weaker. This is a particular issue with older buildings. Always err on the side of caution. If the mortar looks like it’s about to fall out, you probably need to repair it after removing the anchor, not just plug the hole and move on.
Overlooking the potential for damage to the brick itself is another frequent oversight. You might get the anchor out, but if you’ve chipped, cracked, or gouged the brick face, you’ve traded one problem for another. Think about the finished appearance.
If this is a visible part of your wall, you want it to look good. Sometimes, a slightly damaged brick is unavoidable, but you can minimize it by being careful with your tool placement and force. I learned this when I tried to remove a particularly nasty metal anchor, and the prying tool slipped, leaving a deep gouge right across the face of a nice, red brick.
It was an eyesore for months until I figured out how to color-match a filler.
Finally, people often don’t consider what they’ll do after the anchor is removed. If the hole is damaged or enlarged, you’ll need to use a larger anchor or a different fixing method. Some people just try to jam a new anchor into a wallowed-out hole, and surprise, surprise, it doesn’t hold. Always have a plan for remediation. This might involve using a repair epoxy for brick, a larger diameter anchor, or even a different type of fixing altogether, like a self-tapping concrete screw if the hole is truly beyond repair for a standard anchor.
When Is It Okay to Leave an Anchor in?
Sometimes, the effort and potential damage involved in removing an anchor just aren’t worth it. If the anchor isn’t causing any problems, is flush with the surface, and you don’t plan on using that exact spot for something else immediately, leaving it in is a perfectly valid option. For example, if you’ve removed a bracket and the anchor is just a small plastic plug sitting there, and you plan on painting over it, who cares? It’s hidden.
Also, if the surrounding brickwork is particularly fragile, attempting removal might cause more harm than good. In these cases, you can often just cut off any protruding parts, fill any minor voids with a suitable filler or mortar, and move on. It’s about choosing your battles.
When the Experts Weigh in (and What I Think)
Finding a single, definitive authority on removing anchors from brick is tough because it’s such a practical, hands-on task. Different anchor manufacturers will tell you their anchors are easy to install and remove, which isn’t always true in real-world conditions. However, general building and DIY advice often points towards using a combination of tools and techniques. For instance, the Brick Industry Association offers guidance on brickwork repair and maintenance, which indirectly touches on how to preserve the integrity of the brick itself when working with it. Their focus is on not compromising the structural integrity or appearance of the brick. This aligns with my philosophy: be gentle, be precise.
My own experience often diverges from the overly optimistic manufacturer claims. They’ll say “easy removal.” I say, “depends on how long it’s been there and what kind of idiot installed it.” (That idiot is sometimes me). Their advice is generally about proper installation for secure fixing, not necessarily clean removal. They might mention drilling out, but they don’t dwell on the cosmetic damage it can cause. This is where real-world experience comes in. I’ve found that the ‘how-to’ guides on DIY forums and from experienced tradespeople are often more practical than manufacturer specs when it comes to removal.
For example, many sources will suggest using a masonry drill bit to drill directly into the anchor itself if it’s metal and stuck. This is fine if the anchor is soft aluminum. But many are steel. Drilling hardened steel anchors with a standard masonry bit is a losing battle and will likely just ruin your drill bits.
A cobalt or titanium-coated bit might stand a chance, but even then, it’s slow going. The real advice I’ve gleaned from countless frustrating hours is to focus on breaking the bond between the anchor and the brick/mortar, rather than trying to destroy the anchor itself. This usually means carefully working around it with a chisel or screwdriver, or drilling a larger hole around it if necessary.
What about those plastic anchors? Manufacturers often claim they can be pulled out with pliers. True, if they haven’t been in there for years and fused with dust and grime. If they’re broken off flush, the consensus among experienced DIYers is to carefully cut or chisel around them to create an edge for prying. It’s not glamorous, but it’s effective. The key takeaway from both professional advice and informal wisdom is that the right technique depends heavily on the specific anchor, the age of the installation, and the condition of the surrounding brickwork. There’s no one-size-fits-all solution.
Fixing Up After Anchor Removal
So, you’ve wrestled the anchor out. Congratulations! But now you’re left with a hole, and depending on how the removal went, it might be bigger, messier, or just plain ugly. Don’t panic. Most of the time, you can fix it up so it’s barely noticeable. If the hole is roughly the same size as it was originally, and the surrounding brick is intact, you can likely just insert a new anchor of the same size, or one slightly larger if you want a bit more holding power. Make sure to clean out any dust or debris from the hole before inserting the new anchor. A quick blast with compressed air or a vacuum cleaner works wonders. (See Also: Can Anchors In Your Shoulder Break )
If the hole has been enlarged or damaged, you have a few options. For standard plastic anchors, you can often use a larger size plastic anchor. If it’s significantly enlarged, you might need to use a larger masonry anchor, like a concrete screw or a heavy-duty sleeve anchor, which can grip a wider hole. Another common method is to use a repair epoxy specifically designed for masonry. You can fill the damaged hole with this epoxy, let it cure, and then drill a new pilot hole for your anchor. This creates a solid base. Some people also use hydraulic cement or a strong construction adhesive to fill larger voids, then re-drill once it’s hardened.
If the brick itself has been chipped or gouged, you’ll need to address that separately. For minor chips, you can use a good quality brick repair caulk or a specialized masonry filler. These come in various colors, so you can try to match your brick as closely as possible. For larger damage, you might need a more solid repair compound.
The goal is to make the surface as smooth and uniform as possible before you re-hang anything. I once had to deal with a chipped brick from a rogue chisel slip, and after patching it, I found that a slightly different shade of filler really stood out in the sun. I learned to test the color in an inconspicuous spot first.
When filling holes, it’s often best to fill them in layers, especially if they are deep. This allows the material to cure properly and prevents shrinkage cracks. Don’t rush the process. For a truly smooth repair, especially on a very visible area, you might even consider using a colored mortar mix.
This requires a bit more skill, but it can blend in beautifully with the surrounding brick. Remember to use a putty knife or trowel to smooth the filler or mortar flush with the brick surface. It’s all about making it look like the damage never happened. For a really professional finish, you can even use a wire brush to lightly texture the repaired area so it blends with the natural roughness of the brick.
Faq: Common Questions About Brick Anchor Removal
Can You Just Drill Out Old Anchors From Brick?
Yes, you can drill out old anchors from brick, but it’s often a last resort. For metal anchors, you’ll need a strong masonry drill bit and patience. For plastic anchors, drilling might be less effective as the plastic can melt or gum up the bit. Drilling can also enlarge the hole, which may require using a larger anchor or filler to secure a new fixing point. It’s a technique that requires care to avoid damaging the surrounding brick.
What If the Anchor Is Broken Off Flush with the Brick?
If an anchor is broken off flush, you’ll need to carefully use tools like a sharp chisel, utility knife, or a small flathead screwdriver to create an edge or a gap around the anchor. Once you have an edge, you can try to pry it out gently. If that fails, you might need to carefully drill around the anchor to loosen its grip before attempting to pry it again. Patience and precision are key to avoid damaging the brick.
Will Removing Anchors Damage My Brick Wall?
There’s always a risk of minor damage, especially if the anchor is stubborn or the brickwork is old and brittle. Aggressive prying, hammering, or drilling can chip, crack, or crumble the brick and mortar. The key is to use the right tools and techniques, apply controlled force, and work methodically. If you’re dealing with delicate or historic brickwork, it’s wise to proceed with extreme caution or consult a professional.
How Do I Repair a Hole After Removing an Anchor?
After removing an anchor, clean out the hole thoroughly. If the hole is intact, you can usually insert a new anchor of the same or slightly larger size. If the hole is enlarged or damaged, you can use masonry repair epoxy, hydraulic cement, or a strong construction adhesive to fill the void. Once cured, drill a new pilot hole for your anchor. For cosmetic damage like chips, use a matching brick repair caulk or filler.
Removing Stubborn Anchors: A Step-by-Step Process
Here’s a practical sequence to try when you’re facing a really tough anchor:
- Assess and Prepare: Identify the anchor type (plastic, metal, toggle). Clear the area around the anchor and gather your tools (pliers, chisel, hammer, screwdriver, safety glasses, dust mask).
- Gentle Pull and Wiggle: If any part of the anchor is protruding, grip it firmly with pliers. Try wiggling it side-to-side while gently pulling outwards. Repeat, gradually increasing the pulling force if needed.
- Pry Carefully: If pliers fail, use a sturdy flathead screwdriver or a small chisel. Work the tip under the edge of the anchor and gently pry. If using a chisel, tap lightly with a hammer to encourage movement without damaging the brick.
- Score and Dig (for flush plastic): For plastic anchors broken off flush, use a sharp utility knife or chisel to score around the edge where the anchor meets the mortar. Create a small gap to get a prying tool underneath.
- Drill Strategically (for tough metal): If the anchor won’t budge and is metal, consider drilling. For sleeve or lag anchors, you might drill a hole around the anchor to break its grip. For broken screw shafts, a screw extractor might work if you can create a pilot hole. Always use a masonry bit and go slow.
- Chisel Around (for toggle wings): If you’re dealing with toggle bolt wings stuck behind the brick, you may need to carefully chisel away mortar to expose them for removal.
- Repair the Hole: Once the anchor is out, clean the hole. Fill any enlarged or damaged holes with masonry repair epoxy, cement, or adhesive. Let it cure completely.
- Drill New Pilot Hole: After repairs are cured, drill a new pilot hole for your new anchor or fixing.
- Cosmetic Touch-up: Address any chips or gouges in the brick with appropriate filler or caulk.
This systematic approach increases your chances of success while minimizing damage. It’s about working with the material, not against it. Remember, some anchors are designed to be permanent, and removing them will always be a challenge.
Verdict
So, can anchors be taken out of brick? Yes, you absolutely can get them out, but it’s rarely a quick, clean job. I’ve spent more time than I care to admit wrestling with stubborn anchors, learning the hard way that patience and the right tools are a must. The key is to understand how the anchor is seated and to apply force strategically, rather than just brute strength.
Don’t be discouraged if your first attempt doesn’t work. Assess the situation again, perhaps try a different tool or technique. Often, a combination of prying, gentle chiseling, and strategic drilling can get the job done. Remember that the goal is to remove the anchor with minimal damage to your brick wall, so take your time and be precise.
If you’ve got a particularly stubborn anchor or are worried about damaging your brick, it’s always worth considering a professional. But for most common situations, with the right approach, you can get those anchors out and move on with your project. Just be prepared for a bit of a fight – brickwork has a way of holding onto things!