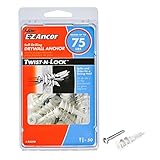
I remember the first time I saw one. I was staring at a box of wall anchors, trying to figure out which one would actually hold up that heavy mirror I’d just bought. And there it was, this chunk of metal looking suspiciously like Mjolnir, minus the lightning. It got me thinking, are anchors shaped like Thor’s hammer a real thing, or was I just hallucinating from staring at too many little plastic doodads?
Honestly, most of the time I just grab whatever seems sturdy enough. But this hammer shape? It’s distinctive. So, let’s cut to the chase: do these hammer-shaped anchors actually work, and are they worth the hype over the boring, everyday ones?
That Hammer Shape: Function or Just Flash?
Look, when you first see a lag shield anchor, especially the ones with a wider, flattened head and a sort of flared base, it’s hard not to think of Thor’s hammer. They aren’t exactly Mjolnir, but there’s a visual resemblance that’s undeniable. The question is, does that shape actually do anything useful? My experience says yes, but not in the way you might initially think. It’s not about hitting things with it, obviously.
The primary reason these anchors are shaped the way they are is to create a strong mechanical lock within the material you’re mounting into. Think of it like this: when you drive a screw into a lag shield anchor, the anchor itself is designed to expand and wedge itself firmly. The flared base and the overall shape help it resist pull-out forces. It’s a brute force method, but it works.
I’ve used them for hanging everything from heavy shelving units in my garage to securing a workbench that sees some serious abuse. The key is the expansion process. As the screw goes in, it forces the anchor material outwards, pressing it against the sides of the hole you’ve drilled.
The wider head helps distribute that outward force, preventing the anchor from just spinning or pulling out.
I learned this the hard way when I tried using some cheap, generic anchors for a load-bearing shelf. They looked fine, but after a week, everything started to sag. I ended up ripping them all out and replacing them with proper lag shields.
The difference was night and day. The hammer-shaped ones, specifically the lag shields, give you that confidence that it’s actually biting into the material. It’s not just a loose plug. They’re typically made of heavier gauge metal than the flimsy plastic ones, which also contributes to their holding power.
So, while the shape might be a bit of a visual gimmick for some, it’s rooted in a practical design for creating a solid connection, especially in materials like concrete or brick.
One thing to be aware of is that these aren’t your go-to for drywall. They need a solid material to bite into. For drywall, you’re looking at different types of anchors altogether. But for masonry? That’s where the hammer-shaped designs really shine. They provide a substantial mechanical connection that can handle significant weight. I’ve seen these used in construction for attaching heavier fixtures, and that’s always a good sign in my book. (See Also: Can Concrete Anchors Be Used In Brick )
When to Reach for the Hammer (anchor)
So, when is it time to grab one of these Mjolnir-inspired anchors? It’s all about the material you’re drilling into and the weight of what you’re hanging. Forget about using them in standard drywall. They’re designed for denser stuff: concrete, brick, cinder block, and sometimes even solid wood, though for wood, you often have simpler screw options that work just as well. If you’re mounting a TV bracket onto a brick wall, hanging heavy garden equipment in a concrete shed, or securing a substantial piece of furniture to a masonry surface, these are your friends.
I’ve personally used them for a few projects where I needed absolute certainty. The biggest one was mounting a heavy-duty workbench in my garage. The wall is old brick, and I didn’t want any chance of it coming loose. I drilled the holes, hammered in the lag shields (they often need a gentle tap to seat properly), and then screwed them in.
The result was rock solid. Another time, I used them to hang some massive industrial-style shelving in my workshop. These shelves were designed to hold tools and materials that weigh a ton, literally. The hammer-shaped anchors held them perfectly without any sign of stress.
It’s that feeling of security, knowing it’s not going to budge, that makes them worth the extra effort.
Here’s a general rule of thumb I follow: if the item you’re hanging weighs more than, say, 20 pounds, and you’re drilling into masonry, start looking at these types of anchors. For lighter items, you might get away with simpler anchors, but for anything substantial, the added holding power of a good lag shield anchor is indispensable. They distribute the load better and provide a much more reliable grip than many other anchor types in these materials. Don’t skimp here; a failed anchor can damage your wall and whatever you were trying to hang, not to mention the frustration.
Common Mistakes People Make
- Using the wrong drill bit size: This is a big one. Too small, and you won’t get the anchor in. Too big, and it won’t have anything to grip. Always check the anchor’s packaging for the recommended drill bit size.
- Not drilling deep enough: The anchor needs space to expand. If the hole isn’t deep enough, the expansion will be limited, and so will its holding power.
- Over-tightening the screw: While you want a snug fit, cranking down too hard can strip the anchor or the screw threads, compromising the hold.
- Using them in the wrong material: As mentioned, these are for masonry. Using them in drywall is a recipe for disaster.
I once tried to hang a very heavy, antique mirror in a plaster wall, thinking it would be strong enough. Big mistake. I ended up with a gaping hole and a very lucky mirror. That’s when I truly learned the importance of matching the anchor to the wall material. It sounds obvious, but when you’re in the middle of a project, it’s easy to overlook the basics. These hammer-shaped anchors are for their specific purpose, and when used correctly, they are fantastic.
What to Look for: Beyond the Hammer Shape
Okay, so we know the shape is functional, but what else should you be looking for when you’re buying these anchors? It’s not just about grabbing the first hammer-looking thing you see. A few key features can make a big difference in performance and ease of use. First off, the material. Most quality lag shield anchors are made from zinc-plated steel or a similar solid metal. Avoid anything that looks flimsy or prone to rust, especially if it’s going to be in a damp environment. The plating helps prevent corrosion, which is important for long-term holding power.
Next, consider the design of the expansion mechanism. Some have a more pronounced flare at the base, which can offer a broader surface area to grip the material. Others might have specific internal threading that helps the screw engage more effectively. It’s worth looking at the packaging or product description to understand how it’s designed to expand. The thickness of the metal is also a factor. Thicker metal generally means a stronger anchor. You can often feel the difference; heavier anchors feel more substantial in your hand.
Then there’s the screw that comes with it. Many kits include a screw, but sometimes it’s worth buying a higher-quality screw separately. Make sure the screw is long enough to fully engage the anchor and penetrate sufficiently into the wall material. The diameter of the screw also needs to match the internal threads of the anchor. If you’re buying the anchor and screw separately (which I often do for important projects), double-check the compatibility. I once bought a kit where the included screw was just a hair too thin, and it kept slipping, making the anchor useless. That was a frustrating afternoon. (See Also: Can Cords Be Used To Make Anchors Climbing )
Here’s a little comparison table to help you sort out some common anchor types:
| Anchor Type | Best For | Holding Power | Ease of Use | My Verdict |
|---|---|---|---|---|
| Lag Shield (Hammer Shape) | Concrete, Brick, Block | Very High | Moderate (Requires drilling specific size hole) | Top-tier for heavy loads in masonry. Reliable. |
| Plastic Expansion Anchor (Sleeve) | Drywall, Plaster | Low to Medium | Very Easy (Tap in, screw in) | Okay for light pictures, but I don’t trust it for anything substantial. |
| Toggle Bolt | Drywall (Thicker) | High | Moderate (Requires larger hole, can be fiddly) | Good for heavier items on drywall where you can’t find a stud. |
| Self-Drilling Screw Anchor (e.g., E-Z Ancor) | Drywall | Medium | Very Easy (Screws directly into drywall) | Convenient for lighter loads, but not for heavy shelves. |
Ultimately, for the ‘hammer-shaped’ anchors, you’re primarily looking at lag shields. Focus on good quality metal, appropriate sizing for your screw, and making sure the dimensions match the hole you’re drilling. Don’t just assume all hammer-shaped anchors are created equal.
Real-World Use: Projects Where They Saved My Bacon
I’ve definitely had projects where these anchors were the unsung heroes. One of the most memorable was attaching a heavy-duty tool chest to the concrete floor in my garage. This thing is loaded with wrenches, sockets, and other metal bits, so it’s got serious weight. I didn’t want it sliding around, especially if I was working on something that required me to lean on it or brace against it. I used four large lag shield anchors, and they locked that chest down like it was part of the foundation.
Another time, I was building a custom outdoor planter box that was going to hold a substantial amount of soil and plants. The sides were made of thick timber, and I needed to secure them to the concrete patio. I used several of the hammer-shaped anchors to firmly attach the wooden frame to the concrete. This wasn’t just about aesthetics; it was about preventing the whole thing from shifting or tipping over, especially after a heavy rain. The anchors provided that rock-solid connection I needed, and the planter has been there, firmly in place, for three seasons now.
I also had a situation where I needed to mount a very large, heavy mirror in an entryway that had a brick veneer. Most people would use a specific mirror mounting kit, but I wanted something more solid, especially since kids and pets frequent the area. I found a way to strategically place a couple of heavy-duty lag shield anchors behind the brick veneer where I knew there was solid block wall. It took a bit of careful planning and a longer masonry bit, but the result was that mirror felt like it was part of the wall itself. That kind of confidence is hard to come by with cheaper anchors.
The common thread in all these situations is the need for a reliable, high-strength connection in masonry. When the stakes are high – meaning the weight is significant, or failure could cause damage or injury – these anchors earn their keep. They’re not the prettiest things you’ll put in a wall, but when you need them to perform, they do it without complaint. They’ve saved me from having to re-do jobs or worry about things falling down, which is worth a lot more than a few extra bucks.
The Contrarian View: Are They Overkill?
Now, here’s where I might ruffle some feathers. Everyone talks about the holding power of these hammer-shaped lag shields, and yes, they are strong. But I’ve found that for most DIY projects, they are absolute overkill. And honestly, sometimes the common advice is just plain wrong.
Think about it. For the average homeowner hanging a TV, a shelf for books, or even a decent-sized cabinet, are you really going to max out the capacity of a good quality plastic expansion anchor or a toggle bolt in drywall? For 95% of what people do around the house, those are perfectly adequate, often much easier to install, and they don’t require you to buy a specific masonry drill bit if you don’t already own one. I’ve seen people wrestling with lag shields for projects that a simple drywall anchor would have handled just fine. It’s like bringing a sledgehammer to crack a peanut.
My honest opinion? The obsession with these heavy-duty anchors for everyday tasks is partly driven by marketing and partly by a misunderstanding of load requirements. People see ‘heavy-duty’ and think they need it, even when they don’t. I personally switched to using high-quality plastic anchors and toggle bolts for about 80% of my drywall hanging tasks, and I’ve never had a single failure. For my concrete garage walls, sure, I’ll use lag shields. But for interior walls? It’s usually a waste of time and effort. You can get plenty of holding power with simpler, more accessible methods. (See Also: Can Anchors In Your Shoulder Break )
I remember a buddy of mine spent an entire Saturday trying to hang a simple picture frame in his living room using lag shields. He was drilling, hammering, screwing… it was a whole production. I watched him, shaking my head. I could have done it with two plastic anchors in about five minutes. He was so focused on getting the ‘strongest’ anchor that he completely missed the point of choosing the appropriate anchor. So, while the hammer-shaped anchors are undeniably strong, don’t feel pressured to use them just because they exist. Assess your actual needs. Often, simpler is better, and less work.
Faq: Your Hammer Anchor Questions Answered
What Is the Hammer-Shaped Anchor Called?
The most common type of anchor that resembles Thor’s hammer is typically a lag shield anchor. These anchors are characterized by their metal construction, often steel or zinc-plated steel, and a design that flares out or expands as a screw is driven into them. The distinctive shape, with its wider head and tapering body, is what gives it the visual similarity to Mjolnir, especially when fully installed.
Are Thor’s Hammer Anchors Strong?
Yes, Thor’s hammer-shaped anchors, or lag shield anchors, are generally very strong and provide excellent holding power. Their strength comes from their ability to mechanically expand and wedge themselves securely into solid materials like concrete, brick, or block. When installed correctly in appropriate materials, they can support significant weight and resist pull-out forces effectively, making them suitable for heavy-duty applications.
Can I Use Hammer-Shaped Anchors in Drywall?
No, you should not use hammer-shaped anchors, like lag shields, in standard drywall. These anchors are designed to expand and grip into solid, dense materials such as concrete, brick, or cinder block. Drywall is too soft and brittle to provide the necessary resistance for the anchor to expand and hold securely. Using them in drywall will likely result in the anchor pulling through the wall, causing damage.
How Do I Install a Lag Shield Anchor?
To install a lag shield anchor, you first need to drill a hole of the correct diameter (specified by the anchor manufacturer) into your masonry material. Then, insert the lag shield anchor into the hole; you might need to gently tap it with a hammer to seat it fully. Finally, drive the appropriate lag screw into the anchor. As the screw advances, it will expand the anchor, creating a secure fastening point.
Conclusion
So, are anchors shaped like Thor’s hammer just a novelty? Not at all. While the visual connection is fun, the hammer-like shape of lag shield anchors is a functional design that delivers serious holding power in masonry. They’ve saved me from more than one potentially disastrous project, especially when I needed to be absolutely sure something heavy wasn’t going to budge.
But remember, they’re not a magic bullet for every situation. Using the right anchor for the right material is key. Don’t go overboard with heavy-duty anchors when a simple plastic plug will do the job just fine. That said, for those moments when you’re dealing with concrete or brick and need a connection that won’t quit, the hammer-shaped lag shield is a tool you’ll be glad you have in your arsenal.
Next time you’re facing a heavy-duty mounting job on a solid wall, take a look for those hammer-shaped anchors. They might just be the Mjolnir you need to get the job done right.