I remember the first time I tried to hang a heavy mirror in my apartment. The studs were nowhere in sight, so I grabbed some of those plastic gizmos from the hardware store, hammered them in, screwed the mirror bracket, and stepped back, feeling pretty smug. Then, three days later, the mirror decided to take a swan dive, taking a chunk of drywall with it. It was then I started asking myself: are drywall anchors supposed to be flush? The answer, as with most things in DIY, is a complicated ‘it depends,’ and the internet offered a lot of conflicting, confusing advice.
Look, most of us aren’t professional contractors. We’re trying to hang a picture frame, a shelf, or maybe that monstrous TV without drilling through a pipe or hitting a stud. We grab what looks like the right tool and hope for the best. But when your anchor sticks out like a sore thumb or disappears into the wall, you know something’s not right.
This isn’t about fancy jargon; it’s about getting things to stay put on your wall without looking like a hack job. Let’s cut through the noise and get down to what actually works.
When Flush Is the Goal (and When It Isn’t)
So, are drywall anchors supposed to be flush? The short answer is: it depends entirely on the type of drywall anchor you’re using and what you’re trying to achieve.
For many common types, particularly the plastic expansion anchors and some metal ones, the goal is indeed to have them sit as flush as possible with the wall surface. This provides a clean look and a stable base for your screw. Think about hanging a thin picture frame or a light shelf; you don’t want a giant plastic mushroom sticking out of your wall. You want the anchor’s flange or collar to sit flat against the drywall, so the screw head can then bear directly against that flange, or the anchor itself will fully recess, leaving only the screw thread protruding.
I learned this the hard way with those cheap, conical plastic anchors. You tap them in, and they’re supposed to kind of expand and wedge themselves. If you tap too hard, they go too deep.
If you don’t tap hard enough, they stick out. And then there are the toggle bolts.
These massive springs or wings that deploy behind the drywall are a different beast entirely. Once the toggle is engaged, you typically tighten the screw until the bolt’s head is snug against the wall, and the toggle mechanism is hidden. The screw you’ll then use to hang your item will thread into the bolt protruding from the wall. So, no, the entire toggle bolt assembly isn’t flush; only its mounting flange or the head of the bolt it’s attached to should be flush with the wall surface.
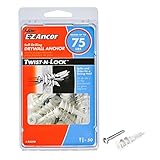
Then you have self-drilling anchors, often made of nylon or metal. These are designed to screw directly into the drywall without a pilot hole. Most of these have a prominent collar or flange. The idea here is that you screw them in until this collar is firmly seated against the drywall.
The screw then goes into the anchor, and the head of the screw should be flush with the wall, or the anchor itself will sit flush, and the screw will thread into it. The key is that the anchor shouldn’t be sticking out, nor should it be so recessed that it doesn’t provide proper support for the screw.
It’s a bit of a Goldilocks situation: not too proud, not too deep.
The real tricky ones are the molly bolts. These have a sleeve that expands behind the drywall. Once you tighten the screw, the sleeve should collapse and grip the back of the drywall.
Ideally, the flange on the front of the molly bolt should be flush with the wall. The screw then goes into the molly bolt’s internal thread. If the flange sticks out, the item you’re hanging won’t sit flat against the wall.
If it’s too far in, you might not be able to get enough threads engaged for a secure hold. My first experience with molly bolts was trying to hang a kitchen cabinet.
I overtightened one, and the whole thing just spun in the wall, the flange pulling away from the surface. Total disaster.
So, while many anchors aim for a flush finish for aesthetic reasons and structural integrity, the definition of ‘flush’ varies. It’s about the visible part of the anchor (or its flange) meeting the wall surface cleanly, providing a solid foundation for the screw you’ll actually use to hang your item. (See Also: Can Concrete Anchors Be Used In Brick )
The Anatomy of a Wall Anchor: What to Look For
Understanding the different parts of a drywall anchor is key to knowing whether it’s supposed to be flush. You’ve got the anchor body itself, which is what goes into the wall. Then there’s the flange or collar – that’s the lip or rim at the top of the anchor. This flange is often the part that’s supposed to sit flush with your wall. Its job is to prevent the anchor from being pulled through the hole you drilled. If this flange sticks out, your item won’t hang flat. If it’s sunk too deep, it might not provide a solid surface for the screw head to rest against, or the anchor might not be fully seated, compromising its holding power.
Then there’s the screw. For many anchors, you’ll use a separate screw that threads into the anchor body. The head of this screw is what you want to be flush with the wall, or at least sit neatly against the anchor’s flange. Some anchors, like self-drilling types, have a screw integrated or are designed to accept a specific screw size. The important point is the interface: the screw head meeting the anchor flange, or the anchor itself sitting neatly in the drywall. This is where the ‘flush’ concept really comes into play for appearances and function.
Let’s talk about the different materials and their implications. Plastic anchors, the most common and cheapest, are usually expansion anchors. You drill a hole, insert the anchor, and tap it in. The idea is that the plastic expands as you drive the screw, creating friction. For these, the flange should be flush. If it sticks out, it looks bad and can prevent the item from sitting flat. If it goes too deep, it might not expand properly. Metal anchors, like ribbed ones or the cheaper molly bolts, also typically have a flange designed to be flush. They offer better strength than plastic for heavier items.
Toggle bolts are a whole different game. They consist of a bolt with a spring-loaded toggle mechanism. You drill a larger hole, push the bolt through, and the toggle opens up behind the drywall. You then tighten the bolt until the toggle is snug against the wall. The flange of the toggle bolt’s head should be flush with the wall. The screw you use to hang something then threads into this bolt. Here, ‘flush’ refers to the part that contacts the wall, not the entire mechanism, which is hidden.
Self-drilling anchors are designed to be screwed directly into drywall. They have a screw point and often a collar. You screw them in until the collar is flush with the wall. The screw that comes with them, or a compatible one, then threads into the anchor. The goal is a clean, flush installation. I once tried to use a self-drilling anchor that was supposed to be flush, but the collar was too thick, and it left a small gap. My shelf sagged a bit because the screw wasn’t seated properly. It was a minor annoyance, but it highlights how the design dictates the ‘flushness’ requirement.
The weight of the item you’re hanging is also a factor. For very light items like small unframed photos, a simple push-pin might suffice, and flushness isn’t even a consideration. For medium-weight items like framed pictures or small shelves, proper installation of a plastic or metal anchor with a flush flange is usually adequate. For heavy items like large mirrors, shelves holding books, or TVs, you absolutely need solid anchors designed for significant weight, and even then, a flush installation is the aesthetic and functional ideal. The anchor’s ability to engage with the drywall, and the screw’s ability to thread securely into the anchor or wall, relies on that flush fit.
Common Mistakes That Mess Up Flushness
I’ve made my fair share of mistakes when it comes to drywall anchors, and almost all of them boil down to not understanding how they’re supposed to work, which directly impacts whether they end up flush. The biggest offender? Using the wrong anchor for the job. You see a bunch of plastic anchors for $5 and think, ‘Great, that’ll hold my 50-pound soundbar!’
Wrong. These cheap plastic ones are for lightweight stuff, like a small calendar or a key hook.
They are designed to expand and grip the drywall, and for them to do that effectively, the flange needs to be flush. If you hammer them in too deep, they might not expand properly, and then they’re not flush and they won’t hold. Conversely, if you don’t get them in far enough, they stick out like a sore thumb and look terrible.
Another huge mistake is incorrect hole sizing. Most anchors come with a recommended drill bit size.
If you use a bit that’s too small, you’ll struggle to get the anchor in, and you might end up forcing it, bending the flange or pushing it too far in. If you use a bit that’s too large, the anchor won’t have enough drywall to grip. It’ll just spin freely, and you’ll have a useless hole and an anchor that’s definitely not flush – it’ll probably just fall out. I had this happen when hanging a medicine cabinet.
I used a drill bit that was slightly too big. The anchor went in easily, but when I tried to screw it in, it just kept turning. The flange was sticking out, and there was zero support.
I had to patch the hole and start over with the right size bit for a different type of anchor.
Over-tightening is also a classic blunder, especially with plastic or ribbed metal anchors. You think ‘tighter is better,’ right?
Wrong. For plastic anchors, over-tightening can strip the threads inside the anchor or the drywall it’s supposed to be gripping. This means the screw will spin endlessly, and the anchor won’t hold. The flange might get pulled away from the wall or crushed. (See Also: Can Cords Be Used To Make Anchors Climbing )
For molly bolts, you tighten a screw, and a sleeve expands behind the wall. If you keep turning after it’s snug, you can pull the entire anchor through the drywall or strip the internal threads. The goal is a firm, secure fit where the flange is flush, not a warped or broken anchor. Some people even use the wrong screw.
For example, using a screw that’s too long or too short for the anchor, or one with the wrong thread pitch. Too long and it might bottom out inside the anchor or wall before it’s secure.
Too short and it won’t engage enough threads. The wrong thread pitch might not grip the anchor properly. All these issues prevent a clean, flush installation and a secure hold.
Finally, there’s the issue of wall condition. If your drywall is already damaged, soft, or crumbling, no anchor, no matter how perfectly installed, is going to hold.
Trying to put an anchor into weak, crumbly drywall is like trying to screw into sawdust. The anchor will just crumble the material around it, and you’ll end up with a hole that’s too big, and the anchor will be recessed or sticking out, completely useless.
I’ve seen people try to ‘save’ a damaged spot by shoving more anchors in, but it just exacerbates the problem. It’s best to repair the drywall first.
Getting that flush finish and solid hold really depends on having good, solid drywall to work with. Ignoring the wall’s integrity is a surefire way to have your anchors stick out or fall out.
When DIY Advice Goes Wrong: My Contrarian Take
Okay, here’s where I go against the grain. You’ll see tons of advice online, especially on DIY forums and from well-meaning but often clueless bloggers, saying, ‘Just screw it in until it feels tight!’ or ‘If it sticks out a little, you can just push it in harder.’ I think that’s terrible advice, and here’s why: it ignores the actual mechanics of how these anchors are designed to work. Not all anchors are created equal, and their ‘flushness’ is dictated by specific design features, not brute force or guesswork.
My major beef is with the general instruction to just ‘hammer it in’ for plastic anchors. Yes, you need to tap them in, but how hard and how far matters immensely. These plastic anchors rely on expanding within the drywall. If you hammer them so they’re flush but too deep, the expansion part of the anchor might end up behind the drywall, or the plastic could compress unevenly, leading to a weak hold. You end up with a sunken, non-flush anchor that wobbles. The common advice doesn’t account for the fact that the ‘sweet spot’ for flushness is often very narrow.
Another one: ‘If the flange sticks out, just push the screw in harder.’ This is sometimes true for very soft plastic anchors where the screw head might slightly indent the flange. But for most decent anchors, especially ribbed metal ones or molly bolts, if the flange is sticking out, it means the anchor isn’t seated correctly, or the hole is too small. Forcing the screw will only strip the anchor’s internal threads or deform the flange, making it look worse and providing a less secure connection. The anchor should sit flush before you even put the final screw in for hanging your item.
And then there’s the ‘just use a bigger screw’ logic. Sometimes, people try to force a screw that’s too large into an anchor that’s too small, hoping it’ll create a tighter fit. This can actually damage the anchor, strip its threads, or just push the anchor itself further into the wall, making it non-flush and less stable. It’s about matching the screw to the anchor and the anchor to the wall, not about brute-forcing a connection. The visual cue of ‘flush’ is often an indicator of correct installation, and if it’s not flush, something went wrong earlier in the process, and you need to diagnose that, not just try to force it straight.
The whole idea of ‘flush’ for drywall anchors is about achieving a clean aesthetic and a secure, stable mechanical connection. When advice tells you to ignore minor cosmetic issues like a slightly proud flange or a slightly sunken anchor, it’s overlooking the engineering. A truly flush installation means the load is distributed correctly and the item sits properly against the wall. My experience tells me that when an anchor isn’t flush, it’s a sign that an earlier step was missed or done incorrectly.
Instead of trying to correct a non-flush anchor with more force, you should be asking yourself: why isn’t it flush? Did I drill the right size hole? Did I use the right anchor for the wall type and weight?
Did I hammer it in too far?
A Practical Look at Anchor Types and Their Flushness
Let’s get down to brass tacks. We’ve talked about the concept, but what does it actually look like with different anchors? Here’s a quick rundown of common types and their ideal state of ‘flushness’ for holding things up: (See Also: Can Anchors In Your Shoulder Break )
| Anchor Type | Ideal Flushness | Why it Matters | My Verdict |
|---|---|---|---|
| Plastic Expansion Anchors (e.g., ribbed cones) | Flange should be firmly seated against the wall surface. No part of the anchor should protrude. | Prevents items from sitting crooked or not hanging flat. Makes sure screw head bears directly on the anchor. | Good for very light items. Can be finicky to get perfectly flush; easy to over-hammer. |
| Self-Drilling Anchors (Nylon/Metal) | The collar or flange should be flush with the wall surface. The screw head should sit neatly. | Provides a clean look. The anchor needs to be flush for the screw threads to engage properly without stripping. | Convenient, often stronger than basic plastic. Can sometimes leave a slight gap if wallboard is uneven. |
| Molly Bolts | The front flange should be flush with the wall. The screw you use to hang the item then threads into the molly. | Makes sure the item sits flush against the wall. A proud flange means the item will be angled out. | Decent strength, but the expanding sleeve behind the wall is important. Can be tricky to install without over-tightening. |
| Toggle Bolts | The bolt head with the toggle mechanism should be snug against the wall (flush). The screw for hanging threads into this. | The primary contact point with the wall should be flat to provide a stable base. Hides the mechanism. | Excellent for heavy items. Requires a larger hole, and the toggle needs clearance behind the drywall. |
| Screw-In Anchors (e.g., WingIts) | Designed to sit flush or slightly recessed, with wings deploying behind the wall. The screw for hanging is the final step. | The anchor itself needs to be seated for stability and appearance. | Generally solid and easy to install for medium to heavy loads. Very forgiving. |
You see, the ‘flushness’ isn’t just an aesthetic choice for most anchors; it’s a functional requirement. A plastic anchor that sticks out isn’t going to hold much because the screw isn’t properly supported. A toggle bolt whose head isn’t snug means the toggle mechanism isn’t engaged properly. The manufacturers design these things with a purpose, and that purpose often involves a clean, flush interface with the wall. When you look at the instructions, they’ll often show diagrams where the anchor’s flange or head is pressed right up against the wall. Deviating from that usually means you’re compromising the anchor’s holding power or its appearance.
I learned this when I tried to hang a relatively heavy mirror using those ribbed plastic anchors. The instructions said to tap them in until flush. I tapped them in, and they looked flush. But the mirror still felt a little loose.
Turns out, I hadn’t tapped them quite far enough, and the screw heads were sitting proud of the anchor flanges. The weight of the mirror wasn’t directly on the anchor material but on the screw threads, which started to strip the plastic.
I ended up having to take it down, patch the holes, and use toggle bolts. The toggle bolts, once installed, had their heads flush against the wall, and the mirror hung perfectly flat and secure. It was a stark lesson: follow the flushness rule, or accept the consequences.
Practical Tips for Achieving a Flush Finish
Okay, so you want your drywall anchors to be flush, and you want them to hold. Here are some hard-won tips that actually work, based on years of screwing things into walls (sometimes literally):
- Read the Damn Instructions: I know, I know. But seriously. Different anchors have different installation methods. Some need a pilot hole, some are self-drilling. Some require tapping, others screwing. The instructions will usually tell you if the anchor is supposed to sit flush and how to achieve it. Don’t assume.
- Use the Right Drill Bit Size: This is a must. If the anchor requires a pilot hole, use the exact drill bit size recommended. Too small and you’ll split the drywall or struggle to insert the anchor. Too large and the anchor will spin freely, unable to grip. Forcing it will ruin the drywall and the anchor, and it definitely won’t be flush.
- Gentle Taps for Plastic Anchors: For those ubiquitous plastic expansion anchors, use a hammer to tap them in gently. You want them to go in straight and all the way, so the flange is flush, but you don’t want to smash them. If you’re hitting it hard, you’re likely going too far or damaging the anchor.
- Screw In Carefully for Self-Drilling Types: When using self-drilling anchors, use a drill or screwdriver on a low torque setting. Screw them in until the collar is flush, then stop. Don’t over-drive them, as this can strip the drywall threads or damage the anchor itself.
- Feel for Resistance, Then Stop: For most anchors that expand or engage behind the wall (like molly bolts or toggles), you’ll feel increased resistance as they seat. Tighten until snug, but don’t force it. Over-tightening is the enemy of both flushness and holding power. The goal is a firm seat, not a crushed anchor.
- Check for Wobble Before Hanging: Once the anchor is in and flush (or its flange is seated), give it a gentle tug. If it wobbles, it’s not secure. You might need to remove it, patch the hole, and try again with the same or a different type of anchor. Don’t hang your valuable item on a shaky anchor.
- Consider the Wall Material and Item Weight: This sounds obvious, but people skip it. Is it plaster? Drywall? Are you hanging a feather or a bowling ball? Use anchors rated for the weight and suitable for your wall type. If you’re unsure, it’s always better to err on the side of a stronger anchor, even if it means a slightly less ‘flush’ look in some cases (like a larger flange on a heavy-duty anchor).
- Don’t Be Afraid to Patch and Restart: If an anchor is clearly not going to be flush, or it’s wobbly, don’t try to make it work. Remove it, patch the hole with spackle or joint compound, let it dry, sand it smooth, and start over. A little extra work now saves you a potential disaster later. It’s far better than having your shelf collapse.
Following these tips will dramatically increase your chances of getting those anchors flush and making sure whatever you hang stays put. It’s about patience and understanding the tool. I’ve learned that a few extra minutes spent on proper installation saves hours of frustration (and potential damage) down the line. My first few attempts at hanging things were often marred by anchors that were either sticking out or had pulled partially into the wall. Now, I aim for that clean, flush finish every time, and my walls are much happier for it.
People Also Ask: Drywall Anchor Edition
Are Drywall Anchors Supposed to Be Flush?
Generally, yes, the flange or visible part of most common drywall anchors is supposed to sit flush with the wall surface. This makes sure a clean appearance and allows the screw to be properly seated, providing maximum holding power. For anchors like toggle bolts, the head that contacts the wall should be flush, while the mechanism is behind the drywall. Deviations usually indicate an installation error or an unsuitable anchor type.
Can I Leave a Drywall Anchor Sticking Out?
No, you should not leave a drywall anchor sticking out. A proud anchor flange means the item you’re trying to hang won’t sit flat against the wall, will look unprofessional, and can be a weak point. It also suggests the anchor isn’t properly seated or secured in the wall, compromising its ability to hold weight.
What Happens If a Drywall Anchor Is Too Deep?
If a drywall anchor is too deep, it may not expand correctly within the wall cavity, leading to a weak or failed hold. For plastic anchors, the expansion mechanism might be pushed too far back. For other types, it might mean the anchor isn’t properly seated or its flange isn’t providing a solid base for the screw. It will likely not be flush and will compromise the stability of whatever you’re hanging.
Should the Screw Head Be Flush with the Wall?
For many applications using drywall anchors, the goal is for the anchor’s flange to be flush with the wall. The screw then threads into the anchor, and its head should ideally sit flush against the anchor’s flange or be flush with the wall surface itself, depending on the anchor type. This makes sure a clean look and that the load is transferred effectively to the anchor.
How Do I Fix a Drywall Anchor That’s Sticking Out?
If a drywall anchor is sticking out, the best fix is usually to remove it, patch the hole in the drywall with spackle or joint compound, and then re-drill and install a new anchor properly. Trying to force a sticking-out anchor flush can damage it or the surrounding drywall, leading to a weaker hold. Making sure you use the correct drill bit size and install the anchor as per instructions is key to avoiding this issue.
Conclusion
So, to circle back to that nagging question: are drywall anchors supposed to be flush? For the vast majority of common anchors, the answer is a resounding yes, at least the visible flange or mounting point should be. It’s not just about looking good, though that’s a big part of it. It’s about structural integrity. When that flange sits flush, it means the anchor is properly seated, providing the best possible grip and support for the screw. If it sticks out, it’s a sign something went wrong, and your item might not be as secure as you think.
My own journey from DIY disaster zone to someone who can hang a shelf without it immediately collapsing has been paved with lessons learned the hard way. It’s easy to get frustrated, especially when instructions are vague or when you’re dealing with those cheap, fiddly anchors. But taking the extra minute to make sure your anchor is properly seated and flush makes all the difference. It means the difference between a securely hung picture and a hole in your wall and a broken frame.
The next time you’re staring at a wall, planning your next hanging project, remember this. Don’t just shove an anchor in and hope for the best. Understand the type you’re using, follow the guidelines for a flush installation, and if it doesn’t look right, don’t be afraid to take it out and try again. Your walls (and your belongings) will thank you for it.