I once spent an entire Saturday wrestling with a shelf meant to hold my extensive collection of vintage board games. The wall was an odd mix of drywall and some kind of rigid foam insulation. Every anchor I tried either spun uselessly or just crumbled the foam. I ended up with a sagging shelf and a whole lot of frustration, all because I didn’t know if drywall anchors could be used in foam insulation effectively.
It’s a question that pops up when you’re trying to hang something on a wall that isn’t just plain old drywall. Think about those insulated wall panels in garages, basements, or even some modern construction. Standard advice often falls apart, literally, when you hit a different material like foam.
So, can you actually get a solid hold in foam insulation, or are you doomed to a life of light-duty velcro strips?
The Grim Reality: Standard Anchors and Foam Don’t Mix
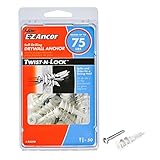
Let’s just cut to the chase: most standard drywall anchors, the plastic ones you twist in or the metal ones you hammer, are absolutely garbage when it comes to foam insulation. I learned this the hard way, as I mentioned. I bought a pack of those ubiquitous self-drilling anchors, the ones that look like little plastic screws, and thought I was golden. I drilled a pilot hole, screwed one in, and it felt… okay? But when I went to hang a fairly light mirror, maybe 15 pounds, the whole thing ripped out, taking a chunk of foam insulation with it like a bad dental extraction. It wasn’t just loose; it was a crater.
The problem is fundamental. Drywall anchors work by expanding behind the drywall or gripping the back of the panel. They need something solid to grip onto.
Foam insulation, especially the rigid types like XPS (extruded polystyrene) or EPS (expanded polystyrene), is basically a block of hardened plastic bubbles. It’s lightweight and airy inside.
When you try to screw or expand a standard anchor into it, the material just compresses, deforms, or outright crumbles. There’s no structural integrity there for the anchor to bite into. It’s like trying to nail Jell-O to a wall. You get a hole, maybe a little resistance, but no real holding power.
I’ve seen people try toggles, molly bolts, even basic screw-in anchors, and the result is almost always the same: disappointment and a damaged wall.
Even the ‘heavy-duty’ ones designed for plaster or thicker drywall often fail because they rely on a solid substrate behind them, and foam insulation just isn’t that. Some might offer a tiny bit more surface area contact, but the inherent weakness of the foam means it’s going to yield under any significant shear or pull-out force. Trying to use them is basically wishful thinking, and frankly, it’s a waste of time and money. You’ll end up patching holes and buying more anchors, only to have them fail again. It’s a cycle I’ve seen too many DIYers fall into, myself included, before I wised up.
What Actually Works: Specialized Anchors for Foam
Okay, so we’ve established that your average plastic cone or metal butterfly toggle is a non-starter for foam. What’s the alternative? You need anchors specifically designed to bite into or spread out within softer materials, or anchors that distribute weight over a larger surface area. The most common and usually effective solution involves specialized foam insulation anchors. These are often made of a tougher plastic and have barbs or wings designed to dig into the foam’s surface and resist pull-out. (See Also: Can Concrete Anchors Be Used In Brick )
One type I’ve found surprisingly effective for lighter loads (think small pictures, maybe a lightweight shelf that won’t be overloaded) are what I call ‘barbed anchors’. They look a bit like a heavy-duty plastic screw but have multiple sharp points or fins around the base. You typically drill a pilot hole, then screw these in. The barbs bite into the foam and create a surprisingly decent grip. They’re not going to hold your flat-screen TV, but for things that don’t weigh much, they can do the job. I used them to hang a set of decorative mirrors in my hallway, and after six months, they’re still solid.
Another category to consider are the ‘picture-hanging’ or ‘specialty’ anchors. Some of these use a broader base or a different expansion mechanism. For instance, some might feature a larger flange that sits flush against the foam surface, distributing the weight more. Others might have a screw that’s designed to thread into the foam itself, creating a more positive connection than a simple push or twist. Brands that cater to the RV or marine industry, where lightweight construction and unusual materials are common, sometimes have good options that might work for home DIY projects.
The key principle here is surface area and material engagement. Instead of relying on expansion behind a solid board, these anchors either dig in aggressively or spread the load across a wider area of the foam. It’s about working with the material’s properties, not against them. If you’re looking at anything more substantial, like hanging cabinets or heavy shelves, you’re probably going to need to bypass the foam insulation entirely and aim for the studs or structural framing behind it. This requires locating those studs, which is a whole other challenge, especially if you have thick insulation.
Locating the Studs: The Holy Grail Behind the Foam
Let’s be blunt: the absolute best way to hang anything heavy on a wall with foam insulation is to go straight into the framing. That means finding the studs. It sounds obvious, but when you’ve got a layer of rigid foam insulation slapped over your studs, it becomes a treasure hunt. Standard stud finders often struggle. The electronic ones that sense density changes can get confused by the foam itself, giving you false positives or just a confusing mess of signals. The magnetic ones that find the nails or screws holding the foam might be your best bet, but even those can be hit or miss depending on how securely the foam is attached.
My go-to method, when in doubt or when an electronic finder is being a jerk, is the ‘poke and prod’ method. This involves drilling small, discreet pilot holes with a very thin drill bit (like a 1/16th inch) in a few spots where you suspect a stud might be. You’re looking for resistance. If the bit goes in easily and keeps going, you’re likely in empty space or foam.
If you hit something solid after about 3/4 inch to 1.5 inches (depending on your wall assembly), that’s probably your stud. You can then carefully enlarge the hole to the size needed for your screw or anchor. If you’re really worried about the aesthetics, you can use spackle to fill these pilot holes later, and they’ll be virtually invisible. I’ve done this countless times, and it’s more reliable than a fancy gadget sometimes.
Another trick is to look for seams or edges. If the foam panels are installed in a specific pattern, you might be able to deduce where the framing is. Also, check around existing fixtures like electrical outlets or light switches. The framing is usually right next to these.
You can often feel the solid wood if you gently press around the edge of the electrical box. Once you find one stud, you can usually measure 16 or 24 inches (on center) to find the next one, assuming standard construction practices. For heavier items, you absolutely must hit the framing.
Relying on anchors in foam insulation for anything more than a very light picture is a recipe for disaster. It’s the difference between a secure mount and a potential falling hazard. (See Also: Can Cords Be Used To Make Anchors Climbing )
Common Mistakes and What to Avoid
I’ve seen people make so many blunders when trying to attach things to foam insulation. The most glaring one is simply ignoring the material and using standard drywall anchors. As we’ve covered, that’s a fast track to failure. Another common error is overestimating the holding power of specialized foam anchors. While they’re better than nothing, they have limits. I’ve seen folks try to hang heavy mirrors or even small furniture on them, and surprise, surprise, it all comes crashing down. You need to understand the weight rating, and frankly, treat those ratings with a healthy dose of skepticism when dealing with foam.
A related mistake is not properly preparing the foam. Some foam insulation can be quite brittle. Trying to force an anchor in without a pilot hole, or using a pilot hole that’s too large, can cause the foam to fracture or crumble around the anchor, significantly reducing its holding power. It’s like trying to start a screw in soft wood without a pilot hole – you’re just creating a bigger, weaker mess.
Here’s a contrarian take: many online guides will tell you to just get the ‘right’ anchor for foam. While that’s partially true, my experience suggests that even the ‘right’ anchors have a very limited capacity.
I disagree that you can reliably hang anything substantial using only foam anchors. The real trick is to use them only for very light decorative items and to aggressively seek out the studs for anything else.
It’s better to be slightly more work finding studs than to have your precious artwork or equipment fall off the wall. I once tried to hang a modest spice rack using what were advertised as ‘heavy-duty foam anchors’. It held for about three weeks before one side gave way, scattering my spices everywhere.
Never again.
Finally, don’t ignore the finish. If you’re drilling pilot holes or installing anchors, you’re creating holes. If you’re using foam anchors, they can leave unsightly marks. A little bit of caulk or spackle can hide these, but it requires a bit of finesse. The goal is to make the repair as invisible as possible after the fact. If you’re not careful, your DIY project can end up looking like Swiss cheese.
My Own Dumb Mistake: The Shelving Unit Fiasco
Back when I was a bit greener and still believed marketing hype more readily, I decided to install a nice, chunky shelving unit in my garage. The walls were covered in that blue rigid foam insulation, probably R-10 or R-13 value, screwed directly to the studs. I figured, ‘Easy peasy, I’ll just use some heavy-duty screw-in anchors for foam.’ I bought a pack that claimed to hold up to 50 pounds each. My shelving unit, fully loaded with tools and paint cans, probably weighed around 150 pounds. That sounds like it should be fine, right? Wrong.
I carefully drilled my pilot holes, screwed in four of these supposed miracle anchors, and felt pretty smug. The unit went up, looked great. I started loading it. (See Also: Can Anchors In Your Shoulder Break )
The first few paint cans went on without a hitch. Then, I added a couple of heavy-duty drill batteries and a box of screws. That’s when I heard it – a faint, sickening crunching sound.
I looked over, and the entire shelving unit was starting to lean forward. The anchors were still in the foam, but the foam itself had basically disintegrated around them, like a poorly executed cookie cutter job.
The whole thing came down with a crash, thankfully missing my car but showering the floor with tools and paint. I lost about $200 worth of tools and spent the next three hours cleaning up the mess and trying to figure out how to properly attach something to that wall. It taught me a very valuable, very loud lesson about the limits of foam insulation as a structural support.
The lesson wasn’t just about the anchors failing; it was about the material itself. Foam insulation, no matter how many pounds its anchors claim to hold, is not designed for direct load-bearing in this manner. It’s an insulator, not a structural element. Trying to use it as such is like asking a pillow to hold up your ceiling fan. It simply doesn’t have the density or integrity. For anything more than a picture frame, you need to find the studs. It’s the only reliable way to make sure your item stays on the wall and doesn’t become a projectile. I learned that day that sometimes the ‘easy’ solution is actually the most complicated and expensive one in the long run.
Practical Tips for Hanging on Insulated Walls
So, you’ve got a wall with foam insulation, and you need to hang something. Here’s the condensed, no-BS advice:
- Assess the Weight: This is the absolute first step. Is it a lightweight picture frame (under 5 lbs)? A set of keys? Or is it a heavy mirror, a shelf, a cabinet, or a TV? Your approach hinges on this.
- Light Items (Under 10 lbs): For genuinely light items, you might get away with specialized foam anchors. Look for ones with barbs or a wide flange designed to grip or spread across the foam. Drill a pilot hole that’s snug – not too big. Even then, watch the weight rating closely. I’d personally keep these items under 5 lbs to be safe.
- Medium to Heavy Items (Over 10 lbs): Your only reliable option is to hit the studs. Get a good stud finder (magnetic ones that find nails can be better with foam) or use the ‘poke and prod’ method with a thin drill bit. Locate the studs, mark them precisely, and then use appropriate screws or lag bolts directly into the wood.
- Locating Studs Through Foam: This is the tricky part. Use your stud finder, but verify with a small pilot hole. Look for resistance after about 3/4 to 1.5 inches. Also, check for nail/screw heads if your foam is attached that way. Think about standard framing (16 or 24 inches on center).
- Consider Alternatives: If you absolutely cannot hit a stud and the item is moderately heavy, explore options like French cleats or French cleat systems mounted directly to the studs, with the cleat extending out to cover the foam if needed. For very heavy items, think about specialized mounting hardware designed for specific applications (like TV mounts that require stud mounting).
- Patching and Repair: Always have spackle or a good wall filler on hand for any pilot holes or failed anchor attempts. A little bit of sanding and touch-up paint can make things look almost new.
Here’s a table summarizing my take on different anchor types for foam insulation:
| Anchor Type | Best For | Weight Capacity (Estimate) | Opinion/Verdict |
|---|---|---|---|
| Standard Drywall Anchors (Plastic Cone, Toggle, Molly Bolt) | Nothing. Don’t even try. | 0 lbs (will fail) | Complete waste of time and money. Guaranteed failure. |
| Self-Drilling Drywall Anchors | Nothing. Seriously. | 0-5 lbs (will likely fail) | Looks promising, but the foam just disintegrates. |
| Specialized Foam Barbed Anchors | Lightweight pictures, small decorative items (under 5 lbs). | 5-15 lbs (highly dependent on foam density and anchor quality) | Can work for very light things, but treat weight limits as a suggestion, not a guarantee. |
| Specialized Foam Flange/Spreading Anchors | Slightly heavier decorative items (5-10 lbs). | 10-20 lbs (again, variable) | Better than barbed, but still not for substantial loads. |
| Screws/Lag Bolts into Studs | Anything over 10 lbs. Cabinets, shelves, TVs, heavy mirrors. | 25 lbs+ (depends on screw/bolt size and stud integrity) | The only truly reliable method for significant weight. This is the gold standard. |
When in doubt, always err on the side of caution and aim for the studs. It might be more work upfront, but it saves you the headache, the mess, and the potential damage of a falling object. The whole question of can drywall anchors be used in foam insulation has a very simple answer: for anything you care about, the answer is a resounding ‘no’.
Verdict
So, to put it plainly, while there are ‘specialty’ anchors that claim to work in foam insulation, I’ve found their actual holding power to be severely limited and highly dependent on the specific type of foam and the anchor’s design. For anything beyond a lightweight picture, trying to use anchors directly in foam insulation is a gamble I’m no longer willing to take. My advice? Assume you need to hit the studs for almost anything substantial.
The effort required to properly locate and fasten into studs is significantly less than the frustration and potential damage caused by failing anchors in foam. It’s about security and peace of mind. You don’t want that shelf of books or that expensive TV crashing down.
Ultimately, when it comes to asking can drywall anchors be used in foam insulation for anything important, the answer leans heavily towards ‘not reliably’. Invest a little extra time finding those studs, and you’ll save yourself a whole lot of headaches, repairs, and potentially costly accidents down the line.