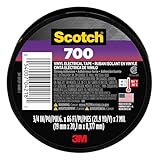
I remember staring at that frayed lamp cord, the insulation practically shedding like a winter coat. My gut reaction? Grab the nearest roll of electrical tape and slap it on. I mean, it’s electrical tape, right? It’s designed for wires. That’s the common wisdom, the quick-fix gospel. But is that really the whole story when it comes to whether can electrical tape be used to fix a cut wire? I’ve learned the hard way that ‘good enough’ often isn’t, especially when you’re dealing with the juice that powers your life.
Years ago, a cheap extension cord on my workbench decided to split open after a year of light use. My first thought was electrical tape. It seemed like the obvious solution. I wrapped it up, felt pretty proud of my DIY fix, and plugged it back in. That was mistake number one. The second mistake was assuming it was a permanent solution.
When ‘good Enough’ Means ‘probably Not’
Look, I’ve been there. You’ve got a wire that’s seen better days, maybe a nick from a careless move with a utility knife, or perhaps it’s just worn down from years of bending. The immediate, siren call is to reach for that roll of sticky, stretchy tape. It feels right. It looks like it’s doing something. But let’s cut to the chase: can electrical tape be used to fix a cut wire as a permanent, reliable solution? My answer, after years of fiddling with wires and regretting some choices, is a resounding ‘nope’. Not for anything important, anyway.
Electrical tape is designed for insulation, yes, but it’s a temporary fix at best. Think of it like putting a band-aid on a gaping wound. It covers the immediate problem, but it doesn’t address the underlying damage. The tape itself isn’t designed to withstand the constant flexing, heat cycles, and potential physical stress that a wire connection is subjected to. Over time, it can dry out, crack, lose its adhesion, or even start to fray. And when that happens? You’re back to square one, potentially with a worse situation because you’ve layered tape over damaged insulation, making a proper repair harder.
I learned this with a set of Christmas lights that had a tiny split in one of the wires. I used electrical tape, and for a while, they worked fine. Then, a few weeks later, during a particularly cold snap, the tape became brittle, cracked, and the lights flickered erratically, eventually shorting out and taking half the string with them. That was a $40 lesson learned. For low-voltage, non-important applications, maybe. But for anything that carries significant current, or anything in your home that you don’t want to become a fire hazard, electrical tape is not the answer.
The real problem is that many people, including myself when I was younger and dumber, see it as a permanent fix. They wrap it up and forget about it. That’s where the danger lies. The insulation is compromised, and the tape can degrade, leaving the conductive wire exposed. This can lead to short circuits, shocks, or even fires. So, while it can be used to cover a cut wire, using it as the sole repair method is a gamble I’m no longer willing to take.
What Electrical Tape Is Actually Good For
Okay, so if electrical tape isn’t the superhero fixer-upper for damaged wires, what is it good for? This is where things get a bit more nuanced. I’ve found that its strengths lie in specific, low-stakes scenarios. For instance, bundling loose wires together can be a lifesaver. Think about the rat’s nest behind your TV or computer. A few wraps of electrical tape can tame that chaos, making it look tidier and preventing cables from getting snagged.
It’s also excellent for marking wires. If you’ve ever wired up a new appliance or tackled a complex electronics project, you know how easy it is to mix things up. Using different colors of electrical tape to label wires (like black for hot, white for neutral, green for ground, or whatever system you devise) can save you a massive headache and prevent costly mistakes down the line. I’ve used red tape to mark the positive terminals on battery packs more times than I can count. It’s cheap, it’s readily available, and it does the job perfectly.
Another common use, and one I find genuinely useful, is for temporary insulation on low-voltage, low-current applications. Think about the wires on a battery-powered toy or a simple hobby circuit. If a tiny bit of insulation scrapes off, a wrap of electrical tape can provide just enough protection to keep things from shorting out. I once repaired a garden solar light where the thin wire leading to the solar panel had a small abrasion. A quick wrap of tape held up for seasons. That’s the kind of application where it shines.
I’ve also used it to secure connections temporarily while soldering. Sometimes, two wires need to be held just so while you get your soldering iron ready. A bit of tape can keep them from slipping apart. Once the solder is done and cooled, the tape is removed. It’s a helper, not a permanent bond.
The key here is understanding the limitations. Electrical tape isn’t rated for high temperatures, significant voltage, or constant physical stress. It’s basically a flexible vinyl with a rubber-based adhesive. It’s designed to provide a dielectric barrier, meaning it resists electrical current, but that resistance degrades over time and under duress. So, while it has its place, it’s important to know its boundaries. Trying to use it for anything beyond its intended purpose is like trying to use a screwdriver as a hammer – you might make it work for a bit, but you’re going to damage something. (See Also: Can I Use Electrical Tape To Connect Wires )
The ‘real’ Way to Fix a Cut Wire (spoiler: It’s Not Tape)
Alright, let’s get down to brass tacks. If electrical tape isn’t the long-term answer for a cut wire, what is? This is where you need to think about proper electrical repair. It’s not as scary as it sounds, and the peace of mind (and safety) is worth the effort. The goal is to restore the electrical connection and then insulate it in a way that’s durable and safe.
The most common and solid method for fixing a cut wire is by using wire connectors. These are small, often plastic devices that you twist onto the ends of the stripped wires. They create a secure mechanical and electrical connection. For household wiring, you’ll most often see the familiar plastic wire nuts, which come in various sizes for different wire gauges. For automotive or more specialized applications, you might use crimp connectors, which require a special crimping tool to create a strong bond.
Here’s a simplified process for using wire nuts:
- Safety First: Always, always, always turn off the power at the breaker box before you even think about touching a wire. Test with a non-contact voltage tester to be absolutely sure.
- Strip the Wires: Using wire strippers, carefully remove about 1/2 to 3/4 inch of the insulation from the ends of the cut wire. You want to expose the bare copper.
- Join the Wires: Take the stripped ends of the wires you want to join and twist them together tightly, either by hand or by holding one stationary and twisting the other.
- Apply the Wire Nut: Screw a wire nut onto the twisted wires, turning it clockwise. It should feel snug and secure. Give the wires a gentle tug to make sure they are held firmly within the connector.
- Insulate (Again): While the wire nut provides insulation, for extra security or in situations where the connection might be exposed to moisture or physical stress, many people will wrap the entire wire nut and the base of the wires with a layer or two of actual electrical tape. This is where tape can be used correctly – as a secondary layer of protection over a proper connection, not as the connection itself.
For more permanent repairs, especially on flexible cords that might see movement, heat shrink tubing is another fantastic option. You slide a piece of the tubing over one of the wires before you make the connection. After you’ve joined the wires (either with a connector or by soldering), you slide the tubing over the connection and heat it with a heat gun or even a lighter. It shrinks down tightly, creating a durable, insulated, and waterproof seal. It looks professional and holds up extremely well.
Some people opt to solder the wires together and then cover the joint with heat shrink tubing. Soldering creates a very strong electrical bond, but it requires a bit more skill and the right tools (a decent soldering iron and solder). For mains voltage wiring, using connectors is generally considered safer and more reliable for the average DIYer than soldering, especially since a poorly done solder joint can be a weak point.
Electrical Tape vs. Other Repair Options: A Showdown
Let’s break down why electrical tape often falls short when compared to more solid repair methods. It’s not that electrical tape is inherently bad; it’s just that its intended use is narrow, and people often try to stretch it beyond its limits. This is where the “can electrical tape be used to fix a cut wire?” question gets messy.
| Repair Method | Pros | Cons | My Verdict |
|---|---|---|---|
| Electrical Tape (as sole repair) | Cheap, readily available, flexible, quick for minor insulation tears. | Degrades over time, loses adhesion, not for significant voltage/heat/flexing, temporary. | Emergency, low-voltage, non-important bundling/marking only. Absolutely NOT for main power fixes. |
| Wire Nuts/Connectors | Secure electrical and mechanical connection, relatively easy to use, designed for the job, durable. | Requires stripping wires, need correct size for wire gauge, can become loose if not tightened properly. | The standard for most household wiring. Reliable and safe when used correctly. |
| Heat Shrink Tubing (with connector/solder) | Excellent insulation, waterproof/weather-resistant when applied correctly, durable, looks professional. | Requires heat source, need to strip wires and make a connection first, can be slightly more time-consuming. | Ideal for exposed connections, outdoor use, or situations needing a solid seal. Top-tier for cord repairs. |
| Soldering (with heat shrink) | Very strong electrical bond, can be very durable if done well. | Requires skill and tools, can be a point of failure if poorly done, not always suitable for high-vibration environments without strain relief. | Great for electronics and some cord repairs, but wire nuts are often simpler and safer for general household use. |
The primary difference is that wire nuts and heat shrink tubing are designed specifically to create a secure, lasting electrical connection and insulation. Electrical tape is more of a finishing or bundling product in the electrical world. It’s like comparing a bandage to stitches. For a paper cut, a bandage is fine. For a deep gash, you need stitches and proper wound care.
I learned this the hard way with a power tool extension cord. It had a small tear in the outer jacket, but the wires inside looked okay. I wrapped it with electrical tape. A few weeks later, during a messy job, I accidentally dragged it over some rough concrete. The tape snagged and tore, exposing the wires. The whole thing shorted out, and I nearly got a nasty shock. If I had used a proper cord repair kit (which usually involves a splice connector and heat shrink), it would have been a much more reliable fix. That experience cost me a good extension cord and a lot of frustration.
Common Mistakes People Make with Wire Repairs
It’s easy to fall into bad habits or make assumptions when trying to fix a wire. I’ve definitely made my fair share of these mistakes, and seeing them happen to others makes me cringe. Understanding these pitfalls can save you a lot of trouble and, more importantly, keep you safe.
One of the biggest blunders is not turning off the power. I cannot stress this enough. People get impatient, or they think, “Oh, it’s just a little wire, I’ll be quick.” That’s a recipe for disaster. Always, always, always go to your breaker box, identify the correct circuit, and flip that breaker off. Then, use a non-contact voltage tester to confirm there’s no power before you even get your tools out. I know someone who got a nasty jolt trying to fix a lamp while it was still plugged in. He was lucky it wasn’t worse. (See Also: Can Electrica Tape Catch On Fire )
Another common mistake is using the wrong type of tape. Not all tape is created equal. Standard office tape or duct tape will not cut it. Duct tape, in particular, is notorious for leaving a gummy residue that’s hard to clean off, and its adhesive properties are awful in heat or cold.
Even using actual electrical tape incorrectly is a mistake. As we’ve discussed, using it as the sole method for a damaged wire is a massive no-no. People wrap it thinly, assuming it’s enough, when it needs multiple layers to offer even minimal protection. This is especially true for mains voltage wires.
For a wire that carries a significant load, you need to see at least two or three good, tight, overlapping layers of quality electrical tape, and even then, it’s a temporary patch.
Stripping wires improperly is another frequent error. Using a knife or scissors to cut the insulation can nick the underlying copper wire. These nicks create weak points that can break over time, leading to intermittent connections or complete failure. You should always use a dedicated wire stripper tool. They are designed to cut the insulation cleanly without damaging the copper strands. They’re inexpensive and make the job ten times easier and safer.
Finally, people often skimp on the connector. They might use a wire nut that’s too small for the wires, or one that’s old and brittle. Or they might not twist the wires together tightly enough before applying the connector. A loose connection creates resistance, which generates heat. Over time, this heat can melt the insulation, damage the connector, and even start a fire. It’s a slow burn, literally.
So, to recap the big mistakes: neglecting power shut-off, using the wrong tape (or using electrical tape incorrectly), damaging wires during stripping, and using improper or loose connectors.
Practical Tips for Wire Repair (when It Counts)
Let’s talk about making wire repairs that actually last, without resorting to flimsy fixes. My philosophy is simple: do it right the first time, and you won’t have to do it again (or worse, deal with the consequences of a bad repair).
First, invest in good tools. A decent pair of wire strippers is a must. They’re not expensive, and they’ll save you so much hassle and prevent damage to the wires. I also keep a few different sizes of wire nuts and crimp connectors on hand. For flexible cords, a roll of good quality heat shrink tubing in various diameters is a lifesaver. You’ll also want a small butane torch or a heat gun for the tubing, and a non-contact voltage tester is your best friend for safety.
When you’re repairing a damaged cord, like on a power tool or an appliance, consider using a cord repair kit. These kits often include a splice connector (like a butt splice) and a piece of heat shrink tubing designed for the specific type of cord. They’re designed to be weather-resistant and durable. You strip the ends of the cord, insert them into the splice connector, crimp it tight, slide the heat shrink tubing over the splice, and then heat it until it forms a solid, insulated seal. This is a repair that will hold up to abuse.
For permanent splices in household wiring (e.g., inside a junction box), always use the correct type and size of wire nut. Make sure the wires are twisted together neatly before screwing on the nut. Give it a firm tug to make sure it’s secure. If the wires feel loose, you might need a larger nut or a better twist. After securing the splice, it’s good practice to wrap the base of the wires and the nut with a layer or two of high-quality electrical tape. This adds an extra layer of protection against abrasion and moisture, even though the wire nut is the primary insulator. (See Also: Can I Substitute Duct Tape For Electrical Tape )
Don’t be afraid of soldering if you’re comfortable with it, especially for electronics or smaller gauge wires. Just make sure you’re using rosin-core solder designed for electrical work. After soldering, always cover the joint with heat shrink tubing. A properly soldered and heat-shrunk joint is incredibly strong and reliable.
Finally, strain relief is often overlooked. If you’re repairing a cord that will be bent or pulled frequently, consider how you can add strain relief. This might involve a cable gland, a sturdy wrap of electrical tape around the outer jacket where it enters a device, or making sure the repair is made in a section of the cord that won’t see excessive movement. A repair that’s too stiff or brittle can simply break again at the edge of the repair.
Can Electrical Tape Be Used as a Permanent Fix for a Cut Wire?
No, electrical tape should not be used as a permanent fix for a cut wire. While it can provide temporary insulation for minor nicks or abrasions, it degrades over time due to environmental factors and physical stress. Permanent repairs require methods like wire nuts, crimp connectors, or soldering with heat shrink tubing for reliable and safe insulation.
Is Electrical Tape Safe for High-Voltage Wires?
Electrical tape is generally not considered safe for high-voltage wires as a permanent repair. Its insulating properties are limited, and it can fail under high electrical stress, heat, or prolonged use. For high-voltage applications, specialized tapes or connectors designed for those specific voltage ratings and environmental conditions are necessary.
How Many Layers of Electrical Tape Are Needed for a Temporary Fix?
For a temporary fix, if electrical tape is the only option available and the wire is low-voltage, at least two to three tight, overlapping layers of good quality electrical tape should be applied. Make sure the tape is stretched slightly as you wrap to create a snug fit. However, this should be considered a very short-term solution until a proper repair can be made.
What Should I Use Instead of Electrical Tape for a Wire Repair?
Instead of electrical tape, you should use proper wire connectors such as wire nuts (for household wiring), butt splices (for cord repairs), or crimp connectors. Following the connection, use heat shrink tubing for durable insulation. Soldering followed by heat shrink is also a reliable method for many applications.
Conclusion
So, to circle back to the burning question: can electrical tape be used to fix a cut wire? Yes, in a pinch, for temporary, low-stakes insulation. But as a real, lasting repair? Absolutely not. I’ve wasted enough time and risked enough minor shocks to know that cheap fixes often cost more in the long run. For anything beyond bundling or marking, investing in the right connectors and proper insulation like heat shrink tubing is the only way to go.
My own experiences, from sparking Christmas lights to a fried extension cord, have taught me that compromising on wire repair is a gamble. It’s not worth the risk of a short circuit, a fire, or a shock. Always prioritize safety and use the correct materials for the job.
Next time you’re faced with a damaged wire, take a deep breath, turn off the power, and reach for the right tool. Your future self will thank you.