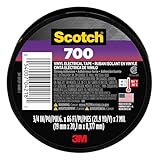
So, you’ve got a frayed wire, a slightly loose connection, or maybe a DIY project that needs a bit of tidying up. Your mind immediately goes to that roll of black electrical tape and that colorful assortment of heat shrink tubing you’ve got stashed away. The burning question: can I use electrical tape and heat shrink together? I’ve been there, staring at a mess of wires, tempted to just slap some tape on it and call it a day. But before you grab the nearest roll, let’s talk about what actually works and when you’re just making a future problem for yourself.
Electrical Tape: The Quick Fix That Might Bite You
Look, electrical tape has its place. It’s sticky, it’s flexible, and it’s cheap. For very low-voltage stuff, like tidying up the wires on a desk lamp where there’s zero chance of it getting yanked or stressed, it can work in a pinch. I once tried to fix a wobbly bike brake lever cable by wrapping it in electrical tape.
Figured it would add some grip and keep things from rattling. Within a week, the tape had gotten gummy, started peeling, and looked like a sad, black slug. It didn’t add any structural integrity, and it just made the whole thing look amateurish. That was a hard lesson: electrical tape is more of a temporary cosmetic fix or a very light-duty insulator for non-important areas.
It’s not designed for abrasion resistance, extreme temperatures, or anything that’s going to be handled a lot. The adhesive can degrade, especially with UV exposure or heat, and it can leave a sticky residue that’s a nightmare to clean off later. For anything that carries actual current or is in a place where it could be touched or snagged, you need to think harder than just wrapping it in tape.
What to Actually Look for in Electrical Tape
When you do need electrical tape, not all of it is created equal. You want something that’s designed for electrical work, not just any old adhesive tape that happens to be black. Look for tapes that explicitly state they are for electrical insulation. High-quality vinyl electrical tape is generally the standard.
It’s supposed to be stretchy, conformable, and offer decent dielectric strength – that’s the ability to resist electrical breakdown. Some tapes are rated for higher temperatures or specific voltage levels, but for most household fixes, a good quality vinyl tape should be your baseline.
Avoid bargain-bin stuff that feels thin and brittle. I learned this the hard way when a cheap roll I bought online fell apart in my hands, the adhesive clinging to my fingers and doing nothing for the wire. It felt more like glorified masking tape. Always check the packaging for specs like voltage rating and temperature range.
If it doesn’t say anything about electrical use, don’t use it for electrical use.
Heat Shrink Tubing: The Superior Choice for Real Connections
Now, let’s talk about heat shrink. This stuff is leagues above electrical tape when it comes to making a solid, durable connection. It’s a plastic tube that you slide over a wire or a splice, and then you hit it with heat – usually from a heat gun, but a lighter or even a soldering iron tip can work in a pinch (carefully!). (See Also: Can I Use Electrical Tape To Connect Wires )
As it heats up, it shrinks down tightly, creating a snug, protective sleeve. It seals out moisture, provides excellent insulation, and offers mechanical protection. It looks professional, too. I remember doing a repair on some outdoor garden lights that had been zapped by the sun and rain.
The original wiring had frayed right where the cables entered the light fixture. I cut out the damaged section, spliced the wires back together with a connector, and then slipped a piece of heat shrink over the whole thing, making sure it overlapped well onto the intact cable insulation. Hit it with the heat gun, and it shrunk down like a glove.
That was three years ago, and those lights are still working perfectly. No tape to peel, no gunk, just a clean, protected joint. That’s the power of heat shrink – it creates a solid, integrated seal.
Why Heat Shrink Wins the Durability Contest
The big difference is how they bond. Electrical tape relies on an adhesive that can break down over time. Heat shrink, on the other hand, physically conforms to the shape of the wire or splice. When you heat it, the material’s molecular structure changes, and it shrinks to a tight fit.
This creates a mechanical bond and a barrier that’s much more resistant to wear and tear. Think about it: tape can snag, tear, or get cut. Heat shrink, once properly applied, is pretty tough.
It can withstand vibration, moderate flexing, and environmental exposure much better than tape. It’s also available in different thicknesses and materials, some of which are rated for very high temperatures or even flame retardancy, which tape almost never is. If you’re doing any kind of repair or installation that’s going to be in a car, an RV, outdoors, or anywhere with moving parts or potential for abrasion, heat shrink is almost always the way to go for a lasting fix.
Can You Use Them Together? The Honest Truth
So, can you use electrical tape and heat shrink together? Yes, you absolutely can. And sometimes, it’s actually the right move, but not in the way you might think.
The most common scenario where this pairing makes sense is when you’re using heat shrink tubing, but the tubing itself isn’t quite long enough to cover the entire splice and extend sufficiently onto the original cable insulation for a proper seal. In this case, you might use a short piece of high-quality electrical tape underneath the heat shrink. (See Also: Can Electrica Tape Catch On Fire )
This serves a couple of purposes. First, it provides an initial layer of insulation and a smooth surface for the heat shrink to grip onto.
Second, it can help to fill any small gaps if the heat shrink isn’t a perfect fit. You’d apply the tape first, making sure it’s smooth and tight, then slide the heat shrink over it, and then heat it. This way, the tape is fully encapsulated and protected by the heat shrink, and its adhesive isn’t exposed to the elements.
It’s a way to beef up a connection or make a less-than-perfect heat shrink fit more secure.
When Not to Combine Them
The mistake most people make is using electrical tape over heat shrink, or relying on electrical tape as the primary insulation with heat shrink as an afterthought. That defeats the purpose of the heat shrink.
If you’ve got a wire that’s frayed, and you wrap it poorly with electrical tape, then slide heat shrink over that messy tape job, you haven’t really fixed the underlying problem. The tape can still slip, the connection underneath might be compromised, and the heat shrink is just covering up a shoddy repair. The heat shrink needs to be in direct contact with the wire or a proper connector to shrink down effectively and create a strong, insulated bond.
If the tape is too bulky or uneven, the heat shrink won’t shrink uniformly, leaving gaps and weak points. It’s like putting a nice coat of paint on a rotten fence – it looks okay for a minute, but it’s not going to last.
Practical Application: Step-by-Step for a Solid Repair
Let’s say you’ve got a wire that’s seen better days, maybe a small nick in the insulation. Here’s how you’d do it right using both materials where appropriate. First, assess the damage. If it’s a deep cut that goes into the conductor, you need to cut out that section and splice in a new piece of wire or use a crimp connector. If it’s just a superficial nick in the insulation, you might be able to get away with just covering it. For this example, let’s assume a minor nick.
- Prepare the Area: Clean the wire with a bit of isopropyl alcohol to remove any grease or dirt.
- Cut Heat Shrink: Select a piece of heat shrink tubing that’s large enough to fit over the damaged section and extend at least an inch onto the undamaged insulation on both sides. Cut it to length.
- Apply Heat Shrink (If Sufficient Length): Slide the heat shrink tubing over the damaged area. If it’s long enough to provide adequate coverage and a good seal, you’re done with this step.
- Using Tape Under Heat Shrink (If Needed): If the heat shrink isn’t quite long enough, or you want extra assurance, take a small piece of high-quality electrical tape. Wrap it tightly and smoothly around the nicked area, making sure it’s flush and creates a uniform surface. Then, slide the heat shrink tubing over this taped section, again making sure it extends well onto the good insulation.
- Apply Heat: Use a heat gun on a medium setting, moving it back and forth constantly to make sure even heating. Start heating from the center outwards. The tubing will start to shrink. Keep heating until it’s snug and has conformed to the wire. Be careful not to overheat or scorch the wire or the tubing.
This method makes sure the heat shrink does the heavy lifting for insulation and protection, while the tape (if used) is completely enclosed and supported. It’s about using tape as a filler or support beneath the primary protective layer, not as the primary protective layer itself. (See Also: Can I Substitute Duct Tape For Electrical Tape )
When to Just Use One or the Other
Most of the time, you’ll probably want to stick to just one material. Heat shrink tubing is the clear winner for any kind of permanent, durable electrical insulation or repair. If you’re splicing wires together, protecting exposed solder joints, or reinforcing cable entries, a good heat shrink application is almost always superior. It’s clean, it’s solid, and it looks like you know what you’re doing. I’ve found that the initial investment in a decent heat gun and a variety pack of heat shrink is well worth it over time, saving you from future headaches and unreliable repairs.
Common Mistakes to Avoid with Heat Shrink
Here’s where people really mess up. Using too small a piece of heat shrink is a classic. It won’t overlap the good insulation, so you get a weak point. Another is not heating it evenly. You end up with wrinkles or areas that haven’t shrunk properly. And please, for the love of all that is holy, don’t use a torch. You’ll melt the tubing, scorch the wire, and possibly start a fire. A heat gun is designed for this. Some folks also think you need to use tape over the heat shrink to hold it down. That’s completely unnecessary and just looks terrible. The heat shrink is supposed to shrink and stay put on its own.
| Application | Electrical Tape (Verdict) | Heat Shrink (Verdict) |
|---|---|---|
| Temporary insulation on low-voltage, non-moving wires | Okay (use sparingly) | Overkill, but works |
| Permanent splice insulation | Bad (will fail) | Excellent |
| Mechanical protection from abrasion | Poor (will tear) | Good to Excellent (depending on type) |
| Moisture/Environmental sealing | Poor (adhesive degrades) | Excellent |
| High-temperature environments | Very Poor (melts/degrades) | Good to Excellent (with specialized types) |
| Appearance/Professional look | Poor (messy) | Excellent |
Faq Section
Is Electrical Tape Safe for Wiring?
Electrical tape is safe for temporary insulation on low-voltage wires in non-important applications where it won’t be exposed to stress or extreme temperatures. However, its adhesive degrades over time, and it offers poor mechanical protection, making it unsuitable for permanent or high-demand wiring repairs. For most applications requiring lasting insulation and protection, heat shrink tubing is a much more reliable and durable option.
Can I Use Electrical Tape Instead of Heat Shrink?
You can use electrical tape instead of heat shrink in very limited, low-stakes situations, but it’s generally not a good substitute for a proper, durable repair. Electrical tape’s adhesive can dry out and lose its stickiness, it’s prone to tearing and abrasion, and it doesn’t offer the same level of sealing against moisture or vibration. Heat shrink, once applied, provides a much more solid and long-lasting protective layer.
Will Heat Shrink Go Over Electrical Tape?
Yes, heat shrink tubing can go over electrical tape. In fact, this can be a useful technique if the heat shrink tubing isn’t quite long enough to provide adequate overlap onto the original cable insulation. Wrapping the damaged wire area smoothly with electrical tape first can create a more uniform surface for the heat shrink to shrink onto, effectively using the tape as a filler or under-layer beneath the primary protective barrier of the heat shrink.
How Do You Make Heat Shrink Stick Better?
To make heat shrink stick better, make sure the tubing is the correct size for the wire or splice, so it shrinks down tightly and uniformly. Clean the wire surface before application to remove dirt or grease. Heat the tubing evenly with a heat gun, starting from the center and working outwards, allowing it to contract snugly. If using tape underneath, make sure it’s applied smoothly and tightly. For very important applications, specialized adhesives or primers can be used, but for most DIY jobs, proper sizing and even heating are key.
Should I Put Tape Over Heat Shrink?
No, you should not put tape over heat shrink. The purpose of heat shrink is to shrink down and form a protective, insulating layer on its own. Adding tape over it is redundant, unsightly, and can actually interfere with the integrity of the heat shrink seal. Once properly heated and shrunk, the heat shrink should provide all the necessary protection and adhesion for the connection.
Final Verdict
So, can I use electrical tape and heat shrink? The short answer is yes, but understanding how and why is the real trick. For most serious repairs or permanent installations, heat shrink is your go-to. It’s the professional, durable choice that stands up to the test of time and use. Electrical tape is best left for temporary fixes on things that aren’t going to be stressed, or as a very specific under-layer when combined properly with heat shrink.
Don’t let shoddy tape jobs become a recurring problem. Invest in a good heat gun and a decent assortment of heat shrink tubing – you’ll thank yourself later when your connections are clean, secure, and actually last. Think about that next time you’re staring down a frayed wire.