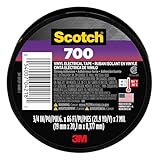
I remember the first time I completely shredded a brand new tire on a pothole that seemingly appeared out of nowhere. My bike, a trusty steed I’d poured way too much money into, was suddenly sidelined. The culprit? A tiny section of compromised rim tape that let a sharp edge of the rim dig right into the tube. This incident got me thinking, and probably got you thinking too: can I use electrical tape instead of rim tape?
It’s a question born from desperation, or maybe just a desire for a quick fix when you’re miles from a bike shop. We’ve all been there, staring at a bike part and wondering if some other common household item could just… do the job.
Let’s cut to the chase: it’s not a simple yes or no. There are nuances, and frankly, some massive risks involved. We’re going to break down why this seemingly innocent substitution can be a really bad idea.
When Your Bike Needs New Shoes: The Real Deal with Rim Tape
Look, when you’re out on a ride and disaster strikes – a puncture, a blown tube – and you’re staring at your wheel, the first thing you might consider is a quick patch-up job. Maybe you’ve got electrical tape in your saddlebag, or you’re at home and realize you’re out of proper rim tape. The question, can I use electrical tape instead of rim tape, pops into your head. It seems so simple, right? Just a strip of tape to cover the spoke holes.
But here’s the blunt truth: electrical tape is not designed for this. Rim tape, whether it’s cloth, nylon, or those fancy tubeless setups, has a specific job. Its primary function is to create a smooth, continuous surface inside the rim that protects the inner tube from the sharp edges of the spoke holes. Think of it as a buffer. If those edges are exposed, even slightly, they can chafe through your tube, leading to frustrating pinch flats. You know the kind – where the tube gets pinched between the rim edge and the tire bead, or worse, right against a spoke hole.
I’ve seen people try it. A buddy of mine, caught out in the middle of nowhere with a flat that wouldn’t seal and no spare tube, used a few layers of electrical tape he’d scavenged. He made it home, barely. The next day, he had another flat, this time a slow leak that kept him guessing. The electrical tape had bunched up, creating a small ridge that was slowly but surely wearing down the new tube. It was a temporary fix, but a costly one in terms of time and potential damage.
The thickness of electrical tape is also a factor. It’s usually thinner and more stretchy than dedicated rim tape. This means it’s more prone to stretching, tearing, and shifting under the pressure of a inflated tire. When you’re running 80-100 psi in your road tires, or even 30-50 psi in mountain bike tires, that tape needs to hold its ground. Electrical tape, with its tendency to stretch and peel, just isn’t up to the task long-term. It might hold for a short, gentle ride, but any significant pressure or bumps are likely to cause it to fail.
Then there’s the adhesive. Electrical tape’s adhesive is designed for wire insulation, not for the constant pressure and temperature fluctuations inside a wheel rim. It can get gummy, melt slightly under friction or sun, and eventually lose its grip, allowing the tape to creep and expose those spoke holes. This can also leave a sticky residue on your rim that’s a pain to clean off. Overall, while the idea might seem practical, the reality is that electrical tape is a gamble you don’t want to take with your bike’s integrity.
Why That Gooey Stuff Isn’t Your Tire’s Best Friend
Let’s talk about what makes proper rim tape, well, proper. Bicycle rims are designed with specific contours and spoke hole placements. The rim tape’s job is to bridge those gaps smoothly. Standard rim tape is typically made of strong nylon, cloth, or even a hard plastic. These materials are chosen for their durability, their ability to withstand high pressures, and their relative rigidity. They don’t stretch much, which is exactly what you want. When you install it correctly, it forms a solid, uniform band that the inner tube presses against, distributing pressure evenly and preventing any part of the tube from getting snagged or abraded by the spoke nipples or the edges of the spoke holes.
Think about the forces at play inside a wheel. You have the constant outward pressure of the inflated tube.
Then you have the dynamic forces from riding: bumps, cornering, braking. These forces can cause the tire and tube to shift slightly against the rim. If your rim tape is too soft, too stretchy, or has already started to peel, it can’t handle this movement. It can bunch up, creating a high spot, or it can simply shift out of place, exposing the spoke holes.
That’s when you get those dreaded pinch flats. I once had a tube fail spectacularly on a downhill because the rim tape had shifted just enough to expose a sharp edge.
The resulting explosion of air and rubber was startling, to say the least, and I ended up walking the last two miles.
Electrical tape, on the other hand, is made of vinyl and a rubber-based adhesive. It’s designed to be flexible and insulating, not structural. Its stretchiness is its downfall here. (See Also: Can I Use Electrical Tape To Connect Wires )
When you try to apply it tightly enough to cover the spoke holes, it wants to stretch. This can lead to uneven tension, making it more likely to fail.
If you don’t stretch it enough, you’ll have gaps or loose spots where it can shift. Moreover, the adhesive on electrical tape isn’t designed to bond permanently under constant tension and heat.
It can soften and creep, especially in hot weather or after prolonged use. You’ll find it peeling away from the rim edges, creating little flaps that can catch on the tire bead or the tube.
The common advice you’ll find online often touches on using multiple layers of electrical tape. While this might seem like a way to add thickness and strength, it often exacerbates the problem. More layers mean more potential for unevenness, more adhesive to fail, and a bulkier, less stable base for your tube. It’s like trying to build a strong wall with tissues – you might add a lot of them, but it’s still not going to be structurally sound. For a bicycle wheel, especially one that sees regular use or rough terrain, you need a solution that’s built for the job, not a makeshift patch.
A Personal Mishap: When ‘good Enough’ Becomes ‘not Good Enough’
I’ll admit it, I’ve been tempted. Back in my early days of bike tinkering, before I knew the ins and outs of every specific bike part, I found myself in a bind. I was building up a vintage road bike, a project that was costing me more than I’d initially budgeted. I’d spent a chunk of change on a nice set of used wheels, but the existing rim tape was ragged and clearly needed replacing. My local bike shop was closed, and I was itching to get the bike on the road. I remembered seeing my dad use electrical tape for all sorts of repairs around the house, and it seemed like a readily available solution.
So, I went for it. I carefully cleaned the rim, applied several tight layers of black electrical tape, making sure to overlap generously. I trimmed the excess with a razor blade, feeling quite proud of my ingenuity. I mounted a new tube and tire, inflated it, and it looked… fine. It held air. I took it for a short spin around the block. No wobbles, no immediate leaks. I thought I’d cracked the code. I figured, hey, if it holds air and protects the tube, what’s the big deal?
The big deal became apparent on my first real ride the next day. It was a moderately paced 20-mile loop.
About 15 miles in, I started noticing a slight squishiness in the rear tire. I dismissed it as perhaps not inflating it quite enough. Then, a mile later, a distinct wobble.
I pulled over, and the tire was significantly deflated. I pumped it up, and within 5 minutes, it was flat again.
This time, when I took the tire and tube off, I saw it. The electrical tape hadn’t held. It had stretched and started to peel away from the rim edge near one of the spoke holes.
The sharp edge of the spoke hole had worn a nasty gash into the inner tube. It wasn’t just a pinhole; it was a significant tear. I had to call a friend to pick me up, embarrassed and annoyed. That day taught me a hard lesson: when it comes to bicycle components subjected to high pressure and stress, ‘good enough’ often isn’t.
The cost of a proper set of rim strips – usually around $10-$20 for a pair – is a pittance compared to the potential damage to your rim, the frustration of repeated flats, or the cost of being stranded. My electrical tape ‘fix’ ended up costing me a new tube and a lot of wasted time and hassle. It’s a mistake I haven’t repeated, and it’s one I strongly advise you to avoid.
Contrarian Corner: Is There Any Scenario Where It’s Okay?
Okay, here’s where I might ruffle some feathers. Everyone will tell you, “No, absolutely not. Electrical tape is garbage for rim tape.” (See Also: Can Electrica Tape Catch On Fire )
And for 99.9% of riding, they are 100% correct. It’s a terrible idea, a recipe for flats, and a potential risk to your rim.
However, let me play devil’s advocate for a sliver of a second, with massive caveats. If you are in an absolute, dire, life-or-death emergency – and I mean you are stranded miles from anywhere with zero other options, and you need to make a bicycle move, however slowly and precariously, for a very short distance to safety – then, and only then, might a carefully applied, multi-layered application of high-quality electrical tape serve as a temporary shield for a very low-pressure ride.
I’m talking about a situation where you’ve got a hole in your tube, and the rim itself is in good condition, but the spoke holes are exposed. You’ve got a few rolls of top-tier electrical tape, maybe some heavy-duty stuff like 3M Super 33+. You’d need to meticulously clean the rim, apply layer upon layer, stretching it taut but not so much it permanently deforms, making sure significant overlap. You’d likely want to use it only on the rear wheel, as that’s less important for steering.
And you’d need to inflate the tire to the absolute lowest possible pressure that still keeps the tire bead seated – maybe 20-30 psi for a road bike, even less for a mountain bike. This is not about performance; it’s about inching your way to civilization.
The risk of pinch flats is astronomically high. The tape is almost guaranteed to shift.
The adhesive will likely fail. You might even damage your inner tube further.
It’s a last-ditch effort, a Hail Mary pass. The common advice is to never do it, and for good reason. My personal experience, as detailed earlier, reinforces that. But if you’re stranded in the desert and need to pedal a mile to water, and your only option is this absolute hack, then maybe, just maybe, it buys you that mile.
It’s like using a credit card to jimmy a lock; it’s not what it’s for, it’s likely to break the card, and it’s a bad habit, but in a pinch, it might get you through the door. Just understand that you are actively courting disaster, and as soon as humanly possible, you need to replace it with proper rim tape.
What to Look for in Proper Rim Tape
When you decide to do this the right way – which, let’s be honest, is the only way you should be doing it long-term – you need to know what you’re looking for. Forget the electrical tape. We’re talking about specialized bicycle rim tape. There are a few main types, and the best choice often depends on your wheels and the type of riding you do.
The most common and traditional type is cloth or nylon rim tape. This stuff is solid. It’s usually a few millimeters wider than your rim’s internal width and comes in rolls. You cut it to length and adhere it to the rim bed, making sure it covers all the spoke holes and reaches up the rim walls slightly. The key here is getting the right width – too narrow, and it won’t cover the holes; too wide, and it can interfere with tire seating. Many cyclists prefer this because it’s durable and reliable. Some brands, like Velox, are legendary for their cloth rim tapes, and they’re relatively inexpensive, costing around $7-$10 for a roll that will do several wheels.
Then you have plastic rim strips. These are often pre-formed to fit specific rim diameters and widths. They’re usually made of a harder, less flexible plastic than electrical tape. You simply press them into the rim bed, and they snap or fit snugly. Brands like Zipp or DT Swiss offer these, and they’re generally a bit pricier, maybe $15-$30 for a pair. They’re convenient because they’re pre-sized and easy to install. The main advantage is their uniformity; they create a very smooth surface.
For tubeless setups, you’ll need dedicated tubeless rim tape. This is usually a very strong, sticky, and somewhat elastic tape, often made of a material like Stan’s Notubes tape or similar proprietary compounds. It’s wider than standard rim tape and needs to be applied meticulously to create an airtight seal. This is a whole different ballgame and requires specific techniques to get right. If you’re going tubeless, don’t even think about using electrical tape; it simply won’t seal.
Here’s a quick rundown: (See Also: Can I Substitute Duct Tape For Electrical Tape )
| Type | Pros | Cons | Verdict |
|---|---|---|---|
| Cloth/Nylon Rim Tape | Durable, reliable, inexpensive, good adhesion, easy to cut to size. | Requires careful application, can shift if not installed perfectly. | Excellent for most applications. A solid, dependable choice. |
| Plastic Rim Strips | Easy to install, precise fit, very uniform surface. | Can be more expensive, less forgiving if the wrong size is chosen. | Very Good, especially for convenience. Great for many road and hybrid bikes. |
| Tubeless Rim Tape | Creates airtight seal for tubeless setups, strong adhesive. | Requires precise application, more expensive, not for tubes. | Key for tubeless. Do not substitute. |
| Electrical Tape | Readily available (sometimes). | Stretchy, adhesive fails under pressure/heat, prone to shifting, leads to flats, can damage rim. | Terrible. Only a desperate, temporary, emergency hack. |
When choosing, consider your rim’s internal width and your tire pressure. For most standard clincher tires, good quality cloth or nylon tape is your go-to. They’re affordable and effective, providing the protection your inner tube desperately needs.
Common Mistakes and How to Avoid Them
Even with proper rim tape, installation can be a bit fiddly, and mistakes are common. Understanding these pitfalls will save you a lot of headaches. The most frequent mistake, of course, is trying to use something that isn’t rim tape, like electrical tape. But assuming you’re using the right stuff, here are other common errors.
First, using the wrong width of tape. If the tape is too narrow, it won’t adequately cover the spoke holes and the edges of the rim bed where the tire bead sits. This leaves gaps for the tube to escape. If it’s too wide, it can interfere with the tire bead seating properly, leading to issues with inflation or even the tire coming off the rim. Always measure your rim’s internal width and choose tape that’s a few millimeters wider. For example, a 15mm internal width rim might need 19mm or 21mm wide tape.
Another mistake is not cleaning the rim thoroughly before applying the tape. Old adhesive residue, dirt, or grease can prevent the new tape from sticking properly. This can lead to the tape lifting or shifting over time. Take the time to clean the rim bed with a degreaser or rubbing alcohol. Make sure it’s completely dry before applying the tape.
When applying cloth or nylon tape, many people don’t get it tight enough. The tape needs to be stretched taut as you apply it, creating a smooth, continuous band. You want it to lie flat, with no bubbles or wrinkles. Wrinkles are weak points where the tube can get pinched. Work from one side, applying steady pressure and overlapping the ends by a good few inches. Some people even use a bit of rubber cement for extra security, though most quality tapes are sticky enough on their own.
For plastic or tubeless tapes, the application is often more about precision. You need to make sure there are no gaps in the tape, especially where the ends meet. For tubeless setups, a perfect seal is most important. Overlapping the tape by an inch or two and making sure the tape sits perfectly flat and smooth is important. A common error with tubeless tape is not pressing it down firmly enough, or not using a roller tool to make sure full adhesion. This can lead to air leaks and the tape peeling away.
Finally, over-tightening when installing the tire can also be an issue, especially with plastic rim strips. You don’t want to force the tire bead over the rim tape in a way that could damage it. Use tire levers carefully, and if you’re struggling, check that the rim tape is seated correctly and not causing an obstruction.
People Also Ask: Faq
Can I Use Duct Tape Instead of Rim Tape?
No, you absolutely should not use duct tape instead of rim tape. Duct tape is far too stretchy and its adhesive is not designed for the pressures and temperatures inside a wheel rim. It will stretch, peel, and fail, leading to pinch flats and potentially damaging your rim. It’s thicker and less uniform than dedicated rim tape, making it a poor substitute.
How Many Layers of Electrical Tape Should I Use?
If you are in a dire emergency and absolutely have no other choice, you might attempt to use multiple layers of electrical tape. However, there is no ‘correct’ number of layers, as it’s a fundamentally flawed solution. Using more layers doesn’t reliably fix the problem and often makes it worse by creating more bulk and potential failure points. It is strongly advised to avoid this entirely and use proper rim tape.
What’s the Difference Between Rim Tape and Rim Strip?
The terms ‘rim tape’ and ‘rim strip’ are often used interchangeably, but there can be slight distinctions. ‘Rim tape’ often refers to rolls of material (cloth, nylon, tubeless tape) that you cut to size and apply yourself. ‘Rim strip’ can sometimes refer to pre-formed plastic or rubber bands that fit specific rim sizes and are simply pressed into place. Both serve the same purpose: protecting the inner tube from spoke holes.
How Long Does Rim Tape Last?
The lifespan of rim tape varies depending on the type, material, riding conditions, and maintenance. Good quality cloth or nylon rim tape can last for many years, often outlasting several tires. Plastic rim strips might degrade over time, especially with UV exposure. Tubeless rim tape might need replacing every few years due to adhesive breakdown or damage from tire installation/removal. Inspect your rim tape periodically for signs of wear, lifting, or damage, and replace it if you see any issues.
Verdict
So, after all this, the answer to can I use electrical tape instead of rim tape is a resounding ‘no, unless you’re facing a truly dire, temporary emergency and understand the significant risks.’ It’s a hack that’s likely to cause more problems than it solves, leading to flats, frustration, and potentially damaging your wheel. The few dollars you might save by not buying proper rim tape are not worth the potential cost and hassle.
Invest in the right tool for the job. A roll of quality cloth rim tape costs less than a single inner tube and will protect your wheel for thousands of miles. When it comes to your bike’s reliability and your safety, cutting corners with makeshift solutions is a false economy.
Next time you need to replace your rim tape, or if you find yourself in a situation where you’re tempted by that roll of electrical tape, remember this. Your inner tube and your rim will thank you for sticking to the proper stuff. Make sure you have a spare set of proper rim tape in your bike repair kit.