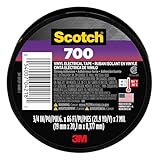
I remember staring at a half-painted wall, tape peeling off in ugly, jagged lines, and realizing I’d screwed up. I was halfway through a DIY trim job, and the cheap blue tape I’d grabbed from the garage was basically staging a rebellion. It looked like a bad impressionist painting on my freshly primed drywall. This whole mess got me thinking: can I use electrical tape instead of painter’s tape? Honestly, it’s a question that pops up when you’re in a pinch, staring down a roll of black sticky stuff and a paint project that needs doing yesterday.
We’ve all been there, right? Facing a DIY dilemma with the wrong supplies at hand. The siren song of ‘close enough’ is powerful, especially when the hardware store is a twenty-minute drive away and your motivation is about to evaporate. So, let’s get down to brass tacks about whether electrical tape is a secret weapon or just another way to ruin your weekend.
The Sticky Truth: What’s the Difference, Really?
Look, the fundamental job of tape in a painting project is simple: create a barrier. You want to block paint from going where you don’t want it.
Painter’s tape is designed for this, and electrical tape… well, it’s designed for wiring. Big difference, right? That’s the blunt truth. Painter’s tape, at its core, is all about adhesion that’s strong enough to hold a line but gentle enough to peel off clean.
It’s usually made of paper, with a specific acrylic adhesive that’s temperature-sensitive and designed to release without leaving residue or, importantly, lifting paint that was already there. There are different strengths, too – the delicate blue tapes for freshly painted surfaces or delicate trim, and the stronger green or purple tapes for more demanding jobs, but the principle is the same: clean removal.
Electrical tape, on the other hand, is typically made of PVC. It’s stretchy, rubbery, and designed to insulate wires. Its adhesive is usually a more aggressive rubber-based or synthetic rubber compound. The goal isn’t a clean peel; it’s a strong, often permanent bond that can withstand some environmental abuse, like UV exposure and temperature fluctuations, that you’d find in an electrical box.
When you try to pull electrical tape off a painted surface, that aggressive adhesive is going to grab onto your paint like a barnacle. I learned this the hard way painting my son’s room.
I thought, ‘It’s tape, it sticks, what’s the big deal?’ Turns out, the big deal was a few hours of scraping and repainting a section I thought was done. The tape stretched as I applied it, creating tiny gaps, and then when I pulled it off, it took chunks of the primer with it.
It looked like a road map of my failure.
So, can you use electrical tape instead of painter’s tape? Technically, yes, you can stick it to a wall. But will it perform the same way? Absolutely not. The properties are just too different. Painter’s tape has a very specific formulation for a specific purpose, and electrical tape is built for a completely different world of electrical conductivity and insulation. Trying to use electrical tape for painting is like trying to hammer a nail with a screwdriver – you might get it in eventually, but it’s going to be a mess, and you risk damaging more than you fix.
When ‘close Enough’ Becomes a Disaster
Let’s talk about the real-world consequences of trying to substitute. The biggest problem with electrical tape in a painting scenario is its adhesive.
It’s designed to stick and keep sticking. Unlike painter’s tape, which has a controlled adhesion meant to be temporary and clean, electrical tape’s adhesive is often a hot mess waiting to happen. When you pull it off, you’re not just pulling off tape; you’re often pulling off paint, primer, and a good chunk of your sanity.
I once saw a guy try to tape off a delicate wooden picture frame before painting a wall. He used electrical tape because it was all he had. The result?
The adhesive didn’t just lift the paint he was trying to protect; it actually gummed up the wood finish, leaving a sticky, discolored residue that took hours of specialized cleaner and careful buffing to even begin to fix. He ended up having to refinish that part of the frame.
Then there’s the bleed-through. Electrical tape is often thicker and less porous than painter’s tape.
This sounds like a good thing, right? More barrier.
Wrong. Because it’s not designed to create a perfect seal against irregular surfaces like trim or wall edges, the paint can still find its way underneath. But instead of a clean line, you get fuzzy, feathered edges where the paint has seeped through the microscopic gaps that the non-conformable PVC material couldn’t seal. Painter’s tape, especially the conformable types, is designed to hug those edges. (See Also: Can I Use Electrical Tape To Connect Wires )
Electrical tape just sits on top, creating a less effective barrier and a sloppier finish. The stretchiness of electrical tape is another huge no-no. When you’re trying to get a sharp line, you need a tape that lays flat and doesn’t distort.
Electrical tape, because it’s so stretchy, can easily be pulled too tight, creating uneven lines, or it can sag and create ripples that paint will inevitably find.
Beyond the immediate visual mess, there’s the long-term damage. That aggressive adhesive can leave behind a gummy residue that’s a nightmare to remove.
It attracts dust and dirt, turning a clean edge into a sticky trap. In some cases, depending on the paint and the age of the tape, it can even react with the paint, causing discoloration or softening. So, while the initial thought might be ‘I’m saving time and money,’ the reality is you’ll likely spend far more time and money fixing the mistakes caused by using the wrong tape. It’s a classic case of being penny wise and pound foolish.
My neighbor tried it on a ceiling fan housing, thinking the black tape would blend in. He ended up with streaks of paint on the metal and sticky black goo. Took him a whole Saturday to clean.
The Contrarion View: When Electrical Tape might Not Be the Worst Idea
Okay, here’s where I’m going to go against the grain a bit. Everyone will tell you, emphatically, ‘NO, DON’T DO IT!’ And for 99% of painting jobs, they are absolutely right.
But there’s a sliver of a scenario, a very specific, edge-case situation, where electrical tape might be a less terrible option than absolutely nothing. This is not an endorsement, mind you, but a grim acknowledgment of survival tactics.
Imagine you’re doing a very rough, exterior job. We’re talking about painting a weathered wooden fence post, where the surface is already rough, uneven, and frankly, a bit of a mess.
You’re not aiming for a showroom finish; you just need to block paint from hitting, say, a metal bolt head or a specific knot in the wood you want to leave natural.
In this highly specific context, the aggressive adhesion of electrical tape might actually be a benefit. It’s more likely to stick to a rough, dirty, or even damp surface where delicate painter’s tape would just peel right off.
Furthermore, if you are painting with a very thick, high-solids paint, like an industrial enamel or a thick exterior stain, and you only need to create a very basic, rough barrier that you plan to aggressively scrape and clean up afterward anyway, the extreme stickiness might hold better during the initial application. You’d also need to be prepared for a significant cleanup job afterwards, likely involving solvents or vigorous scraping to remove both the tape and any adhesive residue. This is not for indoor walls, delicate trim, or anything where a clean line is most important.
This is for rough-and-tumble, ‘get it done’ scenarios where perfection is a distant dream.
I once had to paint a section of a rusty old metal shed, and the only tape I had on hand was electrical. I needed to mask off a small, heavily rusted area I was patching. The surface was so rough and oxidized that painter’s tape wouldn’t even stick for more than ten minutes. Electrical tape, with its forgiving flexibility and strong grip, actually conformed to the uneven metal and stayed put long enough for me to apply the patch and a quick coat of primer.
The cleanup was a pain, sure, and I had to use a putty knife to get the worst of the goo off, but it prevented the primer from getting into the areas I wanted to remain bare metal. So, while I would never, ever recommend it for a standard painting project, in that one specific, grubby, outdoor scenario, it performed better than the alternative of having no tape at all. It’s a last resort, a ‘make do’ situation, not a choice.
| Tape Type | Primary Use | Adhesive Strength | Flexibility | Residue Risk | Verdict for Painting |
|---|---|---|---|---|---|
| Painter’s Tape (Blue/Green/Purple) | Masking for painting, trim work | Low to Medium (designed for clean removal) | Moderate (paper-based, some conformability) | Low | Excellent. Designed for this job. |
| Electrical Tape (Black PVC) | Insulating wires, bundling cables | High (designed for strong, lasting bond) | High (stretchy, rubbery) | High | Terrible. High risk of paint damage and residue. |
| Duct Tape | General repairs, binding | Very High (aggressive, often permanent) | Moderate (cloth-backed, less flexible) | Very High | Catastrophic. Will rip paint and leave massive residue. |
Common Mistakes and How to Avoid Them
One of the most frequent mistakes I see people make when they do attempt to use electrical tape for painting is assuming it will perform like painter’s tape regarding bleed-through. They lay it down and expect a perfect seal. They don’t account for the fact that electrical tape is thicker and less pliable.
This means it doesn’t hug edges as well, and paint can easily seep under. The fix? If you’re in that desperate situation (which, again, I strongly advise against), you need to be incredibly meticulous. (See Also: Can Electrica Tape Catch On Fire )
Press down the edges firmly with a fingernail or a plastic scraper, but even then, expect some bleed. Another mistake is the pulling.
People pull electrical tape off too quickly, just like they might with painter’s tape. Because the adhesive is so aggressive, a slow, steady pull at a low angle is still often insufficient to prevent paint damage.
You need to cut the tape at the end of a line rather than trying to pull it off in one go if possible.
Another common error is using electrical tape on surfaces that are anything less than perfectly clean and dry. Painter’s tape is somewhat forgiving; it can often adhere reasonably well to slightly dusty or even mildly damp surfaces. Electrical tape’s aggressive adhesive might seem like it would compensate, but it can actually make things worse. If the surface is dirty, the adhesive will grab onto the dirt, and when you pull the tape, it pulls the dirt and potentially your paint with it.
If it’s damp, the water can interfere with the adhesive’s bond, leading to lifting and bleeding. The best practice is always to have clean, dry surfaces, but this is doubly true when you’re risking the use of electrical tape. Always test on an inconspicuous area first. Seriously, find a hidden spot – inside a closet, behind a piece of furniture – and tape a small section, paint over it, let it dry, and then try to remove the tape.
This will give you a realistic preview of the damage you might be inflicting on your main project.
The final, and perhaps most fundamental, mistake is simply not having the right tool for the job. It’s like trying to build a birdhouse with a butter knife. You might eventually hack something together, but it’ll be a struggle, and the result will be rough. The few dollars you save on a roll of painter’s tape are almost guaranteed to be dwarfed by the cost of materials (more paint, primer, caulk, filler) and, more importantly, your time spent fixing the inevitable errors.
Painter’s tape is cheap. It’s effective.
It’s designed for this. Electrical tape is designed for electrical work. Stick to their lanes, and you’ll save yourself a massive headache. I once spent four hours fixing a botched job where someone used electrical tape on baseboards – they had to re-caulk and repaint the entire section.
Four hours I’ll never get back.
People Also Ask: Electrical Tape vs. Painter’s Tape
Can Electrical Tape Be Used for Painting?
Technically, you can stick electrical tape to a surface for painting, but it’s strongly advised against. Its adhesive is too aggressive, designed for electrical insulation, not clean removal from painted surfaces. This often leads to paint being lifted, fuzzy lines due to bleed-through, and sticky residue left behind, creating a much worse finish than if you’d used proper painter’s tape.
Will Electrical Tape Leave Residue?
Yes, electrical tape is very likely to leave behind a sticky, gummy residue when removed from most surfaces, especially painted ones. Its adhesive is designed to be strong and long-lasting for electrical applications, meaning it bonds aggressively and doesn’t release cleanly like painter’s tape.
What Tape Is Best for Painting Edges?
The best tape for painting edges is painter’s tape, specifically designed for the job. There are various types, including blue for delicate surfaces, green for medium-duty, and purple for high-performance masking. These tapes offer a balance of adhesion to create a clean line and a formulation that allows for clean removal without damaging the underlying paint or surface.
Can I Use Duct Tape for Painting Instead of Painter’s Tape?
Absolutely not. Duct tape is even worse than electrical tape for painting. Its adhesive is extremely aggressive and often leaves a significant amount of residue that is very difficult to remove. Furthermore, its cloth backing is not designed for clean paint lines and will likely result in substantial bleeding and a ruined finish. It’s intended for heavy-duty repairs, not delicate masking for paint.
Practical Tips for Using Painter’s Tape (the Right Way)
Since we’ve established that electrical tape is a terrible idea for painting, let’s pivot to what actually works. When you’re buying painter’s tape, don’t just grab the cheapest roll. Consider the surface you’re painting and the condition of the existing paint. For freshly painted walls (less than 24 hours old) or delicate surfaces like wallpaper, use a low-tack blue painter’s tape.
It’s formulated to prevent damage to sensitive finishes. For most interior walls with paint that’s been cured for a few days or more, a standard green painter’s tape is usually sufficient. It offers a good balance of adhesion and clean removal. If you’re tackling a rougher surface, like textured drywall, brick, or a heavily grained wood, a high-performance tape, often purple or yellow, might be necessary. (See Also: Can I Substitute Duct Tape For Electrical Tape )
These tapes are thicker and more conformable, designed to create a better seal on irregular surfaces.
Application is key. Always start by cleaning the surface you’re taping. Dust, grease, or moisture will compromise the tape’s adhesion and lead to bleeding. Apply the tape smoothly, pressing down firmly along all edges.
A putty knife, a plastic scraper, or even your fingernail can help make sure a good seal. Run it along the tape’s edge to press it down firmly against the surface. This is important for preventing paint seepage. When painting, apply paint in thin, even coats.
Thick, gloppy coats are more likely to drip and seep under the tape. After painting, but while the paint is still wet (this is the magic window!), carefully remove the tape.
Pull it slowly and at a 45-degree angle away from the painted line. If the paint has dried completely, score the edge of the tape lightly with a utility knife before pulling.
This breaks any potential seal between the paint and the tape, reducing the risk of pulling off dried paint. I learned this particular trick after a disastrous experience with pulling dry tape and taking a whole strip of wall paint with it.
A quick score with a sharp blade changed everything.
Finally, don’t leave painter’s tape on for too long. While some tapes are designed for longer application, it’s generally best practice to remove them as soon as the paint is dry to the touch. Leaving tape on for extended periods, especially in fluctuating temperatures or humidity, can cause the adhesive to cure or become brittle, making removal difficult and increasing the risk of paint damage.
For exterior projects, always check the manufacturer’s recommendations, as some tapes are designed for specific weather conditions. A little attention to detail during application and removal makes all the difference between a professional-looking finish and a DIY disaster.
It’s not rocket science, but it requires a bit of care, which is far more productive than trying to fix the mess electrical tape would make.
The Unvarnished Truth: Just Buy Painter’s Tape
Let’s cut to the chase. Can you use electrical tape instead of painter’s tape? The answer is a resounding, unequivocal ‘no,’ unless you’re in a truly desperate, highly specialized, and frankly, grim situation where you accept a guaranteed messy outcome and a lengthy cleanup. Electrical tape is made for wires. It’s stretchy, its adhesive is aggressive, and it’s designed to insulate, not to create crisp, clean lines on your walls. I’ve wasted my time, my money, and my weekend on bad tape choices, and trust me, electrical tape for painting falls squarely into that category. The amount of frustration and extra work it causes far outweighs any perceived cost savings.
Think about it: you’re investing time, effort, and money into painting. You want a good result, right? A sharp line, a clean finish. Painter’s tape is a relatively inexpensive tool designed precisely for this. It’s available in various types for different surfaces and paint conditions. Using electrical tape is like trying to write a novel with a crayon – you can make marks, but the result will be amateurish and flawed. You’ll end up fighting with the tape, dealing with bleed-through, paint damage, and sticky residue. This leads to more scraping, more filling, more priming, and more painting. It’s a false economy that guarantees a poor outcome and a lot of extra work.
My honest advice? Don’t even consider it. Unless you are in a bizarre survival scenario where electrical tape is literally the only sticky material you have and you’re painting a rusty fence post with a roller while wearing a blindfold, just go buy painter’s tape. It’s not expensive. It works. It saves you time and aggravation. I’ve learned my lessons the hard way so you don’t have to. Go to the store, grab the right stuff, and make your painting project a success instead of a struggle.
Verdict
So, after all that, the answer to ‘can i use electrical tape instead of painter’s tape’ is a pretty firm no. It’s not designed for the job, and the results will speak for themselves – and not in a good way. You’ll get fuzzy lines, lifted paint, and a sticky mess that’s a nightmare to clean up. The money you might save on a roll of electrical tape is pocket change compared to the hours you’ll spend fixing the mistakes it causes.
Stick to what works. Painter’s tape is cheap, effective, and readily available in formulations for almost any job you can imagine. Whether you’re painting trim, a wall, or furniture, the right painter’s tape will give you those crisp, clean lines you’re after without the headache. Don’t learn this lesson the hard way like I did with that first disastrous trim job.
Next time you’re staring down a paint can and a roll of tape, do yourself a favor and grab the actual painter’s tape. Your walls, your patience, and your final finish will thank you. And if you’re ever tempted by electrical tape again, just remember the sticky residue and the hours of scraping. Go get the right tool for the job; it’s always the smarter move.