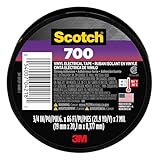
I remember staring at a roll of black electrical tape in my toolbox, a new set of slick road bike wheels sitting beside it. The bike shop wanted an arm and a leg for their fancy tubeless tape, and honestly, I was feeling a bit cheap that day. The question popped into my head: can I use electrical tape as rim tape? It’s flexible, sticky, and readily available. What could go wrong? Turns out, quite a bit. This whole rim tape situation is a bigger deal than many people realize, and jumping to the wrong solution can cost you time, money, and a lot of frustration. Let’s cut through the BS.
So, if you’re staring at that same roll of tape, wondering if it’s a quick fix or a disaster waiting to happen, you’re in the right place. I’ve been there, and I’ve learned a few things the hard way about what actually works and what’s just a waste of good adhesive.
Why You Might Be Thinking About Electrical Tape (and Why It’s Usually a Bad Idea)
Look, I get it. When you’re trying to get your bike rolling again, or maybe you’re building up a wheelset on a shoestring budget, the nearest roll of electrical tape looks mighty tempting.
It’s sticky, it’s black (which looks kind of cool on some rims, I’ll admit), and it’s everywhere. You see it used for all sorts of temporary fixes, so why not for your rims? The common advice you’ll hear is that you need specialized rim tape, but my first thought was always, ‘Is that really necessary?’
Electrical tape is designed to insulate wires, sure, but it’s also pretty stretchy and conforms well to surfaces. It seems like it should work, right? The basic idea behind rim tape, whether it’s cloth, nylon, or some fancy polymer, is to create a smooth, continuous surface inside your rim’s well.
This prevents inner tubes from poking through spoke holes or, if you’re going tubeless, it creates an airtight seal for your rim bed and valve stem. Electrical tape can technically cover those spoke holes. It sticks. It’s a barrier.
On the surface, it seems like it ticks a few boxes. I’ve seen people cobble together solutions that look functional at first glance, and for a short, gentle ride on a paved path, it might even hold air for a while. But here’s the kicker: that initial ‘it seems to work’ feeling often doesn’t last.
The real problems start to creep in when you put any real stress on the wheel, when temperatures fluctuate, or when you actually need to rely on that seal. It’s the difference between something that looks like it’s holding and something that is holding, reliably, day in and day out.
The main reason electrical tape falls short is its adhesive. Most standard electrical tapes use a rubber-based adhesive that’s designed for insulation, not for the constant pressure, temperature changes, and vibration that a bicycle rim endures. This adhesive can become gummy, ooze, or lose its stickiness over time, especially when exposed to heat from braking or prolonged sun exposure. Furthermore, the material itself, typically vinyl, isn’t as solid or abrasion-resistant as dedicated rim tape.
It can stretch too much, leading to uneven pressure and potential leaks, or it can tear more easily if something snags it. Think about it: you’re expecting this thin layer of tape to maintain an airtight seal under significant pressure, and then be able to withstand impacts from potholes, bumps, and the general abuse a bike wheel takes.
Electrical tape just isn’t engineered for that kind of punishment. It’s a compromise, and like most compromises in bike components, it usually ends up costing you more in the long run through flats, failed tubeless setups, and the frustration of repeated repairs.
The Real Deal: What Rim Tape Actually Does
Let’s get down to brass tacks. When we talk about rim tape, we’re not just talking about covering up holes. We’re talking about a important component that makes sure your wheel functions as intended, whether you’re running tubes or going tubeless.
For traditional setups with inner tubes, the primary job of rim tape is to protect the tube from the sharp edges of spoke nipples protruding through the rim bed. Imagine the pressure of an inflated tube pushing against a tiny, sharp metal nipple.
Without a smooth, durable barrier, the tube would eventually chafe and fail. This is why good rim tape needs to be tough and smooth. It needs to withstand constant pressure without deforming or degrading.
I learned this the hard way after a particularly nasty pinch flat on a long descent. Turns out, the cheap nylon rim tape I’d slapped on wasn’t quite wide enough, and the tube had started to creep into a small gap near the rim edge.
For tubeless setups, the stakes are even higher. Tubeless rim tape, often made from materials like nylon or specialized polymers, needs to create an absolutely airtight seal. This means it has to be impermeable to air and have an adhesive strong enough to hold under pressure without any seepage. It also needs to conform perfectly to the rim’s contours, especially in the drop channel where the tire bead seats.
Many tubeless tapes are designed with a specific width and thickness to achieve this. They also have to be durable enough to handle repeated tire removals and installations without losing their adhesion. I’ve seen people try to make tubeless setups work with regular cloth rim tape or even packing tape, and it’s almost always a recipe for leaky tires and a lot of sealant mess. (See Also: Can I Use Electrical Tape To Connect Wires )
The specialized tapes are designed to bond with the rim, creating a near-permanent, airtight surface. They are the foundation of a reliable tubeless system.
So, when you’re asking if you can use electrical tape as rim tape, you’re really asking if a material designed for electrical insulation can perform a task that requires structural integrity, airtight sealing, and long-term durability under significant mechanical and environmental stress. The answer, for most practical purposes, is a resounding no.
Here’s a quick breakdown of what dedicated rim tape offers that electrical tape simply can’t match:
| Feature | Dedicated Rim Tape | Electrical Tape | Verdict |
|---|---|---|---|
| Adhesive Strength & Durability | High, designed for long-term bonding under pressure and temperature changes. | Low to moderate, can become gummy or lose adhesion, especially with heat. | Dedicated tape wins easily. |
| Material Strength & Abrasion Resistance | Tough, designed to withstand spoke nipples and tire pressure. | Vinyl is often too stretchy and can tear or wear through. | Dedicated tape is far more solid. |
| Airtight Seal (Tubeless) | Engineered for complete airtightness, conforms to rim bed. | Unlikely to provide a consistent, long-lasting airtight seal. | Not a viable option for tubeless. |
| Ease of Installation | Generally straightforward with practice; specific widths aid application. | Can be tricky to get a perfectly smooth, wrinkle-free layer. | Both require care, but dedicated tape is designed for the job. |
| Cost vs. Performance | Relatively inexpensive for the performance and reliability gained. | Cheap upfront, but potential for repeated failures and lost time. | Dedicated tape offers far better value. |
My Own Electrical Tape Fiasco: A Lesson Learned
I’m not just telling you this from a manual; I’ve lived it. A few years back, I was building up a cyclocross bike. I’d scored a set of used but decent aluminum rims for a steal, and I was ready to lace them up.
I figured I’d save a few bucks on rim tape. I had a brand new roll of high-quality 3M electrical tape, the good stuff. I carefully cleaned the rim, laid down a few overlapping layers, making sure to press it down really well. It looked pretty clean, actually.
I mounted tires, pumped them up, and went for a spin. Everything seemed fine. I was so proud of my DIY fix.
Then, about three rides in, on a particularly bumpy gravel section, I heard it – that tell-tale hiss. A slow leak. I figured it was the bead, so I put some sealant in. No dice.
The hiss continued.
Eventually, after pulling the tire off again (which was a sticky, gummy mess thanks to the electrical tape adhesive), I found the problem. The tape had started to peel away from one of the spoke holes, and the pressure of the tube was slowly escaping. Not only that, but the edges where the tape met the rim wall had become slightly ‘fuzzy’ and were letting air creep past. It wasn’t a catastrophic failure, but it was enough to make the tire feel soft after a day or two, and I had to constantly reinflate it.
Then, one day, after a particularly hot ride where I’d been braking a lot on some descents, the adhesive really started to give. It became incredibly sticky, almost like chewing gum, and pulling the tire off felt like peeling old wallpaper off a damp wall. The mess was unbelievable.
I ended up having to use a solvent to get the residue off the rim. That experience cost me time, a new inner tube that had been pinched by a stray bit of tape, and a whole lot of sealant.
I learned that day that while electrical tape can cover holes, it’s not designed for the continuous stress and temperature fluctuations of a bike wheel. It’s a temporary fix at best, and usually, it’s just not worth the hassle.
This is why, even though I’m all for saving money where you can, this is one area where you just have to bite the bullet and buy the right stuff. The few dollars you save on electrical tape will be dwarfed by the cost and frustration of dealing with a failed wheel setup. I also learned that you don’t need to go for the most expensive, exotic rim tape out there, but there’s a minimum level of quality and suitability that you shouldn’t compromise on.
Common Mistakes When Applying Rim Tape (and How to Avoid Them)
Beyond the fundamental mistake of using the wrong material, there are a few other pitfalls people often fall into when applying any kind of rim tape, and these can lead to problems even with the correct tape. One of the most common errors is not cleaning the rim thoroughly beforehand.
Grease, dirt, or old adhesive residue can prevent the new tape from sticking properly, leading to peeling or leaks down the line. I always give the rim a good wipe-down with isopropyl alcohol just before applying the tape. It’s a small step that makes a big difference. Another mistake is not getting the tape centered or not applying enough layers for rims with deep spoke beds.
For traditional tape, a single layer is often sufficient, but it needs to be centered perfectly, covering all spoke holes. For deeper rims, or for some tubeless setups, you might need two layers for a truly reliable seal. Overlapping the tape is also important. (See Also: Can Electrica Tape Catch On Fire )
Start the tape a few inches past the valve hole, wrap it around the rim, and overlap it by several inches before cutting. This makes sure there are no gaps where air can escape. Make sure the overlap is smooth and doesn’t create a bump.
Then there’s the issue of stretching the tape too much during application. While some tapes have a little give, aggressively stretching them can distort the tape’s shape and weaken its adhesive. The goal is to lay it down smoothly and firmly, conforming to the rim’s shape without pulling it out of its intended dimensions.
If you’re using tubeless tape, this is even more important, as the tape needs to maintain its structural integrity to create a seal. I’ve seen people try to ‘force’ tape into place by yanking it, and it never ends well.
It either tears, stretches unevenly, or compromises the adhesive. Patience is key here.
Take your time, work slowly, and make sure the tape is laid down flat and smooth. Finally, a mistake I’ve seen folks make is not properly sealing the valve hole area.
Whether you’re running tubes or tubeless, this is a common spot for leaks. If using traditional tape, make sure it’s smooth over the valve hole.
For tubeless, some tapes have specific instructions, and you might need to use a small punch or even a dab of sealant to make sure a perfect seal around the valve stem. A small burr or bubble here can ruin your day.
When it comes to electrical tape, all these mistakes are magnified. The poor adhesive means even if you clean the rim perfectly, it’s more likely to peel. The stretchiness means it’s easier to distort it and create weak spots. And the lack of durability means any minor imperfection is more likely to turn into a major leak. So, if you’re going to use dedicated rim tape, pay attention to these details:
- Cleanliness is King: Always start with a spotless rim.
- Center it Up: Make sure the tape is positioned correctly to cover all spoke holes evenly.
- Overlap Properly: Overlap by several inches for a continuous barrier.
- No Stretching: Lay the tape down smoothly without excessive pulling.
- Valve Stem Focus: Pay extra attention to creating a perfect seal around the valve hole.
Tubeless vs. Tubes: Does It Matter for Rim Tape Choice?
Absolutely, it matters. The demands on rim tape are significantly different depending on whether you’re running inner tubes or going tubeless. For traditional setups with inner tubes, the primary concern is protecting the tube from the spoke nipples. This means the tape needs to be durable enough to withstand the pressure of the tube and sharp edges of the nipples.
Cloth rim tape, often found in older or more basic wheelsets, does a decent job of this. It’s usually wider than the rim’s internal width, and you typically use just one layer. It’s not designed to be airtight, and it doesn’t need to be.
Its job is purely mechanical protection. Electrical tape, with its thin vinyl and less solid adhesive, might cover the spoke holes for a while in a tubed setup, but it’s still a gamble. The adhesive might fail, or the tape itself could eventually wear through from the pressure of the tube.
I wouldn’t trust it for anything more than a very short, casual ride where a flat isn’t a major issue.
Tubeless is where the requirements really ramp up. For tubeless setups, the rim tape is responsible for creating an airtight seal between the tire bead and the rim. This means the tape needs to be: 1.
Impermeable to air. 2.
Have a very strong, durable adhesive that won’t let air seep out. 3.
Conform perfectly to the rim’s contours, especially in the drop channel, to prevent any air leakage. Specialized tubeless rim tape, usually made from nylon or a similar polymer, is designed with these properties in mind. It’s often applied in two overlapping layers to make sure maximum airtightness. (See Also: Can I Substitute Duct Tape For Electrical Tape )
The adhesive is formulated to bond with the rim and withstand the pressures and temperature fluctuations of riding. Electrical tape, even if applied meticulously, simply doesn’t have the necessary impermeability or adhesive strength to reliably create and maintain an airtight seal for a tubeless system. The vinyl can be porous over time, the adhesive will likely degrade, and it’s just not designed to withstand the constant, high-pressure environment of a tubeless setup.
Trying to use electrical tape for tubeless is, in my opinion, a guaranteed way to end up with a leaky tire and a mess of sealant, which is a far worse outcome than a simple pinch flat.
Here’s a comparison of the different types of rim tape you’ll commonly encounter:
| Type of Rim Tape | Primary Use | Pros | Cons | Recommendation for Electrical Tape Replacement |
|---|---|---|---|---|
| Cloth Rim Tape | Tubes | Durable, good protection against spoke nipples. | Can be bulky, not airtight for tubeless. | Not recommended; better options available. |
| Nylon Rim Tape (Standard) | Tubes | Strong, smooth surface, good adhesion. | Can be too narrow for some rims, not always ideal for tubeless. | Better than electrical tape, but dedicated tubeless tape is superior. |
| Tubeless Rim Tape (Nylon/Polymer) | Tubeless (also works for tubes) | Excellent airtight seal, strong adhesive, durable. | Can be more expensive, requires careful application. | The gold standard; electrical tape is not a substitute. |
| Electrical Tape | Wire insulation | Sticky, flexible, cheap, readily available. | Poor durability, weak adhesive, not airtight, degrades with heat/pressure. | DO NOT USE FOR RIM TAPE |
Practical Tips for Getting It Right (without Breaking the Bank)
Okay, so we’ve established that electrical tape is a no-go. But that doesn’t mean you have to drop a fortune on fancy rim tape. There are plenty of affordable and effective options out there. My go-to for most of my bikes these days is a good quality nylon tubeless rim tape.
Brands like Stan’s NoTubes, Orange Seal, or even some of the house brands from online retailers offer excellent tape that’s reasonably priced. You usually get a good length on a roll, and it’s wide enough for most common rim profiles. The trick is to buy the right width for your rim.
Measure the internal width of your rim. For most road and gravel bikes, 18-25mm width is common. For wider mountain bike rims, you might need 25-35mm or even wider.
The tape should ideally cover the entire rim bed and extend slightly up the sidewalls. Don’t be afraid to get a tape that’s a bit wider than your rim’s internal width; you can always trim the excess neatly after application.
When you’re applying it, take your time. Clean the rim with alcohol. Start the tape a few inches away from the valve hole, and wrap it around the rim, applying firm, consistent pressure.
Aim for smooth, even tension without stretching. When you get back to the start, overlap the tape by a good 6-8 inches. Use a sharp utility knife or razor blade to cut the tape. Then, carefully poke a small hole through the tape at the valve hole location.
I usually use a pointed tool or even a sharp screwdriver to carefully enlarge the hole just enough for the valve stem to pass through snugly. If you’re going tubeless, you’ll then install your valve stem and tighten it down firmly. Some people like to use a tiny bit of sealant around the valve stem base to make sure an absolute seal, but with good tape and a well-seated valve, it’s often not necessary. For tubed setups, just make sure the tape is smooth over the spoke holes and the valve hole is clean.
If you’re really on a super tight budget, and you only run tubes, a good quality cloth rim tape can be a very affordable option. It’s not as easy to apply as the sticky nylon tapes, and it doesn’t work for tubeless, but it does a solid job of protecting your tubes. You can often find rolls of this for just a few bucks. The key takeaway is to invest a small amount in dedicated rim tape.
It’s a small price to pay for reliable performance and avoiding the headaches that come with using the wrong material. I’ve found that spending about $15-$25 on a roll of good tubeless tape has saved me countless hours of frustration and money on emergency repairs over the years. It’s one of those bike parts where spending a little more upfront truly pays off in the long run.
People Also Ask
Can I Use Duct Tape as Rim Tape?
While duct tape is sticky and readily available, it’s generally not recommended as a substitute for proper rim tape. Duct tape’s adhesive can become gummy and leave a residue, and the material itself is often too stretchy and not durable enough for the constant pressure and vibration of a bicycle wheel. It also tends to degrade quickly when exposed to heat and moisture, which are common conditions for wheel rims. For reliable performance, especially for tubeless setups, dedicated rim tape is a much safer and more effective choice.
What’s the Difference Between Rim Tape and Rim Strips?
Rim tape is typically a self-adhesive strip that you apply directly to the inside of the rim’s circumference. It serves to cover spoke holes or create an airtight seal for tubeless systems. Rim strips, on the other hand, are often non-adhesive bands that fit into the rim’s channel, sometimes made of rubber or plastic, designed to protect tubes from spoke nipples. While they serve a similar protective function, the application method and material differ significantly. Rim tape is the standard for modern wheelsets, especially for tubeless conversions.
How Often Should Rim Tape Be Replaced?
The lifespan of rim tape varies depending on the type of tape, riding conditions, and how often tires are removed. For traditional cloth or nylon rim tape used with tubes, it might last for years unless it shows signs of wear, damage, or peeling. For tubeless setups, where the tape is important for an airtight seal, it’s often recommended to replace it every 1-2 years, or whenever you notice slow leaks, the tape starts to peel, or it becomes difficult to seat tires. Inspecting the tape regularly is the best approach to know when it’s time for a change.
What Is the Best Rim Tape for Tubeless Tires?
The best rim tape for tubeless tires is typically a high-quality, dedicated tubeless rim tape made from strong, airtight materials like nylon or specialized polymers. Brands such as Stan’s NoTubes, Orange Seal, and Finish Line offer excellent options. The key factors are a strong adhesive that bonds well to the rim and creates a durable seal, and a material that is impermeable to air and resistant to punctures or tears. The correct width for your rim is also important for a reliable setup.
Verdict
So, to directly answer the question: can I use electrical tape as rim tape? My honest, hard-won advice is a resounding no. It might seem like a clever shortcut, a way to save a few bucks in a pinch, but the reality is that electrical tape is simply not designed for the stresses and demands of a bicycle wheel. You’re basically asking a material meant for insulating wires to maintain a important seal under constant pressure, vibration, and temperature fluctuations. It’s a recipe for flats, leaks, and a lot of wasted time and frustration down the line.
Invest in proper rim tape. It’s one of the most cost-effective ways to make sure your wheels perform reliably, whether you’re running tubes or going tubeless. A roll of good quality tubeless rim tape costs very little compared to the potential headaches of using a substitute. Don’t let a cheap fix turn into an expensive problem. Get the right tool for the job, and enjoy your ride with confidence.