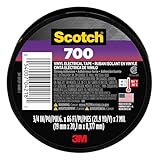
I remember staring at that ripped dryer vent hose, a pathetic tangle of foil and despair. Lint was everywhere, my laundry room smelled vaguely of burnt plastic, and I was about two seconds away from just stuffing a sock in it and calling it a day. The question on my mind, and probably yours right now, is: can i use electrical tape on a dryer vent? It’s the stuff you use to fix wires, right? Seems sturdy enough. But before you grab that roll and start winding, let me tell you, there are some things you need to know. I learned the hard way, so you don’t have to.
Honestly, the temptation is huge. It’s cheap, readily available, and for a quick fix, it might seem like a decent idea. But dryer vents are more than just passive tubes; they deal with heat, moisture, and a lot of airflow. That little roll of black tape might not be up to the job, and I’ve seen plenty of people waste money on things that just don’t cut it.
Why That Electrical Tape Temptation Is a Bad Idea
Look, I get it. You’ve got a busted dryer vent hose, maybe it’s split near the back of the machine, and you can see lint escaping like a tiny, fluffy snowstorm.
Your dryer is probably making some weird noises, or worse, not heating effectively. You rummage through your toolbox and – bam! – there’s that roll of electrical tape.
It’s black, it’s sticky, it looks pretty durable. Seems like a no-brainer, right?
Just wrap it up, and you’re good to go. Except, that’s where the trouble starts. Electrical tape is designed for one thing: insulating electrical wires.
It’s got some flexibility, sure, and it’s got decent adhesion for dry, relatively stable surfaces. But a dryer vent? That’s a whole different beast.
The main issue is heat. Your dryer, especially the heating element, generates a significant amount of warmth.
This heat isn’t just a gentle warmth; it can get pretty hot. Electrical tape, especially the cheaper stuff, isn’t rated for those kinds of sustained temperatures.
What happens when cheap plastic gets hot? It softens, it warps, and its adhesive properties go south fast.
You might think you’re sealing a leak, but you’re really just applying a temporary bandage that’s about to fall off or, even worse, melt. I once tried it on a small tear, thinking I was being clever.
Within a week, the tape was saggy, peeling, and the lint was still making its escape, only now it was mixed with sticky goo. Not ideal.
Then there’s the moisture factor. While your dryer vent primarily moves hot air, there’s always a degree of humidity involved, especially as the hot, moist air from your clothes hits the cooler metal or foil of the vent. Many standard electrical tapes aren’t designed to handle consistent moisture exposure. The adhesive can break down, leading to peeling and gaps. Think about it: you’re wrapping a damp, warm tube with something that’s meant for dry, cool wires. It’s like trying to patch a leaky boat with cling film. It might hold for a minute, but eventually, the water will win. (See Also: Can I Use Electrical Tape To Connect Wires )
The common advice you’ll find online often steers clear of electrical tape for dryer vents for good reason. The materials and conditions are just too different. While it might seem like a quick fix to the question ‘can i use electrical tape on a dryer vent?’, the reality is it’s a recipe for a subpar seal, potential fire hazards due to lint buildup in compromised areas, and the need for a redo sooner rather than later. You’re better off spending a little more upfront for the right material and saving yourself the headache.
What You Actually Need for a Dryer Vent Repair
Alright, so electrical tape is out. What’s in? You need something that can handle the heat, the moisture, and the constant airflow. When I’m looking at dryer vent materials, I’m thinking about durability and safety first. This isn’t the place to skimp, folks. The common advice often points to specialized vent tapes, and for once, it’s spot on. These aren’t your typical hardware store tapes; they’re engineered for this specific, rather harsh, environment.
The gold standard is usually aluminum foil tape. Now, before you picture the stuff you use for ductwork (which can work, but isn’t always the best choice for dryer vents specifically), I’m talking about high-temperature, foil-backed tapes designed for HVAC use. These tapes have a strong, heat-resistant acrylic or silicone adhesive that can withstand the temperatures your dryer vent reaches. The foil backing provides a durable, fire-resistant layer that won’t degrade or soften under heat like vinyl electrical tape will.
I’ve used a few different brands over the years, and the key is to look for something that explicitly states it’s for high-temperature applications and is suitable for sealing foil or flexible ductwork. Some are even designed to be vapor-barrier tapes, which is a bonus.
Another option, especially for repairing tears in flexible foil ducting, is a specialized dryer vent repair tape. These often look similar to foil tape but might have a slightly different backing material or adhesive formulated for the specific polymers found in flexible dryer hoses. They’re usually more flexible than rigid foil tapes, which can be helpful when you’re working around bends or curves in the vent. When you’re inspecting a tear, you want a tape that can conform to the shape without creating sharp edges where lint can snag. My personal favorite for flexible vents has been a heavy-duty foil tape with a good, aggressive adhesive – it’s held up through multiple drying cycles without any sign of lifting.
When you’re choosing, pay attention to the temperature rating. For dryer vents, you want something that can handle at least 200°F (93°C), and ideally higher. Also, check the width. A wider tape, say 2-3 inches, will give you a more secure seal and cover larger areas if needed. It’s worth spending an extra few bucks for a roll of good quality foil tape over a cheap roll of electrical tape. Trust me, the cost savings of using the wrong tape are quickly eaten up by the inconvenience and potential risks of having to do the job again, or worse.
Here’s a quick rundown of what to look for:
| Material | Pros | Cons | Verdict for Dryer Vents |
|---|---|---|---|
| Electrical Tape | Cheap, readily available | Melts under heat, adhesive degrades with moisture, not fire-resistant | Avoid. It’s not designed for this job and poses a safety risk. |
| Standard Duct Tape | Sticky, readily available | Adhesive breaks down with heat and moisture, not durable, fabric can snag lint | Avoid. Similar issues to electrical tape, just a different flavor of wrong. |
| Aluminum Foil Tape (HVAC Grade) | High-temperature adhesive, foil backing is durable and fire-resistant, good seal | Can be less flexible on sharp bends, requires clean surface for adhesion | Excellent Choice. This is what you should be using. Look for high-temp ratings. |
| Specialized Dryer Vent Repair Tape | Designed for flexible hoses, often more flexible, strong adhesive | May be slightly more expensive, availability can vary | Good Choice. Especially useful for tears in flexible ducting. |
The Proper Way to Seal Your Dryer Vent (it’s Not Complicated)
Okay, so you’ve got the right tape – hopefully, that high-temp foil tape. Now, let’s talk about actually doing the job right. This isn’t rocket science, but there’s a right way and a wrong way. The wrong way, as we’ve established, involves electrical tape. The right way involves a bit of prep and careful application. I learned this when my dryer started sounding like a jet engine taking off from a poorly maintained runway. The flexible vent hose behind it had split open, and lint was everywhere. I initially tried to patch it with some old duct tape I found, which, spoiler alert, was a terrible idea.
First things first: safety and access. Make sure your dryer is unplugged. Seriously, unplug it. You don’t want any surprises. Then, pull the dryer away from the wall just enough to comfortably access the vent connection. You’ll probably need to disconnect the hose from both the dryer and the wall outlet. Sometimes these connections are held on with clamps, other times they’re just friction-fit. If they’re clamps, you’ll need a screwdriver to loosen them. Be gentle; old plastic and foil can be brittle.
Once the hose is detached, you need to clean it. Inspect the entire length of the flexible hose for any tears, holes, or kinks. Lint can build up in damaged areas, which is a fire hazard and reduces efficiency. If you have a tear, you need to clean the area around it thoroughly. Use a damp cloth to wipe away any dust, lint, or residue. The tape needs to stick to a clean, dry surface. If you’re just sealing a seam or a small hole, make sure the edges are as smooth as possible. For larger tears, you might need to overlap the tape significantly.
Here’s the process for applying the tape:
- Cut the Tape: Cut a piece of your foil tape that’s long enough to overlap the damaged area by at least an inch or two on all sides. If you’re sealing a seam, you want a piece that will go all the way around.
- Apply with Pressure: Peel back the paper backing from one end of the tape. Carefully align it over the damaged area, making sure good coverage. Smooth it down firmly, pressing out any air bubbles as you go. Work slowly from one end to the other, using your fingers or a smooth, hard object (like the edge of a credit card or a putty knife) to make sure good adhesion. The key here is firm, consistent pressure to activate the adhesive and create a solid seal.
- Overlap and Seal: If you’re wrapping a section, overlap the tape by at least half its width. For longer tears, you might need multiple pieces. Overlap the ends of the tape pieces by an inch or so, just like you would with any other tape application. Make sure the entire seam or tear is covered and sealed.
- Reinforce (Optional but Recommended): For extra security, especially on flexible vents that get a lot of movement, you can wrap the entire connection point with a second layer of tape, or even use a metal hose clamp over the tape to hold it firmly in place. Many people forget the clamps, and they’re important for keeping the hose from pulling away.
After you’ve applied the tape, reattach the vent hose to the dryer and the wall, making sure the clamps are tightened securely. Then, plug the dryer back in and run it on a no-heat or air-fluff cycle for a few minutes to check for any leaks or unusual noises. You should have a good, solid seal. If you’re still hearing air escaping or seeing lint, you might need to reapply or use a larger piece of tape. (See Also: Can Electrica Tape Catch On Fire )
The Truth About Dryer Vent Lint and Fire Safety
This is the part where I get a bit more serious, because while the question ‘can i use electrical tape on a dryer vent’ might seem like a practical DIY query, it touches on something genuinely important: fire safety. Dryer lint is incredibly flammable. It’s basically a pile of tiny, dry fibers. When you have a damaged or poorly sealed dryer vent, lint doesn’t just get on the floor; it can escape into areas it shouldn’t be. This is where the risk really escalates.
A compromised vent hose, perhaps one patched with inadequate tape like electrical tape, can develop gaps. These gaps allow lint to escape not just into your laundry room, but potentially into the wall cavities or behind the dryer itself.
Think about the heat generated by the dryer. You’ve got hot air blowing through that vent, and if there’s a leak, that hot air can come into contact with accumulated lint in places it really doesn’t belong. This is a classic recipe for a house fire. The National Fire Protection Association (NFPA) reports that clothes dryers are a leading ignition source of home fires.
A significant percentage of these fires are caused by the failure to clean clothes dryers, including the venting system.
Using materials not rated for the heat and stress of a dryer vent creates weak points. Electrical tape, as we’ve discussed, softens and degrades. This degradation can lead to the tape peeling away, creating larger gaps and allowing more lint to escape. Furthermore, the adhesive itself can become a sticky mess, attracting and holding onto lint, creating an even more concentrated fire hazard. I’ve heard stories, and seen some not-so-pretty pictures, of melted tape and significant lint buildup around the compromised areas. It’s not just about efficiency; it’s about preventing a disaster.
The common advice to regularly clean your dryer vent and the area around it is most important. But if your vent is leaking, you’re fighting a losing battle. You might clean the accessible parts, but lint will continue to accumulate in the hidden, compromised areas. This is why using the correct materials, like that high-temperature foil tape, is so important. It creates a durable, sealed barrier that prevents lint from escaping in the first place. It’s a proactive measure that directly addresses a significant fire risk. Don’t let the low cost of electrical tape lull you into a false sense of security. The potential cost of a fire is immeasurable.
When you’re inspecting your vent, don’t just look for obvious rips. Feel around the connections. Can you feel any air escaping? Can you see any lint buildup around the tape you’ve applied (if you used something less than ideal)? If the answer is yes to either, it’s time for a proper repair. The peace of mind you get from knowing your vent is sealed correctly, with materials designed for the job, is worth far more than the few dollars you might save by using the wrong product. Regular maintenance combined with proper sealing is your best defense.
Common Mistakes When Repairing Dryer Vents
You’d think fixing a dryer vent would be straightforward, but I’ve seen people mess it up in more ways than you can shake a lint-covered sock at. It usually boils down to trying to cut corners, using the wrong materials, or just not paying attention to the details.
And the biggest mistake? Thinking something like electrical tape is a viable solution to the question, ‘can i use electrical tape on a dryer vent?’ I’ve personally witnessed the aftermath of some questionable DIY repairs, and let me tell you, it’s rarely pretty.
One time, a friend of mine used regular duct tape on a split flexible vent, convinced it would hold. A few months later, during a particularly humid spell, the adhesive gave out, the tape sagged, and the lint explosion in their laundry room was epic.
It took ages to clean up.
Here are some of the most common blunders I see: (See Also: Can I Substitute Duct Tape For Electrical Tape )
- Using the Wrong Tape: This is the big one. Electrical tape, duct tape, packing tape – they’re all fundamentally unsuited for the job. They can’t handle the heat, they degrade with moisture, and their adhesives aren’t built for long-term adhesion in this environment.
- Not Cleaning the Surface: The tape won’t stick properly to a dusty, lint-covered, or greasy surface. You need a clean, dry surface for the adhesive to bond effectively. Wiping down the area with a damp cloth and letting it dry completely is a must.
- Insufficient Overlap or Coverage: Simply covering a hole isn’t always enough. You need to make sure the tape overlaps the damaged area by a good margin (at least an inch or two) on all sides. For flexible hoses, wrapping the entire connection point with a couple of layers of tape can create a much stronger seal.
- Not Smoothing Out Air Bubbles: Trapped air bubbles under the tape create weak spots and can lead to peeling. You need to press the tape down firmly and smooth out any bubbles as you apply it.
- Ignoring Kinks and Crushed Sections: If your vent hose is severely kinked or crushed, even the best tape might not create a perfect seal. A kink restricts airflow, builds up lint, and puts stress on the material. In these cases, it’s often better to replace the entire hose section.
- Forgetting Clamps: Many flexible dryer vents are secured with metal clamps. These clamps are there for a reason – to keep the hose from pulling away from the dryer or wall connection under pressure. Don’t just rely on tape; make sure clamps are present and tightened securely.
I once tried to seal a small split in a rigid metal vent pipe where it connected to the wall. I used some foil tape, but I didn’t overlap it enough, and I didn’t smooth it down properly. Within a month, I could feel a slight draft, and sure enough, the tape was starting to peel. It taught me that even with the right materials, the application has to be meticulous. You can’t be lazy about it. A little extra care upfront saves a lot of hassle later.
Frequently Asked Questions About Dryer Vent Repair
Can Electrical Tape Be Used for Dryer Vents?
No, electrical tape is not suitable for dryer vents. It is designed for insulating electrical wires and cannot withstand the heat, moisture, and airflow generated by a clothes dryer. The adhesive will degrade, and the tape can soften, melt, or peel, leading to leaks and potential fire hazards.
What Is the Best Tape for a Dryer Vent?
The best tape for a dryer vent is high-temperature aluminum foil tape specifically rated for HVAC use. This tape has a durable foil backing and a strong, heat-resistant adhesive that can handle the operating temperatures and moisture present in a dryer vent system. Specialized dryer vent repair tapes are also a good option for flexible hoses.
How Long Does Dryer Vent Tape Last?
High-quality, properly applied HVAC-grade aluminum foil tape can last for many years, often outlasting the lifespan of the flexible vent hose itself. The longevity depends on the quality of the tape, the severity of the dryer’s operating conditions, and the thoroughness of the application. Cheaper or incorrectly applied tapes will fail much sooner.
Can I Use Regular Duct Tape on My Dryer Vent?
No, regular duct tape is not recommended for dryer vents. Its adhesive is not designed to withstand the high temperatures and moisture associated with dryer operation, and it will likely degrade, peel, and fail over time, creating leaks and potential safety issues. It’s also often made of fabric which can snag lint.
How Do I Fix a Cracked Dryer Vent Hose?
To fix a cracked dryer vent hose, first make sure the dryer is unplugged. Clean the area around the crack thoroughly. Then, apply a high-temperature aluminum foil tape or a specialized dryer vent repair tape, making sure the tape overlaps the crack by at least an inch on all sides and is smoothed out to remove air bubbles. For flexible hoses, consider reinforcing the repair with a metal hose clamp.
The Real Cost of a ‘cheap’ Fix: Time, Money, and Safety
We’ve been talking a lot about why electrical tape isn’t the answer to the question ‘can i use electrical tape on a dryer vent?’, and that’s because the repercussions of using the wrong material are significant. Think about it: you’re trying to save a few bucks by grabbing that roll of electrical tape. It seems like a clever, quick fix. But what’s the actual cost? First, there’s the immediate cost: the price of the tape. It’s cheap, sure, maybe a couple of dollars. But then comes the real cost, the one nobody likes to talk about.
If the electrical tape fails – and it will, given the conditions – you’ll have to redo the repair. That means buying more tape (hopefully the right kind this time), spending more time wrestling with the dryer and the vent hose, and dealing with the mess that inevitably comes with a failed seal. I once had a patch I’d done with some flimsy tape start to peel off. Not only did I have to reapply it with better tape, but I also found a substantial amount of lint had escaped and was accumulating behind the dryer. That was a good hour of careful, lint-picking work I could have avoided.
Then there’s the safety aspect. This is the big one. A poorly sealed vent can lead to lint buildup in places it shouldn’t be. As we’ve hammered home, lint is flammable. A compromised vent is a fire risk. The cost of a house fire is astronomical – not just in terms of property damage, but in potential loss of life and personal belongings. That few dollars saved on electrical tape is minuscule compared to the potential cost of a fire caused by a cheap, inadequate repair. It’s the kind of risk that makes you question why anyone would even consider it. It’s not just about efficiency; it’s about protecting your home and your family.
The common advice you’ll hear from appliance repair people and safety experts is consistent: use the right materials for the job. This applies to so many things in home maintenance, but it’s especially true for appliances that deal with heat and create fire hazards. Investing in a good quality roll of high-temperature aluminum foil tape, which might cost you $10-$20, is a fraction of the cost of a potential repair call-out, let alone the catastrophic cost of a fire. It’s a small investment for peace of mind and proper functioning. So, when you’re tempted to reach for that electrical tape, remember the real cost isn’t just the price tag; it’s the potential for failure, wasted time, and serious safety risks.
Verdict
So, to bring it back to the burning question: can i use electrical tape on a dryer vent? My honest answer, after years of fiddling with appliances and seeing what holds up and what doesn’t, is a resounding no. It’s a tempting shortcut, but it’s one that leads to more problems than it solves. You’re trading a few dollars now for potential headaches, wasted time, and, most importantly, a serious safety risk down the line.
Instead of reaching for that roll of black tape, grab some proper HVAC-grade aluminum foil tape. It costs a little more, but it’s designed for the heat and moisture your dryer vent endures. Clean the area, apply it carefully with good pressure, and you’ll have a seal that actually lasts and keeps your laundry room – and your home – safe.
Next time you’re facing a torn dryer vent hose, remember this. Don’t let convenience trump safety and durability. Get the right tape, do the job right the first time, and enjoy peace of mind with every load of laundry.