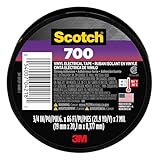
That moment when you find a rat’s handiwork on your car’s wiring harness… or a puppy’s dental experiment on your lamp cord. It’s a sinking feeling. You’ve got exposed copper looking like a tiny, dangerous metallic spaghetti. The immediate question that pops into your head is probably: can electrical tape fix a chewed wire?
I’ve been there. More times than I care to admit, fumbling in the dim light of a garage or under a desk, wondering if a quick fix is actually a real fix. We’ve all seen those DIY videos, right? Slap some tape on it and call it a day. But let me tell you, the reality is a bit more… complicated.
So, before you reach for that roll of black tape, let’s get down to brass tacks about what actually works and what’s just a recipe for future headaches.
Does Electrical Tape Actually Work on Wires? The Science (sort Of)
Let’s cut to the chase: electrical tape is designed for insulation. Its primary job is to prevent electrical current from escaping its intended path and to keep you from getting a nasty shock. It’s made of PVC (polyvinyl chloride), which is a decent insulator and is stretchy enough to wrap snugly around irregular shapes. When a wire gets chewed, you’ve got two main problems: exposed conductive material (the copper) and potentially frayed insulation that could touch another exposed wire, causing a short circuit.
The theory behind using electrical tape is simple: wrap it around the damaged area tightly, making sure that the copper is completely covered and that the tape creates a barrier against contact with other wires or the environment. For very minor nicks, where just a sliver of copper is showing and the insulation is mostly intact, a good, tight wrap can provide a temporary solution. I remember one time, on an old lawnmower, a bit of trim plastic had rubbed a tiny sliver of insulation off a wire. A couple of good wraps of decent electrical tape held it fine for the rest of that season. It wasn’t pretty, but it worked for what I needed it to do then.
However, we’re talking about ‘chewed wires.’ That implies more than a nick. It means strands are likely broken, insulation is missing in chunks, and the underlying conductors are exposed. Electrical tape, by itself, isn’t a structural repair. It’s a wrapper. It doesn’t fuse the wires back together, it doesn’t replace lost insulation material in a solid way, and it certainly doesn’t fix the mechanical damage. If the wire is frayed down to a few strands, tape just compresses those strands and hopes for the best. It’s like putting a bandage on a gaping wound without cleaning it or stitching it up.
The real issue is that electrical tape degrades. It can dry out, crack, lose its stickiness, and become brittle, especially when exposed to sunlight, heat, or oil. So, what might seem like a secure fix today could become a fire hazard tomorrow. The common advice that ‘electrical tape is for electrical fixes’ is true, but it’s often misunderstood to mean it’s a universal repair tool for all wire damage. It’s really for splicing insulation or bundling wires safely, not for patching up rodent vandalism.
There’s a specific type of tape that people sometimes confuse with standard electrical tape: vulcanizing tape. This stuff is different. When you stretch it and wrap it, it actually fuses with itself, creating a smooth, waterproof, and highly insulating rubber-like layer. It’s much more durable and provides a better seal than regular PVC electrical tape. If you’re looking for something that really seals and insulates, vulcanizing tape is a much better bet, though it’s still not a structural repair for a severely chewed wire. I’ve used it on garden hoses that sprung a leak and on some outdoor extension cords. It’s seriously tough stuff and provides a far superior seal.
So, while the answer to ‘can electrical tape fix a chewed wire’ is a reluctant ‘yes, maybe, for a little while, under specific circumstances,’ it’s rarely the right or safe answer for anything beyond superficial damage. It’s a temporary patch at best, and often, it’s just delaying a bigger problem.
When a Temporary Fix Might Be Your Only Option (and How to Do It Right)
Look, I’m not going to lie. Sometimes, you’re stranded. Maybe your car died in the middle of nowhere, and you need to get home. Or it’s a weekend, and the auto parts store is closed. In those dire moments, a temporary fix is better than no fix. If you’re facing a chewed wire and your only tool is electrical tape, here’s how to make it as effective as possible, understanding full well that this is a stopgap measure.
First, assess the damage. Can you identify exactly which wires are damaged? Are there multiple wires chewed? Is the insulation completely gone, exposing a lot of copper, or is it just a few strands? If the wire is completely severed, no amount of tape will bring it back. You need to splice it. If the insulation is just nicked and only a tiny bit of copper is showing, you might get away with it. If the wire looks like it’s been through a shredder, tape is just going to mask the problem.
Clean the area. Get any dirt, oil, or debris off the damaged wire and the surrounding intact insulation. This helps the tape adhere better. Next, if possible, try to rejoin any broken strands of copper.
This is where things get tricky and why tape alone often fails. If you can carefully twist the exposed copper strands back together, do it. This makes sure continuity. Then, you’ll want to use a small piece of heat-shrink tubing if you have it.
Slide a piece over the wire before you splice, or over the splice itself. Heat it up (carefully, with a heat gun or even a lighter, held at a distance) and it shrinks down, providing a much better seal than tape alone. This is where the concept of a ‘proper’ repair starts to creep in, but if you don’t have heat shrink, you move on to tape. (See Also: Can I Use Electrical Tape To Connect Wires )
Now, for the tape. Use good quality electrical tape. Don’t grab the cheap stuff from the dollar store; it’s often brittle and won’t hold.
Start wrapping the tape before the damaged section, overlapping each layer by at least half. Wrap it tightly, pulling the tape taut as you go.
You want to build up several layers, extending well beyond the damaged area on both sides – at least an inch or two of good insulation on either end of the repair. The goal is to create a solid, cohesive layer that simulates the original insulation. Overlap each spiral so there are no gaps.
If you can, try to wrap it in alternating directions on successive layers to add strength. I once had to tape up a trailer light wire that was rubbing on the frame. I used about five layers, wrapping tightly, and it held for a good six months until I could get it properly re-wired.
It felt solid when I was done, but I knew it was temporary.
If you have different types of tape, consider layering. A layer of self-fusing silicone tape (which is similar to vulcanizing tape) underneath the electrical tape can provide a more solid, waterproof seal. Then, wrap the electrical tape over the top for abrasion resistance and UV protection. This is getting into more advanced temporary fixes, but if you have the materials, it’s worth the effort.
Importantly, understand the limitations. This temporary fix is for low-voltage applications or situations where you absolutely must get something working for a short time. It’s not for mains power, important engine components, or anything where failure could be catastrophic. It’s a band-aid, and you need to plan to get the wire properly repaired or replaced as soon as humanly possible. The goal here is mobility or basic function, not long-term reliability.
What to Look for in Electrical Tape (because Not All Black Tape Is Equal)
Okay, you’ve decided you might need electrical tape, or at least you’ve got some lying around. Before you just slap any old black tape on a wire, let’s talk about what makes some electrical tape better than others, and why using the wrong kind can be worse than useless. The most common type you’ll find is made from PVC. This is what most people think of when they hear ‘electrical tape.’
When you’re buying electrical tape, look for a few key things. First, thickness. Thicker tape generally offers better insulation and is more durable.
A good quality tape will be around 7 to 10 mils thick. Cheaper, thinner tapes might be 4 or 5 mils, and they’re much more likely to tear or stretch too thin, compromising the insulation. Second, adhesion.
The adhesive needs to be strong and long-lasting. You want a tape that sticks well but doesn’t leave an unbearable residue when you eventually remove it (though removing old electrical tape residue is a pain no matter what). A tape that loses its stickiness quickly is useless.
Third, flexibility and stretch. Good electrical tape needs to be able to stretch and conform to curves and corners without tearing.
This allows you to wrap it tightly and create a smooth layer. If it’s too stiff, it won’t wrap properly, leaving gaps. (See Also: Can Electrica Tape Catch On Fire )
Look for brands that are reputable. While I won’t name specific brands to avoid sounding like an ad (or worse), there are definitely brands that have been around forever and are known for consistent quality. The packaging will often state the voltage rating and temperature range the tape can handle. For most automotive or household fixes, you’ll want a tape rated for at least 600 volts and a good temperature range, ideally from something like -10°F to 176°F (-23°C to 80°C). Higher is better if you expect extreme conditions.
A really important point that many people miss is UV resistance. If the wire is exposed to sunlight at all, you need tape that can handle it. Standard PVC tape can degrade and become brittle when exposed to UV rays. Some premium electrical tapes have better UV resistance, but none are truly designed for long-term outdoor exposure. This is a major reason why it’s always a temporary fix.
Then there’s vulcanizing tape (also called self-fusing silicone tape). This is a different beast altogether. It’s not sticky in the conventional sense. You stretch it as you wrap, and the layers fuse together to form a solid, waterproof, insulating jacket. It’s excellent for sealing out moisture and providing a really solid layer. It often has a higher temperature rating and better chemical resistance than PVC tape. If you can use this, even under regular electrical tape, it’s a significant upgrade for the ‘fix.’ I always keep a roll of this in my emergency car kit now, just for those ‘what if’ scenarios where a proper repair isn’t immediately possible.
Finally, color. While black is standard for electrical tape, it’s usually for practical reasons – it’s less likely to show dirt and grime. However, different colors are sometimes used to denote different circuits or voltage levels. For basic fixes, black is fine, but be aware that colored tapes exist for specific purposes. For a chewed wire, the color doesn’t matter as much as the material’s properties. Just don’t use duct tape or masking tape; they are NOT designed for electrical insulation and are a serious fire hazard.
The Real Way to Fix a Chewed Wire: Why Tape Isn’t Enough
Alright, let’s be blunt. If you’ve found a chewed wire, especially in a car, boat, or any piece of equipment with moving parts or significant vibration, slapping some electrical tape on it is a gamble. It’s a gamble with your safety, your equipment, and potentially your wallet if it leads to bigger problems. The real fix involves restoring the wire’s integrity, not just covering the damage.
The safest and most reliable method for repairing a chewed wire involves restoring both the electrical connection and the insulation. This usually means cutting out the damaged section entirely and splicing in a new piece of wire. You’ll need a wire stripper, wire connectors (like butt connectors or crimp sleeves), and a crimping tool. Sometimes, you might need a soldering iron and solder for an extra-secure connection, though well-crimped connectors are often sufficient and more vibration-resistant.
Here’s a general process for a proper repair:
- Cut out the damaged section: Use wire cutters to remove the entire chewed-up portion. Make sure you’re cutting into clean, undamaged wire on both sides.
- Strip the ends: Use a wire stripper to remove about half an inch of insulation from each of the cut ends.
- Connect the wires: Twist the exposed strands of the original wire ends together, or use a butt connector/crimp sleeve. If using a connector, insert one stripped end into each side and crimp firmly with a crimping tool. A good crimp should be tight and secure.
- Insulate the repair: This is the important step where electrical tape falls short. The best method is to use heat-shrink tubing. Slide a piece of heat-shrink tubing over one of the original wires before you make the splice. After you’ve crimped the connection, slide the tubing over the newly connected splice and heat it with a heat gun (or carefully with a lighter). It will shrink down, creating a tight, waterproof, and durable insulated seal.
- Secondary protection (optional but recommended): For high-vibration environments like cars, after the heat shrink has cooled, you can add a layer or two of good quality electrical tape or, even better, a wrap of fabric-backed electrical tape (like Tesa tape) over the heat shrink for added abrasion resistance and a factory-like finish.
Why is this so much better than tape alone? Heat-shrink tubing creates a permanent, fused bond that won’t dry out, crack, or peel. It’s sealed against moisture and dirt. A properly crimped connection is mechanically sound and has low electrical resistance. Electrical tape, even the best kind, is a flexible sleeve that can shift, degrade, and fail over time. It’s a patch, not a repair.
I learned this the hard way after a temporary electrical tape fix on a motorcycle headlight wire failed catastrophically on a dark road. The tape had worked its way loose, exposed copper touched the frame, and suddenly I had no headlights. The subsequent tow and repair cost me far more than doing it right the first time would have. That experience hammered home the lesson: when it comes to wiring, especially anything safety-related, don’t cut corners. A proper repair takes a little more time and effort, but it’s the only way to make sure reliability and safety. For anything beyond a tiny nick where the insulation is mostly intact, tape is a temporary measure at best.
When Electrical Tape Is Actually a Good Idea (no, Really!)
Okay, I’ve bashed electrical tape pretty hard for fixing chewed wires. And for good reason. But it’s not entirely useless. There are times when electrical tape is absolutely the right tool for the job, and often, it’s the only tool you need. These are situations where you’re dealing with intact insulation that needs reinforcement or bundling, not replacing missing insulation on exposed conductors.
One of the most common and legitimate uses is simply bundling wires together. If you have a spaghetti junction of cables behind your TV, computer, or in an appliance, wrapping sections with electrical tape can keep them organized, prevent them from vibrating against each other (which can cause wear over time), and make them look neater. A few well-placed wraps can tame a chaotic wire nest effectively. This is a classic use case, and for this, electrical tape is perfect. It’s pliable, sticks well enough to hold, and is relatively easy to remove if you need to rearrange things later.
Another legitimate use is reinforcing slightly damaged insulation. Let’s say you’re pulling a wire through a conduit or a tight space, and the insulation gets a minor scrape, but no copper is showing. A wrap of electrical tape over that scrape can prevent further damage and keep the insulation intact. It’s like putting a protective sleeve on a weak spot. Again, this is about adding a layer of protection to existing, intact insulation, not replacing missing insulation.
I’ve also seen it used effectively to secure connections temporarily. For example, if you’re making a permanent connection with solder or a wire nut, you might wrap the joint with electrical tape first. This helps hold the wires in place while you complete the connection and provides an initial layer of insulation before you add a more solid solution like heat shrink or a junction box cover. This is a supporting role, not the main event. (See Also: Can I Substitute Duct Tape For Electrical Tape )
The controversial opinion I have? Many people use electrical tape for things like sealing up small holes in flexible ducting for HVAC or even as a quick fix for a leaky hose. While it might work for a short while, especially if it’s a low-pressure, non-important application, I generally advise against it for anything other than its intended purpose. Duct tape is usually better for general-purpose repairs like that, and specialized tapes exist for specific jobs. Relying on electrical tape for non-electrical tasks is a slippery slope.
So, when is it a good idea? When you have a wire with decent insulation that needs tidying, reinforcing a minor scrape, or holding a connection while you make a permanent fix. Think of it as a helper tape. It’s great for keeping things tidy and adding a little extra protection to already good insulation. It’s NOT great for covering exposed copper, rebuilding missing insulation, or for permanent repairs in demanding environments. The key is understanding its limitations. If the copper is showing, tape alone is a temporary, often unsafe, solution.
A Quick Comparison: Tape vs. Other Repair Methods
When you’re faced with a chewed wire, especially in a vehicle where vibration and environmental exposure are constant, understanding your options beyond just electrical tape is vital. Here’s a quick look at how electrical tape stacks up against other common repair methods. We’re focusing on the effectiveness and longevity of the insulation and the connection itself.
| Repair Method | Pros | Cons | Verdict on Chewed Wires |
|---|---|---|---|
| Standard Electrical Tape (PVC) | Cheap, readily available, flexible. | Degrades over time (UV, heat, cold), brittle, not waterproof, adhesive fails, not structural. |
Temporary at best. Only for minor nicks with intact copper. High risk of failure over time. |
| Vulcanizing/Self-Fusing Silicone Tape | Forms a smooth, waterproof, highly insulating rubber layer. Good temperature and chemical resistance. | Requires stretching to activate, can be harder to find and slightly more expensive, still not structural for a completely severed wire. |
Good for sealing. Excellent for reinforcing insulation or sealing minor damage under electrical tape. Better than PVC alone, but still not a complete fix for severe damage. |
| Heat Shrink Tubing (with Crimp Connector) | Creates a durable, waterproof, abrasion-resistant, and electrically insulated seal. Professionally looks. Excellent longevity. | Requires a heat source (heat gun is best), needs proper crimping technique, requires cutting out damaged section. |
The Gold Standard. This is the proper way to repair a chewed wire. It restores both the electrical connection and the insulation effectively and durably. |
| Wire Nuts (Household Application) | Cheap, easy to use for joining wires in dry, indoor environments. | Not vibration-resistant, not waterproof, bulky, not suitable for automotive or outdoor use. |
Not for vehicles or harsh environments. Only applicable for very specific, low-stress, dry indoor wiring scenarios. |
| Soldering (with Heat Shrink) | Creates a very strong electrical bond, low resistance. | Requires soldering skill and equipment, can be brittle under constant vibration, heat can damage nearby components if not careful. |
Excellent electrical connection. Often used in conjunction with heat shrink for the best overall repair, though crimping is often preferred for vibration resistance. |
People Also Ask
Can I Use Duct Tape on an Electrical Wire?
Absolutely not. Duct tape is made for general repairs and is not an electrical insulator. It’s flammable and will not provide any protection against electrical shock. Using it on wires is a significant fire hazard and can lead to dangerous situations.
How Do I Repair a Frayed Wire Without Replacing It?
For a frayed wire where the copper strands are exposed but the wire isn’t completely broken, the best approach is to carefully twist the frayed strands back together, then use heat-shrink tubing over the repaired section. If the insulation is significantly damaged, you might need to cut out the section and splice in a new wire using crimp connectors and heat shrink.
What Is the Best Way to Insulate a Spliced Wire?
The best way to insulate a spliced wire is with heat-shrink tubing. After making the electrical connection (usually with a crimp connector), slide a piece of heat-shrink tubing over the splice and heat it until it shrinks down, forming a tight, waterproof seal. For extra protection in harsh environments, you can follow up with a wrap of fabric-backed electrical tape.
What Happens If You Use the Wrong Tape on Electrical Wires?
Using the wrong tape, like duct tape or masking tape, on electrical wires is extremely dangerous. These tapes are not designed for electrical insulation, are often flammable, and can fail quickly, exposing live wires. This creates a serious risk of electric shock, short circuits, and fires. Even regular PVC electrical tape can fail if it’s old, degraded, or used in conditions it wasn’t designed for (like extreme heat or UV exposure).
Final Thoughts
So, to circle back to that burning question: can electrical tape fix a chewed wire? The blunt answer is: it can, but it’s usually a terrible idea for anything but the most superficial nicks, and even then, it’s temporary. It’s a cosmetic cover-up, not a real repair. The underlying damage remains, and the tape itself will degrade.
If you’re in a bind and absolutely have no other option, use the best quality electrical tape you can find, wrap it as tightly and as many layers as possible, extending well beyond the damaged area. But understand that this is a Hail Mary. You’re just delaying the inevitable and potentially increasing the risk.
My advice? Always aim for a proper repair using heat-shrink tubing and crimp connectors. It takes a little more effort, costs a few dollars more for the materials, but it’s the only way to make sure safety and reliability. Don’t let a chewed wire turn into a bigger, more expensive, and dangerous problem. Get it fixed right.