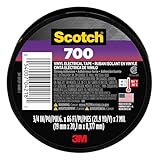
Look, we’ve all been there. You’re miles from anywhere, your MacBook is gasping for juice, and you spot it: a frayed cable on your charger. Panic sets in. Your first thought might be, ‘Can I just put electrical tape on my MacBook charger?’ It’s a question born of desperation and a desire to avoid an expensive Apple Store run. I’ve certainly had that thought, staring down a split in the cable that looked like it was about to expose bare wire. It feels like a quick fix, right? Just wrap it up and hope for the best.
The truth is, while electrical tape might seem like a universal bandage for all things cord-related, it’s a bit more complicated when it comes to your expensive Apple gear. We’re talking about delicate electronics here, and a botched repair can lead to more problems than you started with.
Why Your Macbook Charger Cable Frayed (and Why Tape Isn’t the Hero You Think)
The MagSafe connector on MacBooks, bless its magnetic heart, was a stroke of genius. It saved countless laptops from tumbling off desks.
But the charging cable itself? That has always been a bit of a weak point. I’ve owned more MacBooks than I care to admit, and almost every single one has eventually developed some kind of fraying or splitting on the charger cable. It usually starts near the power brick or at the connector that plugs into the MacBook.
The most common culprit is simple wear and tear. We twist, bend, and shove these cables into bags day after day.
The insulation, designed to protect the delicate wires inside, eventually succumbs to this constant stress. Think of it like repeatedly bending a paperclip; eventually, it snaps.
Now, about electrical tape. On a lamp cord or a cheap extension cable, maybe. Electrical tape is designed to provide insulation against electric shock and moisture.
It’s made of PVC, which has good dielectric strength – meaning it’s a poor conductor of electricity. It also stretches, allowing it to conform to oddly shaped surfaces.
So, in theory, if you had a tiny nick, it could provide a temporary barrier. My first impulse, years ago, was to grab the roll of black tape when I saw a small split near the MagSafe connector on an old MacBook Pro charger. I wrapped it tightly, feeling pretty smug about my DIY skills. For about a week, it seemed to hold.
But here’s the kicker: that tape isn’t designed for the kind of flexing and heat that a MacBook charger endures. It loosens, it gets gummy, and worst of all, it doesn’t actually repair the underlying damage. The internal wires are still stressed, and the tape is just a flimsy Band-Aid. I ended up with a charger that intermittently worked, and then completely died.
Apple’s official documentation, though vague on DIY fixes, implies that any damage to the cable itself, beyond minor cosmetic scuffs, warrants replacement to maintain safety and functionality. They’re obviously pushing you to buy a new one, but their underlying point about cable integrity is valid.
The internal wires are incredibly fine, and if even one breaks, the charger might not work, or worse, it could become a fire hazard. Electrical tape doesn’t reinforce these wires; it just covers them. It’s like putting a sticker over a crack in a dam. The pressure is still there, and eventually, it’ll fail. I learned this the hard way, spending $80 on a replacement charger after my taped-up one finally gave up the ghost. That $80 stung, but it was a cheaper lesson than dealing with a potential electrical issue.
When a Little Fray Becomes a Big Problem: The Risks
Let’s get blunt: using electrical tape on your MacBook charger cable is a gamble, and the house usually wins. The primary risk isn’t just that it won’t work; it’s that it could become dangerous. Your MacBook charger carries a significant amount of power.
Those internal wires are carrying electricity directly to your expensive laptop. If the insulation is compromised, and those wires touch each other or, heaven forbid, something conductive like a metal desk or your hand, you’re looking at a short circuit. A short circuit can do a few things: it can fry your MacBook’s charging port (a repair that costs a pretty penny), it can damage the charger itself beyond repair, or, in the worst-case scenario, it can cause a fire.
I’ve heard horror stories from friends who’ve had chargers overheat dramatically, melting the plastic casing and filling their room with acrid smoke. One friend’s charger literally smoked and sparked while plugged in, thankfully while they were home to unplug it immediately.
The common advice you’ll find online is a mix of wishful thinking and genuine misunderstanding. Many people suggest using a bit of electrical tape as a quick fix. They might even say it worked for them. And sure, for a tiny nick that isn’t near a bend or stress point, it might hold for a while.
But consider the context: MacBook chargers, especially the older MagSafe ones, are subjected to a lot of movement. They get coiled, uncoiled, stuffed into backpacks, and sometimes even tugged on.
Electrical tape, while insulating, isn’t structurally sound. It doesn’t have the tensile strength to prevent the underlying wires from continuing to bend and break. It’s also not designed to withstand the heat generated during charging, which can make the adhesive fail and the tape peel away, exposing the damage again.
I once saw a friend’s “repaired” charger cable get so hot that the electrical tape started to melt and drip onto their carpet. That was the last time they considered a DIY fix. (See Also: Can I Use Electrical Tape To Connect Wires )
A more sensible approach, if you’re trying to save money, is to look at dedicated cable repair kits. These often involve a more solid plastic sleeve or heat-shrink tubing that offers better structural support than simple tape.
However, even with these, you’re still dealing with a potentially damaged internal wire. The real danger is when the frayed part is actively flexing. Every time you plug or unplug, or move the charger, you’re putting more stress on those already weakened wires. It’s a ticking time bomb scenario, and honestly, the few dollars you might save on tape or a cheap repair kit isn’t worth the risk of damaging your MacBook or causing a fire hazard.
The official stance from Apple, and frankly, common sense, is that a damaged cable should be replaced. They offer USB-C power adapters now, and while they’re not immune to damage, the cable situation on those tends to be a bit more solid.
Still, if the cable frays, it needs to be addressed properly.
A Look at the Alternatives: What Actually Works?
So, if electrical tape is a bad idea, what are your options when your MacBook charger cable starts looking like it’s been through a shredder? The first and most obvious answer is replacement.
For older MacBooks with MagSafe chargers, you’re looking at finding a genuine Apple charger or a reputable third-party alternative. I’ve personally found that going for a well-reviewed third-party charger can save you a decent chunk of change. I picked up a 60W MagSafe 2 charger for my MacBook Air a few years back from a brand I’d researched extensively, and it’s held up perfectly. It cost me about $45, compared to Apple’s $80 at the time.
The key is to avoid the ultra-cheap, no-name options that flood online marketplaces; those are often poorly made and can pose their own risks. Stick to brands with good reviews and a clear warranty policy.
For newer MacBooks that use USB-C, the situation is slightly different. The cables are usually detachable from the power brick, which is a plus. If the USB-C cable itself is damaged, you can often buy just the cable and reuse your existing power brick.
This is a much more cost-effective solution than replacing the whole charger. I did this for my work laptop when the USB-C cable started showing wear near the connector. I ordered a replacement cable for around $20, and it was a perfect fit.
This is where the design of the charger matters. The integrated cable design of older MagSafe chargers meant that any cable damage required a whole new unit. With USB-C, the modularity is a huge advantage.
Another option, for the truly adventurous and technically inclined (and I use that term loosely), is using heat-shrink tubing. This isn’t your average electrical tape. Heat-shrink tubing is a plastic sleeve that shrinks tightly around a cable when heated.
You can buy it in various diameters. The process involves carefully stripping back the outer insulation (only if absolutely necessary and you know what you’re doing), sliding the tubing over the damaged section, and then applying heat with a heat gun or even a hairdryer. It creates a much more solid and integrated-looking repair than tape.
I tried this once on a slightly worn cable near the power brick. It looked… okay.
It provided a solid, insulated sheath. However, it still doesn’t address any potential internal wire damage.
And if you’re not careful with the heat, you can melt the surrounding insulation. It’s a better option than electrical tape, but still not a foolproof fix for compromised internal wiring.
Here’s a quick comparison of common charging cable repair approaches:
| Method | Pros | Cons | Verdict |
|---|---|---|---|
| Electrical Tape | Cheap, readily available, can be applied quickly. | Poor structural integrity, can melt, doesn’t fix internal damage, looks messy, unreliable. | Avoid. Last resort for a tiny, non-important nick, and even then, not recommended. |
| Heat-Shrink Tubing | Provides a more solid, insulated sheath; looks cleaner than tape. | Requires tools (heat gun/hairdryer), doesn’t fix internal wire damage, risk of melting insulation if done improperly. | Better than tape, but still a workaround, not a true repair. |
| Dedicated Cable Repair Kits | Often designed for specific cable types, can offer better reinforcement. | Varying quality, might not perfectly match Apple cables, still doesn’t guarantee internal wire integrity. | Potentially useful for reinforcing outer sheath, but be wary of claims of full repair. |
| Replacement Cable (USB-C) | Modular design allows replacing just the cable; cost-effective. | Requires careful selection of a compatible and reputable cable. | Excellent option for USB-C MacBooks if the power brick is fine. |
| Full Charger Replacement | Guaranteed to be working correctly and safely. | Most expensive option. | The safest and most reliable solution, especially for older models or significantly damaged chargers. |
The ‘contrarian’ Take: When a Patch Job Might Actually Save You
Now, here’s where I might ruffle some feathers. Everyone says, ‘replace it immediately!’
And for the most part, they’re right. But there are specific, narrow circumstances where a DIY patch job might prolong the life of your charger, buying you time. I disagree with the absolute ‘never’ approach because, let’s be real, sometimes you’re stuck. (See Also: Can Electrica Tape Catch On Fire )
I’ve been in that situation: a dead MacBook, a flight in two hours, and the only charger I have has a minor split near the brick. In that specific scenario, if the split is tiny, not exposing any wires, and importantly, not in a spot that bends or flexes heavily (like right at the connector), a carefully applied layer of high-quality electrical tape can prevent it from getting worse temporarily.
I’m talking about a clean, small nick, maybe the size of a pinprick, on the rigid part of the cable. I’ve done this myself, and the charger still worked for another six months before I could afford a proper replacement. The key is ‘carefully applied’ and ‘temporarily’.
My own experience with this was on an old MagSafe 2 charger. The cable had a small, superficial split about six inches from the power brick. No wires were showing, but the plastic was clearly weakened.
I cleaned the area thoroughly, making sure no dust or debris was there, and wrapped it with several tight, overlapping layers of good quality electrical tape. I made sure the tape extended a good inch or so beyond the damaged area in both directions.
I even added a layer of sturdy cloth tape over the electrical tape for extra structural support. This setup lasted me for about four months of daily use before I noticed the cable starting to feel a bit warm in that spot – a clear warning sign.
At that point, I immediately switched to my backup charger and ordered a new one. The key takeaway here is that this was a stopgap measure, not a repair. It bought me time, but I was constantly monitoring it and ready to ditch it at the first sign of trouble.
The common advice, while well-intentioned, often fails to account for the reality of people’s situations. Not everyone can afford an $80 charger on a whim when their current one gets a little ding.
So, while I would never recommend it as a permanent solution, or for anything more than a very minor, non-important cosmetic issue, understanding that a careful, temporary patch can work in a pinch is valuable. However, you must be hyper-vigilant. If you notice any heat, any change in functionality, or any further degradation of the tape or cable, you must stop using it immediately. This is not a green light to patch up severely damaged cables; it’s a survival tactic for a very specific, limited scenario.
The risk of electrical shock or fire is always present, so proceed with extreme caution if you choose this route, and consider it a temporary fix at best. The safest bet, always, is a genuine replacement, but life sometimes forces less-than-ideal decisions.
Understanding the Internal Anatomy: Why It Matters
Let’s break down why your MacBook charger cable is more than just a simple wire. Inside that relatively thin plastic sheath are several different components, each with a specific job. You’ve got your main power conductors, which carry the actual electricity. These are usually made of copper and are relatively thin wires because MacBooks don’t draw a massive amount of current compared to, say, a power tool.
Then, there’s often shielding, which helps prevent electromagnetic interference. Some cables might also have smaller data wires, especially if they’re part of a smart charging system.
The important part is that all of these are insulated from each other. The outer jacket, the part you see, is the last line of defense. Electrical tape is designed to replace that outer jacket’s insulating properties, but it’s not designed to hold everything together internally.
When you see fraying, it means the outer jacket is breaking down. If it’s just a superficial nick, the internal insulation might still be intact.
But with bending and stress, that internal insulation can also get damaged, or the wires themselves can start to break. This is where the real danger lies.
If two power conductors touch, you get a short circuit. If a conductor touches the shielding or the metal casing of your MacBook’s port, you can also have issues. Electrical tape, being flexible, can conform to the shape of the damaged cable, but it doesn’t prevent the internal wires from moving or breaking further.
It can even create little pockets where moisture can get trapped, leading to corrosion over time. I learned this the hard way with a phone charger that I’d patched up with tape. It seemed fine, but then the charging port on my phone started acting up. Turns out, the tape had failed, allowing some conductive dust to get into the port, causing intermittent charging issues.
It took me ages to figure out it was the charger’s fault.
The problem with MacBook chargers, especially the older MagSafe ones, is that the cable is permanently attached to the power brick. This means any damage to the cable requires replacing the entire unit. (See Also: Can I Substitute Duct Tape For Electrical Tape )
This is a major design flaw from a repairability standpoint. Newer USB-C chargers are better because the cable can often be detached and replaced separately. When you’re looking at a frayed cable, you have to ask yourself: ‘Is this just cosmetic, or is the internal structure compromised?’
If you can see any nicks in the internal insulation, or if the wires are exposed, or if the cable feels particularly stiff or kinked in the damaged area, it’s a major red flag. For these situations, electrical tape is completely out of the question. You’re basically gambling with your MacBook’s life and your own safety.
The only responsible action is replacement. Apple does have official repair programs and services, and while they can be pricey, they guarantee a safe and functional product.
Practical Tips: When to Call It Quits and What to Do
So, how do you know when it’s time to admit defeat and just buy a new charger? It’s more than just seeing a bit of frayed plastic. Here’s my rule of thumb: if the damage is within six inches of either end of the cable (where it connects to the power brick or the MacBook), it’s usually a sign of heavy stress and you should replace it. That area gets the most bending and flexing.
If you see any exposed copper wires, any signs of melting or scorching on the plastic, or if the cable feels excessively hot in one spot during charging, that’s an immediate no-go. Heat is a sign that electricity isn’t flowing smoothly, and that’s a fire hazard waiting to happen.
I once had a cheap third-party charger that got so hot near the power brick, the plastic casing started to soften. I unplugged it faster than I thought humanly possible.
Another indicator is intermittent charging. If you have to wiggle the cable to get it to charge, or if it randomly disconnects, even if the visible damage looks minor, the internal connections are likely compromised.
This is often due to broken internal wires or damaged pins in the connector. Electrical tape won’t fix broken internal wires.
It’s like trying to fix a leaky pipe by wrapping it in cellophane. It might slow the drip for a minute, but it won’t hold. Furthermore, if your MacBook’s system report shows charging errors or battery health issues that started coinciding with the cable damage, that’s another strong signal to replace the charger.
Sometimes, a damaged charger can even affect the battery’s ability to charge properly, leading to premature wear or reduced capacity.
If you’re determined to try a repair, and I’m still saying you probably shouldn’t, at least use the right materials. Forget the cheap, generic electrical tape.
If you absolutely must, get a high-quality, reputable brand of electrical tape specifically rated for electrical insulation. And be prepared to replace it regularly. A better DIY option, as mentioned, is heat-shrink tubing, but even that has limitations.
For USB-C chargers, if the cable is detachable and damaged, buy a replacement cable from a reputable source. Look for certifications like USB-IF compliance if possible, though that’s often overkill for casual users. Just stick to well-known brands that offer warranties.
For MagSafe chargers, or if the power brick is damaged, your only real safe option is to buy a new charger. Yes, it’s an expense. But consider it the cost of keeping your expensive laptop running safely and reliably. I learned this the hard way after trying to cut corners on a phone charger years ago, which ultimately cost me more in repairs than a new charger would have.
It’s a lesson I don’t forget.
For those who insist on trying a quick fix, here’s a basic, but flawed, process:
- Assess the Damage: Is it a tiny cosmetic nick on a rigid part of the cable, or is it near a bend, exposing wires, or showing signs of heat? If it’s the latter, stop.
- Clean the Area: Make sure the cable around the damage is clean and dry.
- Apply Tape (Carefully): Use high-quality electrical tape. Start wrapping a good inch before and after the damaged section. Overlap each wrap by about half the tape’s width. Apply firm, even tension.
- Add Reinforcement (Optional): Some people add a layer of strong fabric tape (like electrical tape, but thicker and less stretchy) over the electrical tape for added durability.
- Monitor Constantly: Check for heat, watch for any signs of tape loosening or degradation, and listen for any unusual sounds.
- Replace ASAP: Treat this as a temporary solution only. Get a new charger as soon as humanly possible.
Final Verdict
So, to circle back to the original question: can I just put electrical tape on my MacBook charger? The honest, blunt answer is: you can, but you absolutely shouldn’t if you want a safe and reliable fix. Electrical tape is a temporary, flimsy bandage that doesn’t address the underlying issue of damaged internal wiring or compromised insulation. It might seem like a quick save when your MacBook is on its last legs, but the risks of short circuits, fire hazards, or further damage to your laptop are simply too high to justify it as anything more than an emergency, short-term measure.
My own experiences and the countless stories I’ve heard confirm that while it might work for a week or two in a pinch, it’s a ticking time bomb. The real cost isn’t the price of a new charger, but the potential cost of a damaged laptop or a dangerous electrical incident. If your MacBook charger cable shows signs of wear, especially near the ends or in flexible areas, it’s time to invest in a replacement. For USB-C models, replacing just the cable is often a smart, affordable option. For older MagSafe chargers, or if the damage is severe, a full charger replacement is the only responsible choice.
Ultimately, cutting corners on your charging equipment is a false economy. You’re better off spending the money on a genuine or reputable third-party charger than risking your expensive tech. Don’t let a cheap fix turn into an expensive problem.