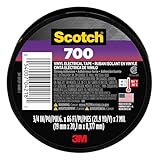
I remember my first real bushcraft trip. I’d meticulously packed all the ‘key’ gear, including what felt like a mile of paracord. When it came time to actually use it for something beyond tying down my tarp, I realized I hadn’t bothered to properly finish the ends. They frayed like a cheap sweater. That’s when the question popped into my head: can I melt ends of paracord with electrical tape? I ended up fumbling with a lighter and a roll of tape, and let’s just say the results were… less than ideal. Not a good look when you’re trying to impress your buddies.
Look, we’ve all been there. You see a quick hack online, and you think, ‘Sure, that’ll work.’ But sometimes, the reality is a bit messier than the glossy photos suggest.
This isn’t about fancy survival skills; it’s about making your cordage do what you need it to do without turning into a bird’s nest by lunchtime.
Why Electrical Tape Isn’t Your Friend for Melting Paracord
Let’s cut to the chase. Can you melt the ends of paracord with electrical tape?
Technically, yes, you can make them stick together. But should you? Absolutely not, if you want a reliable finish.
I learned this the hard way, standing in the woods with a bunch of fraying rope and a half-melted blob of vinyl that smelled like burnt plastic. My first attempt involved wrapping the tape tightly around the end and then hitting it with a lighter. The tape got melty, sure, and it sort of fused the outer sheath, but the inner strands? They were still going rogue.
Plus, that sticky residue? It’s a pain to clean up and makes the cord feel weirdly tacky.
It’s like putting lipstick on a pig – it looks vaguely better for a second, but it’s still fundamentally wrong.
The problem is that electrical tape is designed to insulate and hold wires together, not to create a durable, fused seal on synthetic fibers. Its melting point isn’t ideal for this kind of application.
When you heat it, it softens and stretches, but it doesn’t truly fuse the paracord strands in a way that prevents fraying long-term. What you often end up with is a brittle shell that cracks off after a bit of use, or a gummy mess that attracts dirt. I’ve seen paracord projects fall apart because the ‘sealed’ ends gave way.
It’s a common mistake for beginners, and honestly, I’ve seen more experienced folks fall for this lazy shortcut too. It’s just not worth the potential failure down the line, especially if you’re relying on that paracord for anything important, like securing a shelter or rigging a hammock. Think about the stress you put on your cordage; electrical tape just isn’t engineered for that kind of resilience. It’s a quick fix, but a fundamentally flawed one.
My buddy, Dave, tried this for his climbing setup. He figured it was just a few inches of cord, what’s the worst that could happen? The worst happened. A section of his accessory cord, which he’d ‘sealed’ with electrical tape, started to unravel mid-climb, thankfully on a lower section where it wasn’t load-bearing. He got lucky, but it scared him straight. He now carries a proper lighter and a tiny ceramic blade for trimming and sealing. It takes maybe an extra 30 seconds per end, and it actually works.
The Right Way: Lighters, Knives, and Melting Points
So, if electrical tape is a no-go, what’s the proper way to prevent paracord ends from fraying? It’s surprisingly simple and involves tools most people already have, or can get for cheap. The undisputed champion for sealing paracord ends is a simple lighter. Whether it’s a Bic, a butane torch, or even a Zippo (though the fuel can affect the taste if you’re using it for something food-related, which you shouldn’t be doing with paracord anyway), heat is your friend here. The key is controlled heat.
Here’s the process I follow, and it’s served me well for years: (See Also: Can I Use Electrical Tape To Connect Wires )
- Trim Cleanly: Before you even think about heat, use a sharp knife or a pair of dedicated paracord cutters (they’re like mini-scissors with a ceramic blade, brilliant for this) to get a clean, flat cut. A dull blade or scissors will crush the fibers, making them harder to seal. I got a set of these cutters for about $15, and they were worth every penny after I stopped mangling my paracord ends.
- Apply Controlled Heat: Hold the paracord end about an inch or two above the flame. You don’t want to hold it in the flame, as this will just char and burn the material, making it brittle and black. Instead, let the heat radiating from the flame soften the very tip of the paracord. You’ll see it start to get shiny and slightly gooey.
- Fuse and Shape (Optional but Recommended): Once it’s shiny and melty, you have a couple of options. The simplest is to just let it cool. It will harden into a bulb. For a smoother finish, or to create a specific shape, you can gently press the molten end against a non-flammable surface (like a bit of metal or even a wet cloth held carefully) or use the flat of your knife (cooled slightly!) to shape it into a flatter cap. Be careful not to burn yourself! The nylon and polyester fibers in paracord have a melting point around 250-260°C (482-500°F), so you’re not looking for combustion, just softening.
- Let it Cool: Always let the sealed end cool completely before putting any stress on it. Rushing this step can undo your hard work.
This method creates a solid, fused cap that won’t unravel. It’s clean, durable, and looks professional. It might seem like a small detail, but when you’re out in the field, the last thing you want is your gear failing because of a frayed end. This is how you do it right. It’s not complicated, and it’s far more reliable than any tape trick.
What to Look for in a Good Paracord Seal
When you’re sealing paracord, whether it’s for a keychain, a lanyard, or a important piece of gear, the goal is always the same: a clean, durable finish that prevents fraying. So, what actually makes a good seal? It’s not about making a massive blob, and it’s definitely not about using the wrong materials like electrical tape. A good seal is subtle, strong, and integrated. I’ve seen paracord work fall apart prematurely because the seal was weak, and I’ve also seen work that looked like it was done by a machine. The best seals are the ones you don’t even notice, but they hold up under pressure.
Here’s what I look for:
1. No Fraying: This is the most obvious one. The end should be completely fused. You shouldn’t see any individual strands starting to break away or unravel. If you can still see fuzzy bits or individual threads poking out, it’s not sealed properly. I once spent an entire afternoon re-doing the ends on a paracord bracelet because I thought ‘good enough’ was actually good enough. It wasn’t. It started unraveling within a week of normal wear.
2. Smooth Transition: The sealed end should blend relatively smoothly into the rest of the cord. It shouldn’t have sharp edges or brittle points that could snag on things or cut into your skin. A well-done seal feels like a slightly rounded, solid cap. It’s not a perfect sphere, but it’s not a jagged mess either. Think of it like a well-finished wooden dowel end compared to a splintered one.
3. Durability Under Stress: This is the real test. A good seal will withstand tugging, rubbing against rough surfaces, and general use without cracking or breaking apart. If you can easily chip off the sealed end with your fingernail, it’s a sign of a poor seal, likely due to overheating or not letting it cool properly. I’ve tested this by yanking on ends I thought were well-sealed, and if they give even a little, I know I need to redo them. It’s about creating a monolithic termination.
4. Minimal Residue/Tackiness: A proper melt seal, done correctly, shouldn’t leave behind a sticky or gummy residue. Electrical tape, as we’ve discussed, is notorious for this. A heat-sealed end should feel like part of the cord itself, not like an added adhesive. This is especially important if the cord is going to be handled frequently or if it’s part of something you might put in your mouth (like a zipper pull, though I’d never recommend paracord for that specifically due to potential contaminants).
5. Clean Appearance: While not strictly functional, a clean seal just looks better. It shows attention to detail and pride in your work. If you’re making something to sell or to give as a gift, a professional-looking finish makes a huge difference. This is where having a sharp blade and a steady hand comes into play. It’s the difference between something that looks homemade and something that looks skillfully crafted. For me, the ideal seal is about 2-3mm worth of fused material, forming a slightly rounded tip.
Common Mistakes and Why They Happen
You’d think melting paracord ends would be straightforward, right? Just a bit of heat. But oh, the ways people mess this up. Electrical tape is just one symptom of a deeper misunderstanding. The real culprits are usually impatience, using the wrong tools, or just not understanding the material itself. I’ve made plenty of these mistakes myself, especially when I was first starting out and trying to be ‘resourceful’. Resourceful can quickly turn into sloppy if you’re not careful.
Here are the common pitfalls:
1. Burning Instead of Melting: This is the big one. People stick the paracord end directly into the flame. What happens? You get black, brittle char instead of a fused, flexible end. The nylon and polyester fibers in paracord have specific melting points, and they combust at higher temperatures. You need gentle, radiated heat to soften them, not direct flame to ignite them. I learned this when my first attempt at sealing a compass lanyard turned it into a tiny, stiff charcoal stick. It was useless.
2. Overheating and Dripping: Sometimes, people hold the paracord too close or for too long. The material gets excessively molten and then drips off, leaving you with less cord and a messy, uneven blob that might not even be fused properly. It’s like trying to melt chocolate in a pan too hot – you end up with burnt bits and a seized mess.
3. Insufficient Melting: On the flip side, not applying enough heat means the end won’t fuse properly. You might get a little bit of softening, but the core strands won’t bond. This leads to fraying very quickly. It’s like trying to glue two pieces of wood with just a dab of glue – it won’t hold under any real stress. (See Also: Can Electrica Tape Catch On Fire )
4. Using the Wrong Tools: As discussed, electrical tape is a prime example of using the wrong tool. But it also applies to using dull knives that crush the fibers or trying to seal with something other than a heat source. Some people even try to use friction, which is incredibly inefficient and rarely produces a good result. A sharp blade and a controlled flame (or even a specialized hot knife cutter, which is overkill for most but an option) are your best bets. I once saw someone try to use a soldering iron. Let’s just say it was a smoky, smelly disaster that melted the iron tip.
5. Rushing the Cooling Process: The molten paracord needs time to solidify and become strong. If you try to pull, tie, or put tension on the end before it’s fully cooled, you can weaken the bond or even break it. Patience is key here. Let it cool for at least 30 seconds to a minute.
These mistakes often stem from a lack of understanding of the material properties and a desire for speed. But the truth is, taking an extra minute to do it correctly saves you a lot of potential headaches down the road.
Real-World Use Cases: When a Good Seal Matters
Let’s be honest, not every single piece of paracord you own needs a perfectly sealed end. If you’re using it to bundle up some newspapers for recycling, a little bit of fraying isn’t going to cause an apocalypse. But there are plenty of situations where a properly sealed end is not just desirable, but downright necessary. I’ve learned over the years that skimping on these details can turn a minor inconvenience into a major problem, especially when you’re relying on your gear in challenging conditions. When I’m out camping, hiking, or even just doing some DIY around the house, I want my paracord to perform reliably.
Here are some scenarios where a good, fused paracord end is a must:
1. Survival and Bushcraft Situations: This is probably the most obvious. If you’re building a shelter, setting snares, making a fishing line, or rigging a bear bag, the last thing you want is for your cordage to fail. A frayed end can snag, weaken, or completely unravel, compromising your efforts and potentially putting you in a dangerous situation. Imagine trying to secure your tarp in a sudden downpour, only to have the tie-down point start to shred. Not fun.
2. Hammock Ridgelines and Suspension: If you’re a hammock camper, your ridgeline and suspension system are literally holding you up. While most commercial hammock systems come with professionally finished ends, if you’re making your own or adding custom accessories, a well-melted end makes sure that the cord doesn’t slip or fray where it connects to your carabiners or tree straps. A failure here means a long walk home, or worse.
3. Knife Lanyards and Zipper Pulls: These might seem small, but they’re constantly handled. A frayed end on a knife lanyard can make it difficult to grip your knife quickly, and a frayed zipper pull can be incredibly annoying and difficult to manage, especially with gloves on. A sealed end keeps these small but important bits of gear functional and easy to use.
4. Keychains and Gear Tethers: Losing your keys or dropping a piece of key gear can be a real pain. Paracord keychains and tethers keep things secure. If the end of the paracord on your keychain frays, it might not be long before your keys are on the ground or, worse, lost forever. The same goes for tethers on tools or other gear you don’t want to drop.
5. Craft Projects Requiring Durability: Beyond survival, many crafts use paracord for functional items like dog leashes, bracelets, camera straps, and even furniture. For any item that will undergo repeated stress, friction, or handling, a proper seal is key for longevity and appearance. A frayed dog leash is not only unsightly but could eventually break.
It’s about understanding that paracord, while strong, is made of many small strands. Those strands need to be held together. Heat-sealing is the most effective way to do that, creating a monolithic end that distributes stress and resists abrasion. It’s a simple step that dramatically increases the reliability and lifespan of your paracord projects.
The Humble Hot Knife: A Superior Alternative
While a lighter and a sharp blade are perfectly adequate for most paracord sealing needs, for those who work with paracord frequently or need an exceptionally clean and precise finish, a hot knife is a big deal. I resisted getting one for the longest time, thinking my Bic lighter and utility knife were good enough. I paid about $35 for a basic model, and honestly, I regret not getting one sooner. It’s not just about melting; it’s about cutting and sealing in one go, cleanly.
A hot knife, often called a hot cutting tool or fabric cutter, uses a heated blade to simultaneously cut through synthetic materials like paracord and melt the edges. This means you get a perfectly clean cut with a fused, sealed end in a single action. There’s no charring, no need to fiddle with flame height, and no worry about uneven melting. The heat is precise and consistent. (See Also: Can I Substitute Duct Tape For Electrical Tape )
Here’s why it’s superior for frequent users:
1. Precision and Cleanliness: The heated blade cuts cleanly through the paracord, leaving no fuzz or crushed fibers. As it cuts, it fuses the ends instantly. This results in a super neat, professional-looking finish every single time. It’s fantastic for intricate projects or when you need identical ends for symmetry.
2. Speed and Efficiency: For projects involving a lot of paracord cuts (like making multiple keychains or a large rigging project), a hot knife is significantly faster than using a separate blade and lighter. It simplifies the process, saving you time and effort.
3. Consistency: Unlike a lighter, where flame intensity can vary and your hand might shake, a hot knife provides a consistent, controlled heat. This means predictable results, reducing the chance of errors like burning or incomplete fusion. You get the same quality finish on the first cut as you do on the hundredth.
4. Less Mess: There’s no soot from a flame, and the fused end is typically very clean, without the sticky residue that can sometimes occur with lighter methods if not done perfectly. The molten material is immediately integrated, creating a solid cap.
5. Versatility: While we’re talking paracord, hot knives are also excellent for cutting other synthetic materials like webbing, rope, and certain fabrics, fusing the edges to prevent unraveling.
Of course, a hot knife requires electricity or a specific power source, and it’s an additional tool to purchase. For the occasional user, a lighter and sharp knife are more than sufficient. But if paracord is a regular part of your toolkit for crafting, repairs, or survival preparations, investing in a hot knife will likely pay dividends in terms of quality, speed, and frustration reduction. It’s the closest you’ll get to a factory-perfect finish at home.
Is It Safe to Use Electrical Tape to Seal Paracord?
No, it is not safe or effective to use electrical tape to seal paracord ends. While it might temporarily hold things together, it doesn’t create a durable fusion. The tape itself can melt unevenly, leave a sticky residue, and the underlying paracord strands are still prone to fraying. This can lead to a failure of your paracord project, which could be dangerous depending on its use.
Can I Use a Plastic Bag to Melt Paracord Ends?
Using a plastic bag is generally not recommended for melting paracord ends. While plastic bags are made of synthetic materials that melt, they are often thin and can burn or char quickly, potentially contaminating the paracord with melted plastic residue. The fusion would likely be weak and uneven compared to directly melting the paracord fibers themselves.
What Is the Best Alternative to Electrical Tape for Sealing Paracord?
The best alternative to electrical tape for sealing paracord is a controlled heat source like a lighter or a butane torch, combined with a sharp blade to trim the ends cleanly first. For a more professional and efficient finish, a dedicated hot knife cutting tool is an excellent option. These methods directly fuse the paracord fibers, creating a strong and durable seal.
How Long Does a Heat-Sealed Paracord End Last?
A properly heat-sealed paracord end can last indefinitely under normal conditions, as the synthetic fibers are fused together. The longevity depends on the quality of the seal and the stress it’s subjected to. If the seal is done correctly without charring or incomplete fusion, it should remain intact for the life of the paracord itself. However, extreme abrasion or prolonged exposure to very high temperatures could eventually degrade the fused end.
Can I Use Super Glue on Paracord Ends Instead of Melting?
Super glue (cyanoacrylate) can be used as a temporary fix for paracord ends, and it does harden them. However, it’s not as solid as a heat seal. Super glue can become brittle over time, especially with repeated flexing or exposure to moisture and temperature changes, and it may crack or flake off. A heat seal creates a more integrated, fibrous bond that is generally more durable for applications where the paracord will experience significant stress or movement.
Conclusion
So, to answer the burning question: can I melt ends of paracord with electrical tape? My honest opinion is a resounding no. It’s a hack that sounds plausible but falls apart faster than you can say ‘frayed rope’. You’re trading a few seconds of effort for a potentially compromised piece of gear.
Stick to the basics: a sharp blade and a controlled flame. It takes practice, sure, but the results are vastly superior and far more reliable. If you’re serious about your gear, whether it’s for camping, survival, or just making cool stuff, don’t cut corners on something as fundamental as sealing your paracord ends.
Next time you need to finish off a length of paracord, grab that lighter and a decent knife. You’ll thank yourself when your gear doesn’t unravel on you.