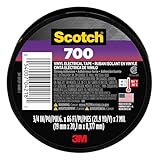
You’re staring at a mess of speaker wire, maybe one’s a little too short, or a cat decided to redecorate. The question pops into your head: can I tie stereo wires together with electrical tape? I’ve been there, staring at tangled messes in dusty attics or behind entertainment centers, and honestly, my first instinct was usually ‘just wrap it up and hope for the best.’ It’s the quick fix that often leads to bigger headaches down the line, trust me.
Most people just want their music to sound good without crackles or pops, and the idea of splicing wires can seem daunting. But here’s the blunt truth: while you can technically twist wires together and cover them with electrical tape, it’s usually a terrible idea for anything beyond a very temporary, low-stakes situation. Let’s talk about why this commonly considered shortcut is often just that – a shortcut to disappointment.
Why Twisting and Taping Speaker Wire Is a Bad Idea
Look, I get it. You’ve got your speakers set up, you’re ready to blast some tunes, and you realize a wire isn’t quite long enough.
Or maybe a connection came loose. The nearest tool is a roll of electrical tape. It seems simple enough: twist the bare ends together, wrap it up, and voilà! Problem solved.
Except, it’s rarely that simple, and more often than not, you’re just delaying a bigger issue, or worse, introducing new ones. The primary reason this method fails is the inherent unreliability of the connection itself.
Speaker wire carries an audio signal, which is basically a low-voltage alternating current. For this signal to travel cleanly and without interference, the connection needs to be solid, secure, and insulated from the outside world.
Electrical tape, while an insulator, doesn’t create a mechanically stable or electrically sound joint on its own.
When you twist two strands of copper wire together and wrap them with tape, you’re relying on the physical pressure of the twisted wires to maintain contact. This pressure can easily fluctuate due to vibrations, temperature changes, or even just the slight springiness of the wire. Over time, this leads to intermittent connections.
You might notice crackling sounds, one speaker cutting out, or a general degradation of audio quality. It’s like trying to hold two pieces of metal together with a rubber band and expecting a perfectly smooth ride. Furthermore, electrical tape isn’t designed for the mechanical stress that wires are often subjected to.
It can peel, unravel, or become brittle over time, exposing the bare wires. This not only degrades the connection but also creates a potential safety hazard, even with low-voltage AC, by allowing stray conductors to touch other components or surfaces.
I remember a time years ago when I was trying to extend a speaker wire for a surround sound setup in a rented apartment. I was impatient, didn’t have the right connectors, and thought a quick twist-and-tape job would suffice. For a few days, it was fine. Then, during a particularly bass-heavy scene in a movie, the connection on the left rear speaker started sputtering. (See Also: Can I Use Electrical Tape To Connect Wires )
I fiddled with it, retaped it, and it worked again, but the sound was never quite as clear. Eventually, it died completely, leaving me with no surround sound for weeks until I finally bought proper wire connectors. It was a frustrating lesson in ‘penny wise, pound foolish’.
The temporary fix cost me time, enjoyment, and ultimately, the need to buy connectors anyway, plus the hassle of redoing the job properly.
What Actually Works: Secure Speaker Wire Connections
So, if twisting and taping is a no-go, what’s the right way to join or extend speaker wires? The goal is always a connection that is both mechanically strong and electrically sound. This means the copper conductors need to be firmly joined and then sealed in a way that prevents oxidation and interference. The most common and reliable solutions involve connectors specifically designed for this purpose. My personal go-to for most home audio situations is using crimp-on butt connectors or lever-style wire connectors (like Wago or Ideal Industries In-Sure connectors). These are straightforward, provide a secure mechanical grip, and create a low-resistance electrical path.
For butt connectors, you strip a small amount of insulation from the end of each wire you want to join, insert one wire into each end of the connector, and then use a crimping tool to squeeze the connector down, effectively joining the two wires. This creates a very solid connection. Lever connectors are even simpler: you strip the wire ends, insert them into the designated ports on the connector, and flip the lever to secure them.
They make extending wires or joining multiple wires a breeze, and they’re reusable. Another excellent option, especially for permanent installations where you’re not planning on moving things much, is soldering. Soldering creates a very strong electrical bond, but it requires a bit more skill and the right tools (a soldering iron, solder, and flux).
After soldering, you absolutely must insulate the joint. Heat-shrink tubing is the professional choice here, offering a clean, durable, and watertight seal when properly applied with a heat gun. It’s far superior to electrical tape for this application because it shrinks tightly around the joint, providing excellent mechanical protection and insulation.
Then there are banana plugs and spade connectors. These are often used at the amplifier or speaker end of the wire, but they can also be used for splicing if you get the right type. They screw onto the wire ends and provide a clean, secure connection point. While they add a bit of bulk, they are incredibly reliable and make it easy to disconnect and reconnect wires. The key takeaway is that any solution you choose should provide a permanent, low-resistance electrical connection that is mechanically secure and well-insulated. Anything less is a compromise that will likely cost you in audio quality or reliability.
| Method | Pros | Cons | Verdict |
|---|---|---|---|
| Twist & Tape | Cheap, quick in a pinch. | Unreliable, degrades over time, poor electrical contact, can be unsafe. | Avoid. Only for absolute emergencies, temporary fixes. |
| Crimp Butt Connectors | Secure, good electrical contact, relatively cheap. | Requires crimping tool, permanent. | Excellent for extending wires reliably. |
| Lever Connectors (Wago, etc.) | Very easy to use, secure, reusable, good for multiple wires. | Slightly more expensive per connection than crimps. | My top choice for ease of use and reliability. |
| Soldering + Heat Shrink | Extremely solid and reliable connection, professional finish. | Requires soldering skill and tools, permanent. | Best for permanent installations where quality is most important. |
| Banana/Spade Plugs | Secure, easy to connect/disconnect, good for terminations. | Can add bulk, requires specific connectors for splicing. | Great for terminations, can be adapted for splicing. |
Common Mistakes When Joining Speaker Wires
You’d think joining two bits of wire would be simple, right? Apparently not. The biggest mistake, as we’ve covered, is relying on electrical tape alone. But even when people try to do it “properly,” they often mess up.
One common blunder is not stripping enough insulation off the speaker wire. You need sufficient copper exposed to make good contact with the connector. If you only strip a millimeter or two, you might get a weak connection, or the wires might not seat fully into the connector.
Conversely, stripping too much insulation can leave a long section of bare wire exposed outside the connector, which is a recipe for shorts or accidental contact with other components. Aim for just enough to get a solid grip within the connector. (See Also: Can Electrica Tape Catch On Fire )
Another frequent error is using the wrong gauge of connector for the wire. Speaker wire comes in different gauges (thicknesses), typically ranging from 18 gauge for smaller runs to 12 gauge or even 10 gauge for longer runs or higher power systems. If you try to cram a thick 10-gauge wire into a connector designed for 18-gauge, it won’t fit properly, leading to a loose connection. Conversely, using a connector that’s too large for thin wire means the mechanical grip won’t be strong enough, and the wires can pull out easily.
Always match your connector size to your wire gauge. I’ve seen people try to connect speaker wire with wire nuts meant for household electrical wiring. While they might seem similar, speaker wire is stranded and flexible, whereas household wiring is often solid core. Wire nuts can cut into the stranded copper, damaging it and creating a poor connection.
Polarity is another big one. Most stereo speaker wire has some marking on one of the conductors – a stripe, a rib, a different color insulation, or sometimes just one conductor is tinned (shiny) and the other is copper-colored. This is important for maintaining the correct phase. Connecting positive to positive and negative to negative makes sure your speakers work in sync.
If you accidentally reverse polarity on one speaker (connecting its positive to the amplifier’s negative, and its negative to the amplifier’s positive), the sound waves will be out of phase. This doesn’t mean it’s dangerous, but it can result in a thin, hollow sound, a loss of bass, and a poor stereo image. It basically cancels out certain frequencies. So, when you’re joining wires, always pay attention to these markings and make sure you’re connecting like with like.
It’s a simple step that makes a huge difference in sound quality.
Real-World Scenarios: When Does It Matter Most?
The importance of a good connection really hinges on the application. For a cheap, portable Bluetooth speaker you might use for a backyard BBQ, maybe it doesn’t matter as much. But when you’re talking about your home stereo system, your surround sound, or any setup where audio fidelity is a priority, the connection quality is most important. Think about the signal path: amplifier -> wire -> speaker. Any weakness or degradation along that path directly impacts the sound you hear. A poor connection can introduce noise, reduce clarity, attenuate certain frequencies (especially bass), and create an uneven soundstage. It’s like trying to pour a fine wine through a dirty, narrow pipe – the quality suffers.
Consider a high-fidelity stereo setup. You’ve likely invested a fair bit in your amplifier and speakers, aiming for an immersive listening experience.
Using twisted and taped wires is the equivalent of putting bicycle tires on a race car – it just doesn’t fit the performance level. The subtle nuances in music, the crisp highs, the deep lows – all can be lost or distorted by a subpar connection. Similarly, for home theater systems, especially those with Dolby Atmos or other surround formats, precise timing and phase coherence are important.
An out-of-phase speaker due to reversed polarity, or a speaker cutting in and out due to an intermittent connection, completely ruins the immersive experience. You’re not getting the intended effect of the sound design, and it’s just frustrating.
Even in less important applications, like background music in a workshop or garage, a reliable connection prevents intermittent issues that can be annoying. Imagine you’re working on something requiring concentration, and your music suddenly cuts out because a wire splice has come loose. It’s a small thing, but it’s a preventable annoyance. The common advice that electrical tape is sufficient for speaker wire is, in my experience, often given by people who haven’t pushed their systems hard or who just don’t care about the absolute best sound. For anyone who values clear, consistent audio, investing a few dollars in proper connectors is a no-brainer. It’s about respecting the equipment you have and the audio signal you’re trying to deliver. (See Also: Can I Substitute Duct Tape For Electrical Tape )
Practical Tips for Foolproof Speaker Wire Joins
Alright, let’s get practical. If you absolutely need to extend or repair speaker wire, here’s how to do it right, without resorting to that dodgy electrical tape fix. First, gather your supplies: the correct gauge wire connectors (butt splices, lever connectors, or something similar), a wire stripper, and possibly a crimping tool if you’re using butt connectors. Make sure the connectors are rated for the gauge of your speaker wire. You can usually find this information on the packaging.
- Preparation is Key: Carefully strip about half an inch (1-1.5 cm) of insulation from the end of each wire you need to connect. You want enough bare copper exposed to make good contact inside the connector, but not so much that a lot of it will be left dangling outside. If you’re joining two existing wires, strip the ends of both. If you’re adding a new piece of wire, strip the ends of the new wire and the existing wire.
- Check Polarity: Before making any connection, identify the positive and negative conductors on both sets of wires. Look for the stripe, ribbing, or color difference. Make sure you will be connecting the positive wire from one side to the positive wire on the other, and the negative to the negative.
- Make the Connection:
- For Crimp Butt Connectors: Insert one stripped wire end into each opening of the connector. Use a proper crimping tool to firmly crimp the connector onto the wires. You should feel a solid bite.
- For Lever Connectors: Open the lever, insert the stripped wire end into the port until it stops, and then close the lever firmly. Repeat for all wires.
- Test and Insulate (if necessary): Give the wires a gentle tug to make sure the connection is secure. For butt connectors or lever connectors, the insulation is built-in. If you were to solder, this is where you’d slide on a piece of heat-shrink tubing and shrink it down over the joint.
- Tidy Up: Neatly route your wires, securing them with zip ties or cable clips to prevent them from getting tangled or damaged again.
A small, often overlooked tip is to always buy connectors that are rated for a higher current than your amplifier typically outputs. It’s cheap insurance against overheating. Also, keep a small stash of various wire connectors and some spare speaker wire. You never know when you’ll need to make a quick, proper repair or extension. Finally, resist the urge to twist multiple wires together and tape them. It’s a false economy that rarely pays off.
People Also Ask Section
Can You Connect Speaker Wires Without a Connector?
While you technically can twist wires together and use electrical tape, it’s highly discouraged for any permanent or quality-sensitive audio setup. This method creates an unreliable connection that is prone to intermittency, signal degradation, and potential shorts over time. Proper connectors, like crimp splices, lever connectors, or soldered joints with heat shrink, are designed to provide a secure, low-resistance, and well-insulated connection key for good audio performance and longevity.
What Is the Best Way to Join Speaker Wire?
The best way to join speaker wire is using connectors designed for the job. Lever-style connectors (such as Wago or Ideal In-Sure) are excellent for their ease of use and reliability. Crimp-on butt connectors offer a very secure mechanical and electrical bond, though they require a crimping tool. For permanent installations where the highest quality is desired, soldering the wires together and then insulating the joint with heat-shrink tubing is the professional standard. Whichever method you choose, make sure it provides a solid, low-resistance connection and proper insulation.
How Long Can Speaker Wire Be?
The length of speaker wire you can use depends on the wire’s gauge and the speaker’s impedance. Generally, for typical home audio systems, you can use runs up to 50-100 feet (15-30 meters) with 16-gauge wire without significant signal loss. For longer runs or lower impedance speakers (like 4-ohm speakers), you’ll need thicker gauge wire (14-gauge or 12-gauge) to minimize resistance and signal degradation. Excessive resistance can lead to a loss of power and duller sound, especially in the bass frequencies.
Can I Use Wire Nuts for Speaker Wire?
It’s generally not recommended to use standard wire nuts designed for solid-core household electrical wiring for stranded speaker wire. The sharp internal threads of a wire nut can cut into the fine strands of speaker wire, creating a weak connection that is prone to failure and signal loss. While some specialized connectors might resemble wire nuts, dedicated speaker wire connectors are a much safer and more reliable choice for maintaining audio quality and preventing damage to the wire.
Final Thoughts
So, to cut to the chase: can I tie stereo wires together with electrical tape? Technically, yes, you can make a connection. But should you? Absolutely not, if you care about your sound quality or want a connection that lasts longer than a week. Electrical tape is for insulating wire nuts or temporarily securing a loose wire, not for making permanent audio connections. It’s a band-aid that rarely holds and usually makes things worse.
The good news is that proper speaker wire connectors are dirt cheap. A pack of lever connectors or crimp splices costs less than a fancy cup of coffee and will give you a connection that’s leagues better than any tape job. It’s a small investment for reliable audio and peace of mind. Don’t let impatience or a lack of the ‘right’ tools lead you to compromise on your sound.
My advice? Next time you’re staring down a speaker wire dilemma, skip the tape. Grab some actual connectors, take five extra minutes, and do it right. Your ears will thank you, and you won’t have to deal with that dreaded crackle or sudden silence.