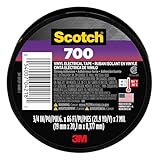
I remember staring at a bare, dangling wire from a ceiling fan that just wouldn’t cooperate. The bulb socket looked a bit chewed up, and in a moment of what felt like pure genius (spoiler: it wasn’t), I grabbed the roll of electrical tape from my toolbox. My thought process? It’s electrical, it’s tape, what could go wrong? It seemed like a quick fix for a problem I didn’t want to deal with. This whole ‘can I use electrical tape on bulb socket positive end’ question pops up more than you’d think, especially when you’re in a pinch.
Look, I’ve spent my fair share of time and money on tools and DIY projects, and I’ve learned the hard way that sometimes, the easiest-looking solution is actually the worst. So, before you go wrapping up that socket, let’s get real about what’s safe and what’s just asking for trouble.
Why the Quick Fix Mentality Fails on Sockets
We’ve all been there. You’re trying to get a light working, the socket looks a little rough, maybe a bit of plastic is chipped, or the metal contacts seem a bit loose. The immediate urge is to grab whatever insulating material is handy.
Electrical tape is usually front and center in the toolbox, right? It’s black, it’s stretchy, and it’s designed for electrical stuff. So, the question ‘can I use electrical tape on bulb socket positive end’ seems innocent enough.
But here’s the blunt truth: it’s a terrible idea, and I’m going to tell you why. I once tried to ‘insulate’ a slightly frayed wire leading into an old lamp socket with electrical tape. The idea was to prevent a short.
Within a week, the tape had melted and peeled away, leaving a sticky mess and, thankfully, no fire. It taught me a valuable lesson: not all electrical tape jobs are created equal, and sockets are a whole different ballgame.
The real problem isn’t just about insulation. A bulb socket has to handle heat, and not just a little bit.
The bulb itself gets hot, and that heat transfers directly to the socket. Electrical tape, while rated for certain voltages and temperatures, isn’t designed to be constantly subjected to that kind of sustained heat, especially in a confined space like the base of a light fixture. Over time, the adhesive breaks down, the tape can sag, shrink, or even melt. This compromises the very insulation you were trying to create in the first place.
Worse, a melted mess can actually become conductive or can short-circuit in ways you didn’t anticipate, creating a fire hazard. It’s the kind of problem that doesn’t usually announce itself with a bang, but rather a slow burn, literally.
Think about the design of a bulb socket. It’s not just a hollow tube.
There are specific contact points designed to make secure connections with the bulb’s base. When you start messing with tape around these points, you’re interfering with that precise engineering. You might be creating a poor connection, which can lead to the bulb flickering, or worse, overheating at the contact point.
This is like trying to fix a leaky faucet with chewing gum. It might hold for a bit, but it’s not a permanent or safe solution.
The materials used in bulb sockets are chosen for their heat resistance and electrical insulating properties under specific conditions. They aren’t designed to be jury-rigged with tape, no matter how ‘electrical’ that tape is.
The Real Dangers: Heat, Fire, and Bad Connections
Let’s talk about heat. This is the big one. Incandescent bulbs, especially older ones, get seriously hot. Even LED bulbs, while more efficient, still generate some heat, particularly at the base where the electronics are housed. (See Also: Can I Use Electrical Tape To Connect Wires )
Electrical tape is typically made of PVC (polyvinyl chloride). While it’s a good insulator and flexible, its heat resistance is limited.
Most standard electrical tapes are rated for temperatures around 176°F (80°C). The surface of a bulb socket, especially one holding a higher wattage bulb, can easily exceed this.
When the tape heats up, the plasticizer can leach out, making the tape brittle or sticky and gooey. This degraded tape is no longer a reliable insulator. Instead, it can become a fire risk, potentially igniting.
I had a buddy, bless his heart, who thought he was being clever by using electrical tape to secure a loose wire in an outdoor floodlight socket. He figured it was just a bit of insulation. A few weeks later, after a heavy rain, the whole fixture shorted out and tripped the breaker. Luckily, no fire, but it was a stark reminder of how moisture and heat combined with a compromised connection can be a recipe for disaster.
The tape had absorbed moisture and, combined with the heat from the bulb, turned into a conductive sludge. The positive end is where the current enters, and if that connection is compromised by melted or degraded tape, you’ve got a direct pathway for sparks, shorts, and fires.
Then there’s the issue of the connection itself. The metal tabs inside the socket are designed to make firm contact with the metal base of the light bulb. If you’ve wrapped tape around these areas, you’re adding an inconsistent layer between the bulb and the socket.
This can lead to a poor electrical connection. A loose connection means higher resistance at that specific point. Higher resistance generates more heat. So, you create a feedback loop: poor connection leads to more heat, which degrades the tape, leading to an even poorer connection and more heat.
It’s a vicious cycle that can end with melted plastic, smoke, and potentially a fire. The common advice is to make sure a clean, tight connection for safety and longevity. Tape, by its very nature, interferes with this.
What You Should Be Doing Instead
So, if electrical tape is out, what’s the right move when you encounter a dodgy bulb socket? First and foremost, safety. Always, always, always turn off the power at the breaker box before you even think about touching a light fixture or socket. Don’t just rely on flipping the light switch; that only cuts power to the switch itself, not necessarily the wiring in the ceiling.
I learned this the hard way once when I was changing a fixture and forgot to kill the power at the breaker. Got a nice little zap, not enough to send me to the hospital, but definitely enough to make me respect the breaker box from that day forward. It’s a simple step that can save you a lot of pain and a trip to the ER.
If the socket is physically damaged – cracked plastic, bent metal contacts, or signs of melting – the only safe and correct thing to do is replace the entire socket. They’re not expensive, and they’re designed to be replaced. You can find them at any hardware store.
For a standard medium base (E26/E27) socket, you’re probably looking at anywhere from $3 to $10, depending on the type and brand. The process usually involves unscrewing the old socket, disconnecting the wires (typically two, one for the hot and one for the neutral), and connecting the new one in reverse. Make sure you get the wires connected to the correct terminals on the new socket – usually, the smooth wire goes to the silver screw (neutral) and the ribbed wire goes to the brass screw (hot, or positive). If you’re unsure, take pictures before you disconnect the old one, or better yet, consult a qualified electrician.
Sometimes, the issue might be a loose wire within the socket housing, not the socket itself being damaged. In this case, with the power OFF, you might be able to carefully tighten the wire connections at the screw terminals. Many sockets have two sets of terminals for daisy-chaining fixtures. Make sure the wires are stripped to the correct length and are making solid contact. (See Also: Can Electrica Tape Catch On Fire )
If the wiring looks frayed or damaged at the point where it enters the socket, that’s a separate issue that needs to be addressed, potentially by re-stripping the wire or using a wire nut to splice in a new section if there’s enough length. This is where understanding wire preparation and proper connections becomes vital.
It’s not about making it pretty with tape; it’s about making it electrically sound.
Socket Repair vs. Replacement: When to Call It Quits
This table breaks down my general rule of thumb. It’s not exhaustive, but it covers the most common scenarios. Remember, when in doubt, always err on the side of caution and replace the component or call a professional.
| Symptom | Likely Cause | Verdict |
|---|---|---|
| Cracked plastic housing | Physical damage, age, heat stress | Replace socket. Tape won’t fix structural integrity. |
| Loose metal contact tabs | Bulb not seated correctly, wear and tear | Try gently bending tabs with pliers (power OFF!). If still loose or brittle, replace. |
| Signs of melting or charring | Overheating, short circuit, poor connection | Immediate replacement. This is a fire hazard. DO NOT use tape. |
| Flickering bulb only when socket is moved | Loose wire connection inside socket or at fixture | Check and tighten wire connections (power OFF!). If wiring is damaged, replace socket. |
| Smell of burning plastic when bulb is on | Overheating, degraded materials | Immediate replacement and investigation. Potentially a serious fire risk. |
What Kind of Tape is Actually Suitable for Electrical Work?
Okay, so electrical tape is a no-go for directly insulating a bulb socket’s positive end. But that doesn’t mean it’s useless. It has its place, and understanding that place is key to not making a mess of things. High-quality electrical tape, like 3M Super 33+ or 3M Temflex 1700, is designed for specific applications. It’s great for insulating splices where wires are joined together using wire nuts, for bundling loose wires neatly, or for providing a temporary outer layer of protection over a properly insulated connection. The key here is insulating a connection, not the exposed metal contact points of a socket or a frayed wire that’s still live or about to be.
When you’re working with electrical tape, think about its limitations. It’s good for low-voltage applications or temporary fixes where it won’t be subjected to excessive heat or mechanical stress. For example, I’ve used it to wrap the handle of a tool that had a slightly cracked grip to prevent splinters, or to temporarily secure a wire that had pulled out of a connector after I’d turned off the power and disconnected the wire. The tape provides a barrier, but it’s not meant to be the primary, permanent insulator for a live electrical connection that generates heat.
There are also specialty tapes out there that are better suited for higher temperatures or more demanding environments. For instance, vulcanizing tape (sometimes called self-fusing tape) is a silicone-based tape that fuses to itself to create a solid, waterproof, and highly insulated connection. It’s often used for sealing splices in high-moisture areas or for higher-voltage applications. Silicone tape is also another option that can handle higher temperatures than standard PVC electrical tape. However, these are still for insulating connections or wires, not for patching up a damaged socket itself. They require a proper connection underneath; they don’t magically make a bad situation safe.
The core principle remains: electrical tape is for insulating wires and properly made splices, not for improvising repairs on components like bulb sockets that have specific design requirements for heat dissipation and electrical contact. It’s like using a Band-Aid to fix a cracked pipe – it might cover the hole for a moment, but it’s not going to hold under pressure. The materials in a bulb socket are designed for a specific job, and covering them with tape, even electrical tape, defeats their purpose and introduces new risks.
Common Mistakes and Why They Happen
The biggest mistake people make, and it’s one I’ve seen countless times (and, ahem, occasionally made myself early on), is thinking that because a tape is labeled ‘electrical,’ it’s a universal solution for any electrical problem. This is fundamentally wrong. Electrical tape is a specific tool for specific jobs. It’s like using a hammer to screw in a screw; it’s the wrong tool for the task, even though it’s a tool. The mistake stems from a misunderstanding of what electrical tape actually does and its limitations, particularly concerning heat and the integrity of direct electrical contact points.
Another common error is underestimating the heat generated by light bulbs. People might think, ‘It’s just a small bulb, how hot can it get?’ But that heat is concentrated right at the socket. When you wrap tape around it, you’re basically creating an insulating blanket that traps that heat.
This leads to the tape degrading faster than it would in a cooler environment, which then leads to the failure of the insulation, and the potential for shorts or fire. I once saw a ceiling fan fixture where the owner had wrapped electrical tape around the socket because it was a bit loose.
The fixture was in an enclosed glass shade, which further trapped heat. The tape had melted and dripped down, creating a sticky, hazardous mess, and the smell of burning plastic was palpable.
Thankfully, it hadn’t ignited, but it was a close call.
The third major pitfall is the ‘it’s just a temporary fix’ mentality. While electrical tape can be used for temporary solutions in some contexts (like bundling wires temporarily before a permanent repair), it’s rarely appropriate for anything involving heat or important connections in a socket. The problem with ‘temporary’ fixes in electrical work is that they often become permanent. People forget about them, or they get used to them, and the potential hazard remains. (See Also: Can I Substitute Duct Tape For Electrical Tape )
A loose wire in a socket, a slightly damaged contact – these aren’t issues to be ‘temporarily’ dealt with by wrapping them in tape. They need to be properly repaired or replaced. The risk of fire or electrical shock is too high to leave to chance or a quick wrap of tape.
A Real-World Scenario: My Lamp Socket Mishap
I was redoing the wiring on an old brass floor lamp I’d picked up at a flea market for a steal – about $30. It was gorgeous, but the original wiring was frayed, and the socket itself looked a bit worn. I was going to replace the socket entirely, but in my haste to see if the lamp worked with new wiring, I decided to try and salvage the old socket. I figured I could wrap some electrical tape around the base of the socket where the insulation had worn off. My reasoning was that the tape would keep the exposed wire strands from touching anything and causing a short. It seemed so simple, so ingenious.
So, I wired it up, taped the heck out of the socket base, plugged it in, and flipped the switch. Bam! Light.
Success! I was pretty pleased with myself for saving a few bucks and a trip to the hardware store. I let it sit for about an hour while I admired my handiwork.
Then, I noticed a faint, acrid smell. I traced it back to the lamp. The electrical tape, directly around the metal part of the socket, was starting to warp and melt.
The heat from the bulb, combined with the constant electrical flow, was too much for the tape. It was oozing a sticky residue and looked like it was about to short out any second. I yanked the plug immediately.
The smell lingered for days. I ended up buying a new socket the next day for $4 and installed it properly.
The whole ‘saving money’ exercise cost me time, a potential fire hazard, and a lesson learned the hard way. That’s when I truly understood that ‘can I use electrical tape on bulb socket positive end’ is a question with a resounding ‘no’ for any actual safe and lasting repair.
Faq: Your Burning Questions Answered
Can Electrical Tape Prevent Shocks?
Electrical tape provides a layer of insulation, but it’s not a foolproof shock prevention method, especially if it’s old, damaged, or used improperly. It’s designed to insulate wires and connections, not to make direct contact with live electrical components safe. If a connection is already faulty or the tape degrades, you can still get shocked.
Is It Okay to Tape Over a Frayed Wire in a Socket?
No, it is not okay. Frayed wires in a socket indicate a problem that tape cannot safely fix. The tape might cover the fraying temporarily, but it doesn’t restore the wire’s integrity or make sure a safe connection. The heat and electrical current will likely degrade the tape, leading to a higher risk of shorts or fire.
What If the Socket Is Slightly Loose, Can Tape Help?
If the socket itself is loose and wobbly, tape is not the solution. A loose socket can lead to poor bulb contact, overheating, and potential short circuits. You need to make sure the socket is securely mounted to the fixture, and if the internal components are damaged or loose, the entire socket should be replaced.
Can I Use Duct Tape Instead of Electrical Tape on a Socket?
Absolutely not. Duct tape is not an electrical insulator at all. It’s an adhesive tape designed for general-purpose repairs. Using it on any electrical component, especially a heat-generating one like a bulb socket, is extremely dangerous and a major fire hazard.
Conclusion
So, to cut to the chase: can I use electrical tape on bulb socket positive end? No. Just don’t do it. That roll of tape you have might seem like a quick fix, but it’s a shortcut that leads straight to trouble, whether that’s a tripped breaker, a melted mess, or worse, a fire. The materials in a bulb socket are there for a reason – they’re designed to handle heat and make a secure connection. Tape interferes with that, plain and simple.
If your bulb socket is showing signs of damage, wear, or is just plain loose, the only safe and sensible thing to do is replace it. They’re cheap, readily available, and the replacement process isn’t rocket science, especially if you kill the power at the breaker first. There are specialty tapes for specific electrical jobs, but patching up a hot socket isn’t one of them. Learn from my mistakes, and from the countless others who’ve learned the hard way.
Your best bet is to head to the hardware store, grab a new socket that matches the one you’ve got, and take the time to do it right. Safety first, always. It’s not worth the risk to save a few bucks or a few minutes.